?Are you ready to make a show-stopping chocolate mocha cake that tastes like a bakery masterpiece right from your own kitchen?

Ultimate Chocolate Mocha Cake Recipe
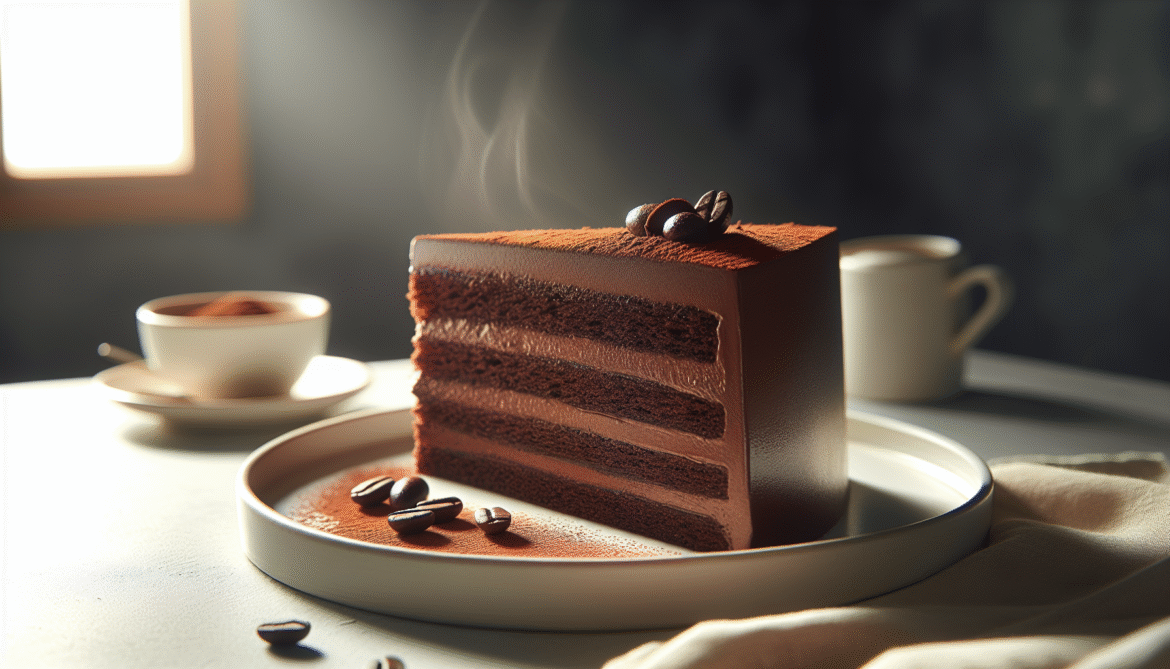
This recipe gives you a rich, moist chocolate cake layered with coffee-infused syrup, silky mocha buttercream, and a glossy chocolate ganache finish. You’ll get detailed steps, helpful tips, and troubleshooting advice so you can bake with confidence and enjoy amazing results.
Why this recipe works
This cake balances deep chocolate flavor with a clear but not overpowering coffee note, which enhances the chocolate rather than masking it. The combination of a tender crumb, syrup to boost moisture, and multiple frostings creates a textured, layered dessert that holds up for slicing and serving.
What you’ll achieve with this cake
You’ll produce a three-layer 8-inch cake (or a two-layer 9-inch alternative) that’s moist, structured, and rich enough to satisfy chocolate lovers. You’ll also learn techniques—like adding hot coffee to the batter and using a simple syrup—to keep the crumb tender and flavorful.
Ingredients — Cake, Syrup, Buttercream, and Ganache
Below is a clear ingredient breakdown for every component so you can gather everything before starting. Quantities are given in both US and metric measurements for convenience.
| Component | Ingredient | Amount (US) | Amount (Metric) |
|---|---|---|---|
| Cake | All-purpose flour | 2 1/2 cups | 312 g |
| Cake | Granulated sugar | 2 cups | 400 g |
| Cake | Unsweetened cocoa powder (Dutch-process or natural) | 3/4 cup | 75 g |
| Cake | Baking powder | 1 1/2 tsp | 6 g |
| Cake | Baking soda | 1 1/2 tsp | 6 g |
| Cake | Salt | 1 tsp | 6 g |
| Cake | Instant espresso powder | 2 tbsp | 14 g |
| Cake | Hot brewed strong coffee | 1 1/4 cups | 300 ml |
| Cake | Whole milk or buttermilk | 1 cup | 240 ml |
| Cake | Large eggs | 2 | ~100 g |
| Cake | Vegetable oil | 1/2 cup | 120 ml |
| Cake | Sour cream or plain yogurt | 1/2 cup | 120 g |
| Cake | Vanilla extract | 2 tsp | 10 ml |
| Mocha Syrup | Granulated sugar | 1/2 cup | 100 g |
| Mocha Syrup | Hot brewed coffee | 1/2 cup | 120 ml |
| Mocha Buttercream | Unsalted butter, room temp | 2 cups (4 sticks) | 454 g |
| Mocha Buttercream | Powdered sugar, sifted | 6–7 cups | 720–840 g |
| Mocha Buttercream | Instant espresso powder | 1½–2 tbsp | 10–14 g |
| Mocha Buttercream | Heavy cream or milk | 2–4 tbsp | 30–60 ml |
| Mocha Buttercream | Salt | Pinch | — |
| Ganache | Semisweet or bittersweet chocolate, chopped | 10 oz | 285 g |
| Ganache | Heavy cream | 1 cup | 240 ml |
| Decorations (optional) | Cocoa nibs, chocolate shavings, espresso beans | As desired | As desired |
Equipment you’ll need
You’ll want the right equipment to make this process smooth and consistent every time. Gather your pans, mixer, spatulas, and measuring tools before you begin.
- Three 8-inch round cake pans, or two 9-inch pans
- Stand mixer or electric hand mixer
- Mixing bowls
- Sifter or fine mesh sieve
- Rubber spatula
- Whisk
- Cooling rack
- Offset spatula and bench scraper for frosting
- Saucepan for syrup and ganache
- Instant-read thermometer (optional but useful)
Ingredient notes and substitutions
These notes will help you adapt the recipe based on what you have and what you prefer. Each substitution has an effect on texture and flavor, so adjust with intention.
- Flour: All-purpose flour gives structure; for lighter crumb, use cake flour (replace 1 cup AP with 1 cup minus 2 tbsp cake flour). For gluten-free, use a 1:1 measure GF blend and add a binder if it doesn’t contain xanthan gum.
- Cocoa powder: Dutch-process yields smoother, less acidic chocolate flavor; natural cocoa is brighter. If you use one, maintain the espresso and baking soda ratio for lift.
- Coffee: Use freshly brewed strong coffee or espresso. Instant espresso powder gives a concentrated coffee flavor without added liquid if needed.
- Oil vs butter: Oil keeps the cake moister; for a more buttery flavor, substitute half the oil with melted unsalted butter.
- Buttermilk vs milk/sour cream: Buttermilk brightens the crumb and works with baking soda; sour cream provides richness and moisture.
Preparing pans and oven
Proper pan prep and oven calibration will help your layers bake evenly. Take a few minutes to prepare and preheat before making batter.
- Preheat the oven to 350°F (175°C). Position a rack in the center.
- Grease the cake pans with butter or baking spray, line bottoms with parchment circles, and grease the parchment. Dust with flour or cocoa to prevent sticking.
- If using multiple racks, rotate pans halfway through baking for evenness.
Step-by-step: Making the chocolate mocha cake batter
Follow these steps in order to achieve a smooth, well-aerated batter that bakes up evenly. Each stage has tips to prevent overmixing and keep the texture tender.
- Whisk dry ingredients: In a large bowl, sift or whisk together flour, cocoa powder, sugar, baking powder, baking soda, salt, and instant espresso powder. Make sure they’re well combined to avoid pockets of leavening.
- Mix wet ingredients: In a separate bowl, whisk the eggs, milk (or buttermilk), vegetable oil, sour cream, and vanilla until uniform. This mixture helps distribute fat and moisture evenly.
- Combine wet and dry: Add wet ingredients to dry and whisk until just combined. Avoid overmixing to prevent a tough crumb.
- Add hot coffee: Pour the hot brewed coffee slowly into the batter while whisking gently. The hot liquid blooms the cocoa and thins the batter for a moist texture. The batter will be fairly liquid — this is normal and results in a tender cake.
- Portion into pans: Divide batter evenly between prepared pans using a scale or measuring cups for consistent layers. Tap pans on the counter to remove air pockets.
Baking the layers
Bake times depend on pan size and oven variation, so monitor doneness with a toothpick or thermometer. Proper baking ensures the crumb sets and the layers rise evenly.
- Bake three 8-inch layers at 350°F (175°C) for 22–28 minutes, or two 9-inch layers for 28–34 minutes.
- Test doneness: a toothpick inserted in the center should come out with a few moist crumbs, not wet batter. An instant-read thermometer should read about 200–205°F (93–96°C) in the center.
- Cool in pans for 10–15 minutes, then invert onto wire racks to finish cooling completely before frosting. Cooling ensures the buttercream won’t melt when you assemble.
Making mocha simple syrup
Adding a syrup keeps the cake moist and intensifies the coffee flavor without making the crumb soggy. Make it while cakes bake so it’s ready at assembly.
- Combine 1/2 cup sugar and 1/2 cup hot brewed coffee in a small saucepan over medium heat. Stir until the sugar dissolves completely.
- Remove from heat and add 1 tsp vanilla or 1 tsp espresso powder if you want a stronger coffee note. Let cool to room temperature before brushing onto layers.
Mocha buttercream (American-style)
This buttercream is stable and pipeable, with clear coffee flavor. You’ll frost between and around the layers, and it holds up at room temperature for several hours.
- Beat room-temperature butter on medium-high until pale and fluffy, about 3–5 minutes.
- Dissolve espresso powder in 1 tbsp hot water to make a paste. Add to the butter along with 2 cups powdered sugar; beat on low to combine.
- Gradually add remaining powdered sugar and 2–4 tbsp heavy cream, increasing speed to medium-high and beating until light and spreadable. Adjust cream for desired consistency and add a pinch of salt to balance sweetness.
- Taste and adjust coffee intensity by adding more dissolved espresso if desired, but do so sparingly to avoid thinning the buttercream.
Chocolate ganache for glazing or drip
A glossy ganache adds richness and a professional finish. Use it to pour over the top or create a drip effect on the cake edges.
- Heat 1 cup heavy cream until it just begins to simmer. Pour over 10 oz chopped semisweet chocolate in a heatproof bowl. Let sit for 2 minutes, then stir until smooth.
- If the ganache is too thick for pouring, gently warm or add 1–2 tbsp more cream. For a stiffer ganache suitable for piping, let it cool and thicken in the fridge, stirring occasionally.
Assembling the cake — crumb coat and layering
Layering and crumb coat are where structure and look come together. Take your time to keep edges clean and even.
- Level layers if needed with a serrated knife or cake leveler so each layer sits flat. This makes stacking stable and presentation clean.
- Place the first layer on a cake board or serving plate and brush with mocha syrup, using about 2–3 tbsp per layer. The cake should be moist but not soggy.
- Pipe or spread a generous layer of mocha buttercream, roughly 3/4 cup to 1 cup per layer depending on your preference.
- Stack remaining layers, pressing gently to adhere, and repeat syrup and buttercream application.
- Apply a thin crumb coat of buttercream around the entire cake to trap stray crumbs. Chill the cake for 15–30 minutes until the crumb coat sets.
Final frosting and finishing touches
The final coat should look smooth and clean; garnishes add texture and visual appeal. Work carefully to achieve a polished result.
- Apply a thicker final layer of buttercream and smooth with an offset spatula and bench scraper while turning the cake for even sides.
- If using ganache drip: slightly warm the ganache to pouring consistency and apply to the chilled cake top, letting it flow naturally over the edges to create drips. Pour the remaining ganache on top and smooth.
- Decorate the top with chocolate shavings, cocoa nibs, or a dusting of cocoa powder and a few espresso beans for contrast.

Slicing, serving, and presentation
Good slicing and serving techniques help the cake look as appealing on the plate as it does on the stand. Use a few tricks for neat slices.
- Chill the cake slightly before slicing (15–30 minutes) so the buttercream firms a bit. Use a long sharp knife dipped in hot water and wiped dry between cuts for clean edges.
- Serve slices with a dollop of whipped cream, a scoop of ice cream, or a small espresso for an elegant pairing.
Storage and make-ahead tips
Knowing how to store and transport your cake will keep it tasting its best when you serve it. Follow these steps for freshness and safety.
- Room temperature: The cake can sit at room temperature, covered, for up to 2 days in cool conditions if your buttercream contains a high proportion of butter. Avoid warm environments.
- Refrigeration: Store covered in the fridge for up to 5 days. Let the cake come to room temperature for at least 30–60 minutes before serving for the best texture and flavor.
- Freezing: You can freeze frosted cake (double-wrapped in plastic and foil) for up to 3 months. Thaw overnight in the refrigerator, then bring to room temperature before serving.
- Make ahead: Bake layers up to 2 days in advance and store wrapped at room temp or in the fridge. Make buttercream and ganache up to a week ahead and keep refrigerated, bringing back to spreadable temperature before use.
Scaling and pan-size conversion
If you want a different size cake, adjust batter amounts by pan volume or use the table below to guide you. Accurate scaling will maintain proper layer height and bake time.
| Pan Size | Layers | Total Batter Volume | Approx. Bake Time |
|---|---|---|---|
| 8-inch round | 3 layers | As written (full recipe) | 22–28 min |
| 9-inch round | 2 layers | Reduce batter ~25% or use full and 9″ will be thinner | 28–34 min |
| 6-inch round | 4 layers | Reduce batter to ~60% and use multiple pans | 20–25 min |
| 13×9-inch sheet | 1 sheet | Full recipe fits 13×9 | 28–35 min |
When scaling, keep batter depth similar to original for predictable bake times. Increase or decrease baking time and check doneness regularly.
Troubleshooting common problems
This table covers common issues and reliable fixes so you can recover from small missteps without starting over.
| Problem | Likely cause | Fix |
|---|---|---|
| Cake is dense | Overmixing, expired leavening, too much liquid | Check ingredients, mix gently, measure correctly |
| Cake sinks in center | Oven temp too low or opened door during bake | Use oven thermometer, avoid opening during early bake |
| Dry cake | Overbaked or insufficient fat/moisture | Reduce bake time, brush with syrup to add moisture |
| Buttercream too soft | Room too warm or not enough powdered sugar | Chill briefly, add more powdered sugar or cornstarch |
| Ganache too thin | Warm temperature or too much cream | Cool until thicker, or add more chopped chocolate |
| Uneven layers | Batter not divided evenly, pans uneven heating | Use scale to portion batter, rotate pans mid-bake |
Flavor and texture variations
Customize the cake to match your palate or occasion with simple swaps and add-ins. Each change will subtly shift flavor, so taste and adjust.
- Orange mocha: Add 1–2 tbsp finely grated orange zest to the batter and buttercream for citrus-chocolate contrast.
- Nutty twist: Fold 1/2 cup toasted chopped hazelnuts into the buttercream for texture and flavor.
- Deeper chocolate: Use a 70% cacao chocolate for ganache and increase cocoa powder to 1 cup for a bolder chocolate profile.
- Lighter frosting: Swap in Swiss meringue buttercream for a silkier, less sweet finish that still holds structure.
Dietary adaptations (gluten-free and vegan guidance)
You can adapt this recipe to meet dietary needs, though textures will change slightly. Use reliable substitutes for best outcomes.
- Gluten-free: Use a high-quality 1:1 GF flour blend and ensure leavening is fresh. Add 1 tsp xanthan gum if your blend lacks it for better structure.
- Vegan: Replace eggs with a commercial egg replacer or 2 tbsp ground flaxseed + 6 tbsp water per egg. Use non-dairy milk and vegan butter for frosting; use coconut cream for ganache with vegan chocolate.
- Note: Baking powder and soda reactions and fat content differ in vegan versions, so expect adjustments in texture and crumb.
Nutrition estimate
This is an approximate estimate per slice when the cake yields 12 slices. Values will vary based on exact ingredients and portion size.
- Calories: ~520–700 kcal per slice
- Fat: 28–40 g
- Carbohydrates: 62–85 g
- Protein: 5–8 g
If you need an exact nutritional breakdown, use your specific ingredient labels and an online calculator for precision.
Frequently asked questions (FAQ)
This section answers the most common questions that might come up while you bake and assemble the cake. Read through to avoid common pitfalls.
Q: Can I use brewed coffee instead of espresso powder?
A: Yes; use 1/4 cup very strong brewed coffee in place of 1 tbsp instant espresso, but reduce liquid elsewhere if needed. Espresso powder is concentrated and has little added moisture.
Q: How do I fix overwhipped buttercream?
A: Chill the bowl briefly to firm the butter, then slowly beat and add a small amount of room-temperature liquid (cream) to loosen if needed.
Q: Can I stack this cake higher than three layers?
A: Yes, but ensure each layer is leveled and use dowels or a central support for tall cakes to prevent collapse.
Q: Is it okay to omit the mocha syrup?
A: You can omit it, but syrup enhances moisture and coffee flavor. If omitted, consider slightly more buttercream between layers to compensate for mouthfeel.
Final tips for success
Small habits make a big difference in the final cake. Use these quick tips to get consistent, beautiful results every time you bake.
- Weigh ingredients when possible for accuracy, especially flour and cocoa.
- Use fresh leavening agents and fresh coffee for optimal lift and flavor.
- Cool cakes fully before frosting to prevent meltdown or sliding layers.
- Keep bench tools clean and warm your knife between slices for neat presentation.
Serving occasions and pairings
This cake works beautifully for birthdays, dinner parties, and special occasions when you want something decadent but not cloyingly sweet. Pair slices with:
- Espresso or americano to mirror the mocha notes.
- A scoop of vanilla or salted caramel ice cream for contrast.
- Fresh berries and a light dusting of powdered sugar for brightness.
Wrap-up
You now have a step-by-step plan to make a moist, richly flavored Ultimate Chocolate Mocha Cake with detailed instructions for batter, syrup, buttercream, and ganache. With small adjustments and the troubleshooting tips, you’ll be able to adapt the recipe to your kitchen and preferences and serve a cake that impresses both visually and in flavor.
If you’d like a printable shopping list, a scaled version for a 9-inch two-layer, or a vegan-specific recipe conversion, tell me which option you want and I’ll provide it.