Imagine being able to capture the beauty and intricacy of coffee beans with just a pencil and a blank piece of paper. With “The Art of Coffee Beans: A Drawing Guide,” you can master the art of drawing these tiny, flavorful gems, bringing their rich textures and unique shapes to life. Whether you’re a seasoned artist or just starting out, this guide will walk you through each step, from understanding the anatomy of a coffee bean to mastering shading techniques that will make your drawings truly come alive. So grab your favorite cup of joe and unleash your creativity with this captivating drawing guide!
Choosing the Right Drawing Supplies
Pencils
When it comes to drawing coffee beans, having the right pencils is essential. Different pencil grades offer varying levels of darkness and hardness, allowing you to create a range of tones and textures in your artwork. For sketching the initial outline, a medium or soft pencil such as a 2B or 4B would work well. For adding details and shading, a harder pencil like an H or 2H can provide more control. Experiment with different grades to find the ones that suit your drawing style the best.
Paper
Choosing the right paper is crucial in capturing the intricate details and textures of coffee beans. Opt for a heavyweight paper with a smooth surface, such as a drawing or bristol paper. This type of paper will hold up well to erasing and blending without smudging or tearing. Make sure to choose a paper that is acid-free to prevent yellowing or deterioration over time. Consider using a sketchpad or a larger sheet of paper to give yourself ample room to work on the drawing.
Erasers
Erasers are an essential tool for any artist, and when it comes to drawing coffee beans, having the right eraser can make a big difference. A kneaded eraser is versatile and perfect for gently lifting graphite without damaging the paper. It can be shaped into different forms, allowing for precise erasing and highlighting. For more detailed erasing, a precision eraser or a small vinyl eraser can come in handy. Remember to always test your erasers on a scrap piece of paper before using them on the actual drawing to avoid any accidental smudging or tearing.
Blending tools
Blending tools are useful for creating smooth transitions and softening edges in your coffee bean drawing. There are various options available, such as blending stumps or tortillons, which can be used to blend graphite and create subtle gradations. You can also use tissue paper or your fingers for smudging and blending. Experiment with different techniques and tools to achieve the desired effect in your artwork.
Preparing Your Workspace
Clean and organized environment
Before you start drawing, it’s important to create a clean and organized workspace. Clear away any clutter or distractions that may hinder your focus. Having a tidy environment will not only help you stay mentally organized but also prevent any accidental smudging or damage to your artwork.
Adequate lighting
Having proper lighting is crucial for accurately observing the details and colors of coffee beans. Natural daylight is ideal, but if that’s not possible, invest in a good-quality desk lamp with adjustable brightness settings. Position the light source in a way that minimizes shadows on your workspace and provides an even illumination across your drawing.
Comfortable seating arrangement
Drawing can be a time-consuming process, so it’s important to prioritize your comfort. Ensure that you have a comfortable chair and a suitable table or easel at the right height for you. Maintain a relaxed posture throughout your drawing session to avoid any discomfort or strain on your body. Taking regular breaks to stretch and relax your muscles is also beneficial.
Understanding Coffee Beans Anatomy
Basic shapes
Begin by familiarizing yourself with the basic shapes of coffee beans. They typically resemble rounded ovals or ellipsoids with a slight curve on one side. Pay attention to the overall proportions and sizes of the beans, as they can vary depending on the species and roast level.
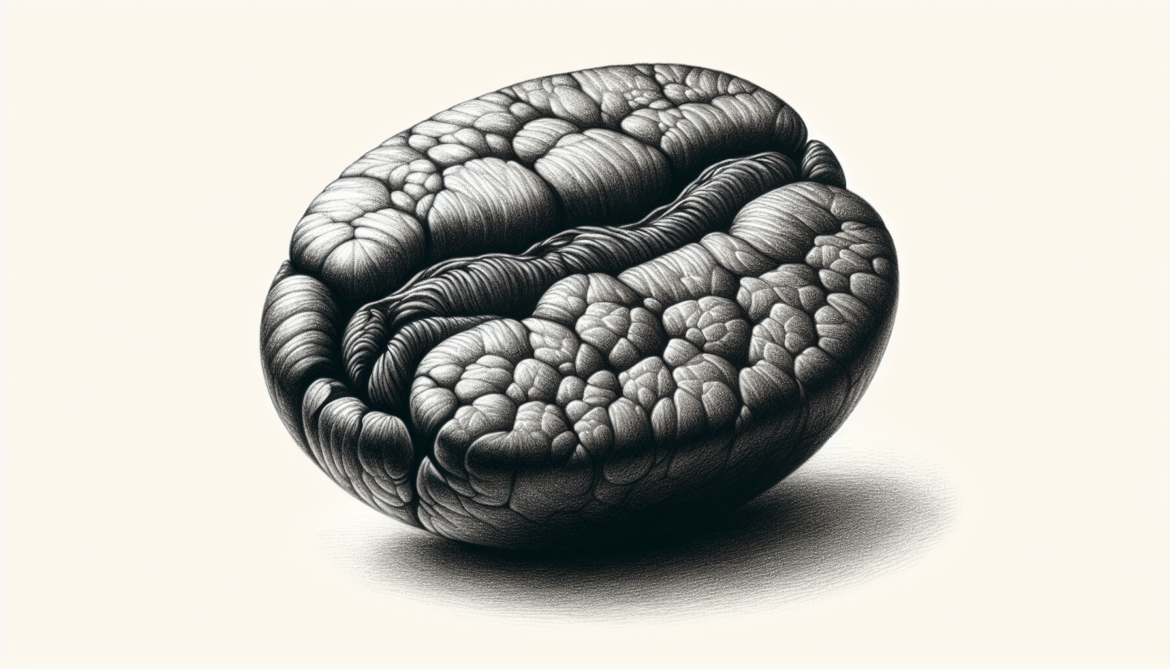
Texture and surface details
Coffee beans have a unique texture with ridges and uneven surfaces. Observe the texture closely and try to replicate it in your drawing. This can be achieved by varying the pressure and stroke direction of your pencil. Practice creating lines and marks that mimic the roughness and irregularities of the bean’s surface.
Color variations
Coffee beans exhibit a range of colors, from rich browns to dark blacks. Study different reference images and observe how the colors change depending on the species and roast level. Experiment with blending different shades of brown and black to achieve the desired color variation and realism in your drawing.
Sketching the Outline
Start with basic shapes
Using a light pencil, start by sketching the basic shapes of the coffee beans. Begin with loose, fluid strokes to establish the overall composition and placement of the beans on the paper. Focus on capturing the general form and proportions accurately.
Refine the shape and proportions
Once you are satisfied with the basic outline, gradually refine the shape and proportions of the coffee beans. Pay close attention to the curves and edges, ensuring that they are smooth and proportional to each other. Make any necessary adjustments to achieve a balanced and aesthetically pleasing composition.
Add details like curves and edges
After establishing the overall shape, start adding more specific details to your drawing. Observe the curves and edges of the coffee beans and sketch them with precision. Take your time to carefully replicate the unique contours and irregularities of each bean. This attention to detail will bring your drawing to life and make it more realistic.
Creating Texture and Highlights
Study the texture of coffee beans
To accurately depict the texture of coffee beans, carefully observe reference images or even real coffee beans. Notice the areas of roughness, ridges, and grooves on the surface. Use your pencil to create light, short strokes or dots to emulate these textures. Gradually build up the layers and intensity of the pencil marks to achieve the desired effect.
Use shading techniques to depict texture
Utilize shading techniques such as hatching, cross-hatching, or stippling to enhance the texture in your drawing. These techniques involve creating different patterns and densities of lines or dots to simulate the complex surface of the coffee beans. Experiment with different pencil pressures and strokes to achieve the desired level of texture and realism.
Add highlights to create dimension
To create dimension and make your coffee beans appear more three-dimensional, add highlights strategically. Observe where the light source is coming from and lighten those areas accordingly with your eraser or a lighter pencil grade. These highlights will create the illusion of light hitting certain areas, adding depth and visual interest to your drawing.
Working with Different Pencil Grades
Understanding pencil hardness
Pencil hardness is determined by the amount of clay and graphite in the lead. A higher graphite content results in a softer pencil, while a higher clay content creates a harder pencil. Understanding the grading system, ranging from 9H (hardest) to 9B (softest), will help you choose the appropriate pencil for different aspects of your coffee bean drawing.
Experimenting with different pencil grades
Experiment with different pencil grades to achieve the desired effects in your drawing. A softer pencil, such as a 2B or 4B, can be used for darker areas and shading, while a harder pencil, like an H or 2H, is suitable for lighter areas and details. Try layering different pencil grades to create subtle variations in tone and texture.
Using different strokes for shading
Varying your pencil strokes can greatly impact the overall appearance of your coffee bean drawing. Experiment with different stroke techniques, such as circular strokes, cross-hatching, or even a combination of short and long strokes. Each stroke technique creates a distinct texture and shading effect, allowing you to add depth and dimension to your artwork.
Blending and Smudging Techniques
Using blending stumps or tortillons
Blending stumps or tortillons are cylindrical tools made of rolled paper. These tools are useful for blending and smoothing out pencil marks, creating soft transitions between different tones. Gently rub the blending stump or tortillon over the graphite to create a seamless and polished look. Remember to clean the blending tool between uses to avoid unintentional smudging.
Smudging with fingers or tissue
If you don’t have blending stumps or tortillons handy, you can also use your fingers or tissue to smudge and blend the graphite. Be cautious when using your fingers, as the natural oils on your skin may transfer to the paper and affect the drawing. When using tissue, lightly press and rub over the desired areas to blend the pencil marks smoothly.
Creating smooth transitions
To achieve smooth transitions between lighter and darker areas in your coffee bean drawing, focus on blending and smudging. Gradually build up the layers of graphite and use blending techniques to create a seamless transition between different tones and textures. This will give your drawing a more realistic and refined appearance.
Adding Depth and Shadows
Understanding light and shadows
Light and shadows play a vital role in creating depth and realism in any drawing. Study how light interacts with objects and observe the shadows cast by coffee beans in different lighting conditions. Understand the concepts of highlights, mid-tones, and shadows, and how they contribute to the overall form of the beans.
Creating depth through shading
To create depth in your coffee bean drawing, effectively utilize shading techniques. Focus on building up layers of darker and lighter tones, gradually deepening the shadows and adding highlights where necessary. Pay attention to the locations and intensity of the shadows, as they define the shape and volume of the beans.
Emphasizing shadows for realism
By emphasizing the shadows in your coffee bean drawing, you can enhance the sense of realism and three-dimensionality. Use a softer pencil grade or a heavier hand to darken the areas of shadow. This contrast between light and dark areas will make your beans appear more solid and grounded, adding depth to your artwork.
Highlighting and Reflective Surfaces
Capturing reflective surfaces
Coffee beans often have reflective surfaces due to their shininess. Observe how light interacts with these surfaces and try to capture the reflections and highlights in your drawing. Use an eraser or a lighter pencil grade to carefully erase or lighten areas where light hits the beans, emphasizing their reflective nature.
Using highlights to bring out shine
Highlights are crucial in bringing out the shine and luster of coffee beans. Use a kneaded eraser or a fine-pointed eraser to carefully lift off graphite and create highlights on the reflective areas. Make these highlights subtle and precise, as they will add a sense of depth and realism to your drawing.
Creating a sense of realism
By effectively capturing the reflective surfaces and highlights on the coffee beans, you can create a sense of realism in your drawing. Take your time to observe the play of light and shadows and incorporate it into your artwork. The careful placement of highlights will add that extra touch of authenticity, enhancing the overall realism of the drawing.
Adding Details and Finishing Touches
Refining the drawing with intricate details
Once you have established the basic shapes and textures of the coffee beans, it’s time to add intricate details. Pay attention to any unique markings, imperfections, or variations in the beans and incorporate them into your drawing. Fine-tune the curves, edges, and lines to capture the individual characteristics of each bean.
Adding reflections and small imperfections
To make your coffee bean drawing more authentic, consider adding reflections and small imperfections. Reflective surfaces often show small distortions or bumps due to variations in the surface. Incorporating these subtle details will elevate the realism of your drawing and make it visually engaging.
Signing and varnishing the finished artwork
Once you are satisfied with your coffee bean drawing, don’t forget to sign it! Add your signature in a discreet corner of the artwork, using a fine-tip pen or a sharpened pencil. This final touch signifies your ownership and completes the artwork. If you wish to protect your drawing from smudging or fading, you can apply a thin layer of fixative or varnish. Follow the instructions on the product carefully to ensure proper application.
Drawing coffee beans requires a careful eye for detail, patience, and the right drawing supplies. By understanding the anatomy of coffee beans, honing your sketching skills, and mastering various shading techniques, you can create a stunningly realistic depiction of this beloved beverage ingredient. So gather your drawing supplies, set up your workspace, and unleash your creativity to create a captivating coffee bean drawing that will amaze and inspire others.
