?Have you ever wondered how to get consistently rich, chocolate-kissed espresso from your mocha coffee machine every single morning?

Mocha Coffee Machine Mastery
You’re about to learn everything you need to know to get the best mocha-style coffee from your machine, whether it’s a stovetop moka pot, an electric moka, or an espresso machine designed for mocha drinks. This article walks you through equipment, ingredients, techniques, recipes, maintenance, troubleshooting, and advanced tips so your cups are reliably delicious.
What is a mocha coffee machine?
A “mocha coffee machine” commonly refers to devices used to make strong brewed coffee concentrates that pair perfectly with chocolate and milk. You’ll find people mean different things by “mocha”: sometimes they mean a Moka pot, sometimes a chocolate-flavored espresso drink, and sometimes an espresso machine used to make a mocha beverage.
Mocha vs. Moka vs. Mocha beverage
You should know the distinction: “Moka” (with a K) usually refers to the stovetop device invented by Alfonso Bialetti; “mocha” (with an H) more often refers to a chocolate-and-coffee drink, inspired by mocha coffee beans historically linked to Yemen. This article uses both meanings when relevant, and you’ll learn how to use either kind of machine to produce a chocolate coffee drink you’ll enjoy.
Types of mocha coffee machines
Choosing the right machine depends on how you plan to drink your mocha, how much hands-on control you want, and your budget. You’ll find three main categories: stovetop Moka pots, electric moka machines, and espresso machines that produce espresso for mocha beverages.
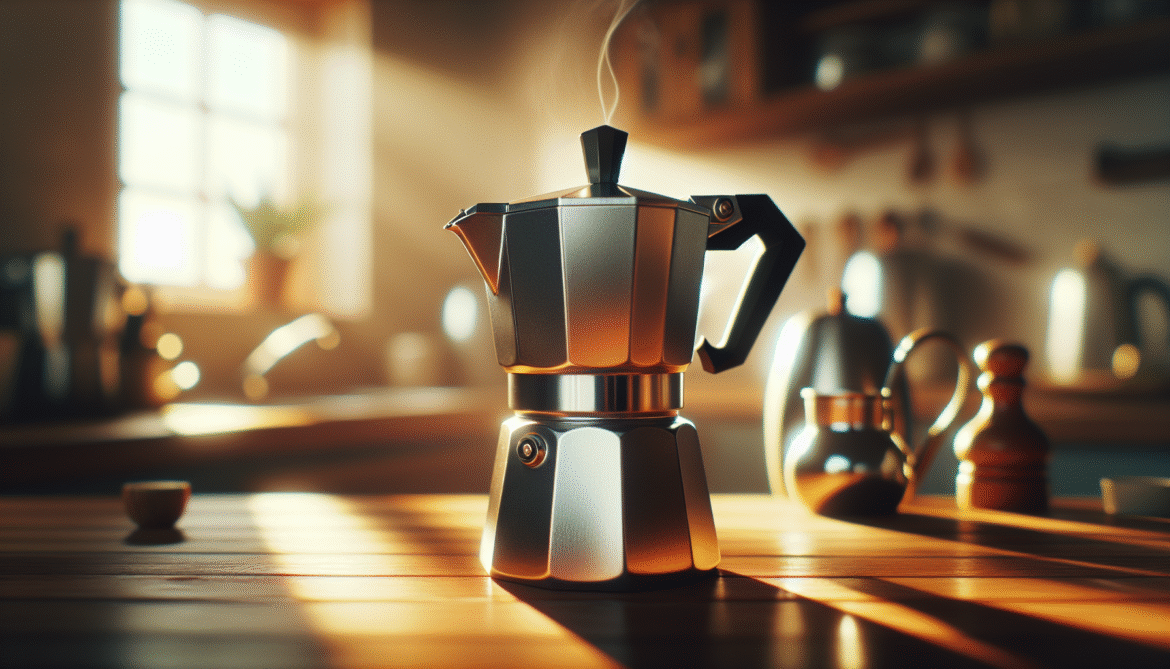
Stovetop Moka pot
The Moka pot is compact, affordable, and produces a concentrated coffee that works great with chocolate and milk. You’ll appreciate its simplicity and portability, though it won’t produce true espresso crema.
Electric moka machines
Electric moka machines automate heating and can offer consistent temperatures and convenience. You’ll like them if you want Moka-style coffee without using a stove, and a few models include steam wands for frothing milk.
Espresso machines used for mochas
Semi-automatic and automatic espresso machines can produce true espresso shots and steam milk for classic mochas. You’ll get better texture and control, but you’ll pay more and need more maintenance.
| Machine Type | Best for | Pros | Cons |
|---|---|---|---|
| Stovetop Moka pot | Small households, campers | Inexpensive, durable, portable | No true crema, heat control needed |
| Electric moka | Daily convenience | Consistent heating, automated | Less portable, variable build quality |
| Espresso machine | Authentic mochas, cafés | True espresso, steam wand control | Higher cost, more maintenance |
Key components and how they work
Understanding how the parts interact helps you troubleshoot, maintain, and get the most flavor from your machine. Each part contributes to pressure, temperature, and extraction.
Boiler or base chamber
This is the lower chamber where you add water. You’ll heat the water so pressure pushes it through the grounds, extracting flavors.
Funnel filter and coffee basket
You place your ground coffee here. You’ll want an even, appropriate grind to ensure balanced extraction.
Upper chamber or carafe
This is where your brewed coffee collects. You’ll screw it onto the base so that the brewed concentrate flows in cleanly.
Safety valve and gasket
The safety valve prevents dangerous pressure buildup, and the gasket seals the chambers. You should regularly check both for wear.
| Component | Role | Maintenance Tip |
|---|---|---|
| Base chamber | Holds water and creates pressure | Rinse daily; descale periodically |
| Funnel/filter | Holds grounds | Replace if bent or clogged |
| Upper chamber | Collects brew | Rinse to prevent oily build-up |
| Gasket | Seals unit | Check for cracks; replace yearly |
| Safety valve | Pressure relief | Inspect for blockages |
Choosing the right machine for your needs
Think about capacity, heat source, build material, and features. Your ideal choice balances your daily routine with desired flavor and effort level.
Capacity and household size
You’ll want to pick a size that matches how many cups you make at once. A 3-cup moka pot suits one person; larger sizes are available for groups.
Material and heat source
Aluminum Moka pots heat quickly and are lightweight, while stainless steel is durable and better on induction stoves. Electric options often use stainless steel or plastic housing.
Features and budget
Consider whether you want a steam wand, automatic shutoff, or programmable controls. You’ll pay more for advanced features and easier maintenance.
| User Profile | Recommended Machine Type | Key Features to Look For |
|---|---|---|
| Minimalist, budget | Stovetop Moka pot | Aluminum, 3-cup size |
| Convenience-oriented | Electric moka | Auto shutoff, consistent heat |
| Coffee hobbyist | Semi-automatic espresso | Steam wand, PID temperature control |
Coffee and ingredients for mocha
Great mocha drinks start with good coffee, quality chocolate, fresh milk, and clean water. Each element affects balance, texture, and sweetness.
Beans and roast level
You’ll typically prefer medium-dark to dark roasts for mocha drinks because their fuller body and chocolatey notes complement cocoa. Use fresh roasted beans and grind them just before brewing for the best aroma.
Grind size and distribution
Grinding for a Moka pot is coarser than espresso but finer than drip — a texture like table salt. You’ll want uniform particles to prevent channeling and bitter over-extraction.
Water quality and temperature
Use filtered water to avoid mineral buildup and off-flavors. The water temperature matters: preheating the water slightly can reduce overall time the grounds spend at high heat, limiting bitterness.
Chocolate options and sweetness
You can use cocoa powder, chocolate syrup, or melted chocolate. You’ll control sweetness and cocoa intensity through choice of chocolate: unsweetened cocoa gives you control, while syrups add convenience.
Milk and alternatives
Whole milk gives the creamiest mouthfeel, while 2% still froths well. Non-dairy options like oat, almond, and soy vary in frothing ability and flavor — oat milk tends to be a top barista-friendly substitute.
| Ingredient | Typical Choice | Why it matters |
|---|---|---|
| Beans | Medium-dark roast | Adds chocolate, body |
| Grind | Moka-level (between espresso & drip) | Ensures balanced extraction |
| Water | Filtered | Prevents off-flavors & scaling |
| Chocolate | Cocoa powder or syrup | Controls sweetness & texture |
| Milk | Whole or barista oat | Affects foam stability & creaminess |
Brewing fundamentals and techniques
Your technique is as important as your machine. Small adjustments to grind, heat, and timing make significant flavor differences.
Preheat and fill correctly
You should preheat your water when possible to reduce time at high heat and avoid burnt flavors. Fill the base to just below the safety valve for Moka pots.
No tamping for Moka, even distribution only
Unlike espresso machines, you should not press the grounds in a Moka pot; packing can increase pressure and create bitter flavors. Just level the grounds and remove excess.
Heat control and timing
Use medium to medium-low heat on the stovetop to avoid scalding the coffee. Let the brew flow steadily; if it sputters and spits, the heat is too high.
Pouring and finishing
Stop heating once the upper chamber is near full and you hear a gurgle. Remove from heat immediately to preserve aromatics and reduce burnt notes.
Stovetop Moka pot: step-by-step
Follow these steps to get a consistent, flavorful base for mochas.
- Preheat water to just under boiling to shorten extraction time.
- Fill the base to just below the safety valve with hot water.
- Add freshly ground coffee to the funnel; level it without tamping.
- Screw the upper chamber on snugly but not overly tight.
- Place the pot on a medium-low flame and watch for steady flow.
- When extraction wanes and you hear gurgling, remove from heat.
- Pour immediately and mix with your chocolate/milk preparation.
You’ll get a concentrated brew similar to espresso but with a slightly different crema and mouthfeel.
Electric moka machine: step-by-step
Electric models are similar in principle but often simpler to operate.
- Fill the water reservoir according to the manufacturer’s mark.
- Add ground coffee to the filter, level gently.
- Assemble and plug the machine in.
- Start the machine and wait for automatic brewing to finish.
- If your unit has a steam wand, froth milk while the coffee brews.
- Combine coffee with chocolate and milk as desired.
You’ll appreciate the convenience and consistent heat for daily use.
Making mocha: classic recipes
Below are popular mocha recipes with ratios and tips so you can replicate or scale them.
Classic café mocha (hot)
You’ll get a balanced chocolate-forward drink that’s similar to what you order at cafés.
- Ingredients (single serving): 1 shot (25–30 ml) espresso or 50–60 ml Moka brew; 1 tbsp (15–20 g) chocolate syrup or 1 tbsp cocoa + 1 tsp sugar; 6–8 oz (180–240 ml) steamed milk.
- Method: Mix chocolate with a small amount of hot coffee to dissolve; add the rest of the coffee and steamed milk; top with foam and optional cocoa dust.
White mocha
You’ll use white chocolate for a sweeter, creamier profile.
- Ingredients: Use the same ratios but substitute melted white chocolate or white chocolate sauce for the cocoa.
- Tip: White chocolate melts at a lower temperature, so stir thoroughly and add to warm coffee rather than boiling milk.
Iced mocha
You’ll enjoy this for warm days or when you want a chill treat.
- Ingredients: 1 shot espresso or 60 ml Moka brew, 1 tbsp chocolate syrup, 6–8 oz cold milk, ice.
- Method: Mix chocolate with a small portion of hot coffee to dissolve (or use syrup), add cold coffee and milk over ice, stir, and optionally top with cold foam.
Vegan mocha
You’ll substitute plant milk and vegan chocolate to keep things dairy-free.
- Ingredients: Use oat milk (best frothing), dark chocolate or cocoa, and sweetener as needed.
- Tip: Oat milk creates a natural creaminess that pairs beautifully with dark chocolate.
| Recipe | Coffee Amount | Chocolate | Milk | Notes |
|---|---|---|---|---|
| Classic hot mocha | 1 espresso shot / 60 ml Moka | 1 tbsp syrup or 1 tbsp cocoa + sugar | 6–8 oz steamed milk | Balanced sweetness |
| White mocha | 1 shot | White chocolate | 6–8 oz steamed milk | Sweeter, creamier |
| Iced mocha | 1 shot / 60 ml | 1 tbsp syrup | Cold milk + ice | Use syrup for easy mixing |
| Vegan mocha | 1 shot | Dark chocolate/cocoa | Oat milk | Oat milk = best dairy-free foam |

Tuning flavor: extraction, temperature, and yield
You’ll modify grind, heat, and water to tune your cup. The key is to balance extraction (not too sour, not too bitter) with chocolate sweetness and milk texture.
Grind adjustments
If your coffee tastes sour or weak, grind a little finer (but not espresso fine for Moka pots). If it’s bitter and harsh, use a slightly coarser grind or reduce heat.
Heat control
Lower heat slows extraction and reduces burnt notes, while higher heat speeds extraction but risks over-extracting. Aim for a steady, gentle flow.
Brew ratio
For a balanced mocha, you’re typically using a concentrated coffee base: about 1:2 to 1:3 coffee to water ratio by weight for espresso-like strength. Use scales for precise adjustments.
Frothing and milk steaming
Milk texture elevates a mocha from good to great. You’ll aim for microfoam: silky, glossy milk with tiny, uniform bubbles.
Using a steam wand
- Purge the wand to remove condensation.
- Submerge the tip just below the surface and introduce air briefly to create foam.
- Lower the pitcher slightly to continue heating while keeping the tip near the surface to create microfoam.
- Finish at 60–65°C (140–149°F) for latte-style drinks, or 65–70°C for a hotter beverage.
Without a steam wand
You can use a handheld frother, French press, or jar-and-shake method. Your foam won’t be as fine as steam but can still create nice texture. Warm the milk gently before frothing.
Cleaning and maintenance
Regular cleaning preserves flavor and prolongs your machine’s life. Follow a routine for daily, weekly, and monthly tasks.
Daily care
You should rinse the carafe and funnel after each use, discard spent grounds, and dry parts thoroughly to prevent odors and mold.
Weekly tasks
Deep-clean the filter and gaskets, check the safety valve for debris, and descale if your water is hard.
Monthly and annual maintenance
Replace gaskets yearly or when cracked, clean internal components if your model allows it, and service steam wands and pumps on espresso machines as recommended by the manufacturer.
| Frequency | Task | Why |
|---|---|---|
| Daily | Rinse chambers, empty grounds | Prevents stale oils and odors |
| Weekly | Clean filter, check valve | Reduces clogging and uneven flow |
| Monthly | Descale (if needed) | Prevents mineral buildup |
| Yearly | Replace gaskets, service machine | Maintains pressure and seal integrity |
Troubleshooting common problems
You’ll likely encounter a few recurring issues. This quick guide helps you diagnose and fix them.
| Symptom | Likely Cause | Solution |
|---|---|---|
| Bitter or burnt taste | Overheating, too fine grind | Lower heat, adjust grind coarser, shorten brew time |
| Weak or sour coffee | Under-extraction, too coarse grind | Grind finer, preheat water, check ratio |
| Sputtering or spitting | Too high heat, clogged filter | Reduce heat, clean filter and safety valve |
| Slow or no flow | Blocked funnel or safety valve | Clean thoroughly, inspect gasket |
| Leaks | Worn gasket or loose assembly | Replace gasket, tighten connections |
Safety tips
You should handle pressurized equipment with care. Regular checks and proper assembly will keep you safe.
- Always inspect the safety valve and gasket before use.
- Never force disassembly while the machine is hot or pressurized.
- Use heat-resistant handles and protective mitts for stovetop pots.
- Keep the machine on a stable surface away from flammable materials.
Accessories and upgrades
You can improve consistency and flavor with a few well-chosen accessories.
Grinder
A quality burr grinder gives you consistent particle size for better extraction. You’ll notice improved sweetness and clarity.
Scale and thermometer
Use a scale to dial ratios precisely and a thermometer to steam milk to the right temperature.
Milk pitcher and tamper
A stainless-steel milk pitcher helps with steaming technique, and a tamper helps only for machines requiring tamping — not Moka pots.
Advanced tips and creative recipes
Once basic technique is mastered, you can experiment to personalize your mocha drink.
Layering and presentation
You can make visually appealing drinks by layering chocolate syrup, espresso, and milk. Pour carefully over the back of a spoon to create separation before gently stirring.
Infused mochas
Infuse simple syrups with spices like cinnamon, cardamom, or star anise to add aromatic notes. You’ll add these to the chocolate or milk, rather than to the coffee, to control balance.
Cold-brew mocha variation
Use a concentrated cold brew as the base for an iced mocha. You’ll mix less concentrated cold brew with milk and chocolate so the drink remains balanced without heating.
Buying guide and budget considerations
Your budget determines what features you can expect. Align spending with how much you’ll use the machine and how much control you want.
- Budget (