Have you ever imagined brewing a cup of coffee made from beans grown in your own garden?
How to Plant Coffee Tree for Beginners
Growing a coffee tree can be a rewarding project that connects you to the beverage you love. This guide walks you through each step in a friendly, practical way so you can begin planting, caring for, and eventually harvesting coffee from your own trees.

Why grow a coffee tree?
Growing a coffee tree gives you the chance to learn about the source of your daily cup and to enjoy a living, productive plant. You’ll gain experience in horticulture, and in the right climate you can harvest cherries to process yourself for a truly homegrown brew.
Which coffee species should you choose?
There are two main species you’ll encounter: Coffea arabica and Coffea canephora (commonly called robusta). Each has different climate needs, cup profiles, and disease resistance, so your choice should match your local conditions and flavor preferences.
| Species | Altitude & Climate | Flavor profile | Disease resistance | Best for |
|---|---|---|---|---|
| Arabica (C. arabica) | 600–2,000 m; prefers cooler highlands and stable temps 15–24°C | Bright, nuanced, acidic | More susceptible to rust and pests | Specialty flavor, home growers in cooler tropics/subtropics |
| Robusta (C. canephora) | Low to medium altitude; tolerates higher temps and humidity | Stronger, harsher, more bitter | Hardier and more disease-resistant | Robust production, lower-altitude areas, insect resistance |
Choose arabica if you want specialty coffee and live in a higher-altitude or mild climate. Choose robusta if you need a hardier plant for warmer, lowland conditions.
Choosing the right variety (cultivars)
Once you pick a species, choose a cultivar suited to your locale and resistance needs. Cultivars can differ in yield, cup quality, and tolerance to diseases like coffee leaf rust.
Talk to local nurseries, extension services, or experienced growers to find recommended cultivars for your area. You’ll get better results if you select varieties tested in local conditions.
Climate and location requirements
Coffee trees prefer stable climates without harsh frosts and with consistent rainfall or irrigation. Arabica does best between 15–24°C, while robusta tolerates 24–30°C. Avoid strong, drying winds and locations with late frosts that can damage new growth and buds.
Aim for a location with morning sun and afternoon shade in hotter regions, or more uniform sun exposure in cooler settings. If you’re growing in containers, you can move plants to adjust light and temperature as needed.
Soil requirements
Healthy soil is essential for coffee. Coffee prefers well-draining, fertile soils with good organic matter and a slightly acidic pH between 5.5 and 6.5. Heavy clay that holds water will cause root problems, while very sandy soil will need more organic amendments.
Improve soil with compost, aged manure, or leaf mold to enhance structure and nutrient retention. A soil test helps you correct pH and deficiencies before planting.
Propagation methods: seeds, cuttings, and seedlings
You can propagate coffee by seed, stem cuttings, or by buying nursery seedlings. Each method has pros and cons: seeds are natural and widespread, cuttings preserve the exact cultivar traits, and seedlings give you a head start on growth.
Seeds are easy if fresh; cuttings require some skill and rooting hormone; seedlings from a reputable nursery save time and reduce early losses. Choose the method that fits your patience and resources.
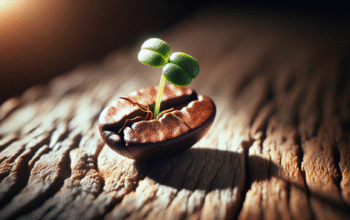
Propagating from seeds
Using fresh coffee seeds gives you genetic diversity but can be unpredictable for precise cultivar traits. Seeds should be planted within a few days of being removed from the cherry for best germination rates.
Soak seeds briefly, then plant in a moist, well-draining seed mix. Keep them in partial shade and maintain steady moisture until they sprout, which can take 2–3 months.
Propagating from stem cuttings
Cuttings allow you to preserve the exact characteristics of a parent plant and can produce a fruiting tree faster than seed-grown plants. Use semi-hardwood cuttings about 10–15 cm long, and apply root hormone before planting.
Place cuttings in a humid, shaded environment and keep soil consistently moist. Rooting can take several weeks to months, and success is improved with misting systems or humidity domes.
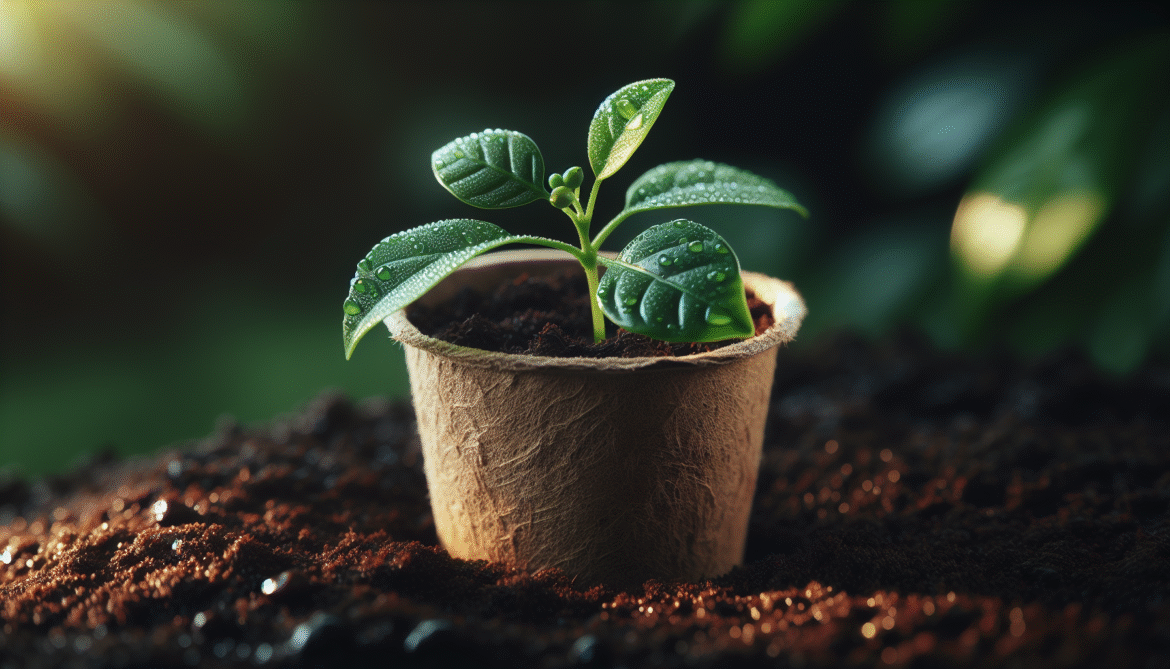
Using nursery seedlings
Buying seedlings from a reliable nursery is the easiest way to start. Seedlings that are 6–12 months old and 30–60 cm tall make excellent candidates for transplanting.
Inspect seedlings for healthy roots, no pests or disease symptoms, and balanced growth. Acclimate them gradually to full sunlight if they were grown in shade-nets.
Germinating coffee seeds: step-by-step
Germination requires patience and consistent care. Follow these steps to give seeds the best start:
- Remove the pulp from fresh cherries and rinse seeds gently. Fresh seeds germinate better than dried or old seeds, so work quickly.
- Soak seeds in water for 12–24 hours to hydrate them.
- Plant seeds 1–2 cm deep in a well-draining germination mix that’s kept moist but not waterlogged.
- Provide partial shade and stable temperatures in the 20–25°C range.
- Expect germination to begin after several weeks and to continue for up to three months. Keep conditions stable and transplant seedlings when they have a few true leaves.
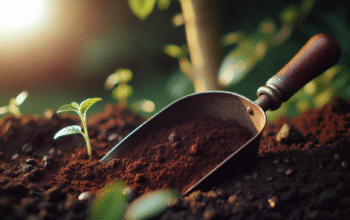
Planting site preparation
Preparing your site improves establishment and long-term health. Clear weeds and grass, loosen soil, and incorporate organic matter before planting.
Dig planting holes twice as wide as the root ball and slightly shallower than the nursery pot depth to avoid planting too deep. Mix compost into the backfill to boost nutrients and structure.
Planting step-by-step
Planting correctly ensures strong establishment. Place the seedling in the hole, backfill gently, and firm the soil to avoid air pockets. Avoid burying the stem deeper than it was in the nursery.
Water thoroughly after planting to settle the soil and supply moisture to roots. Apply a 5–10 cm layer of mulch to retain moisture and reduce weeds, keeping mulch a few centimeters away from the trunk to prevent collar rot.
Spacing and planting density
Spacing affects light, airflow, and yield. For small home gardens give each tree 2–4 meters of space depending on variety and desired shape. Commercial spacing is wider, often 2.5–3 meters for dense planting or up to 4 meters for larger trees and shade systems.
Closer spacing may increase early yield but raises disease risk and competition for nutrients. Plan spacing to suit your management style and expected tree size.
Shade management
Shade is crucial for coffee in many settings, moderating temperature and protecting trees from intense sun. Young plants benefit from 50–70% shade, while mature plants often do well with 30–50% shade depending on climate.
Use fast-growing shade trees that fix nitrogen or produce usable products (fruit, timber). Regularly manage shade trees to keep a balanced canopy and maintain sufficient light penetration.
Watering and irrigation
Consistent moisture is important, especially during establishment and cherry development. Water young plants frequently to keep soil evenly moist, then reduce frequency but increase depth as the root system matures.
Signs of overwatering include yellowing leaves and root rot; signs of underwatering include wilting, leaf drop, and poor berry set. Drip irrigation gives precise water delivery and is water-efficient in drier climates.
Fertilization and nutrients
Coffee is a moderate feeder that benefits from balanced fertilization. Nitrogen encourages leaf and branch growth, phosphorus supports root development and flowering, and potassium enhances cherry quality and disease resistance.
Follow a fertilization schedule based on soil tests, plant age, and production goals. Organic options like compost, manure, and mulches supply nutrients over time. Consider the table below for a basic guideline, then adjust for local recommendations.
| Growth Stage | N-P-K ratio (example) | Frequency | Notes |
|---|---|---|---|
| Nursery (0–6 months) | 6-6-6 or balanced | Monthly light feeds | Use diluted fertilizer to avoid burning roots |
| Establishment (6–24 months) | 8-10-8 | Every 2–3 months | Focus on steady growth, incorporate organic matter |
| Fruiting (from year 2–3) | 12-6-20 (higher K) | 3–4 times/year or split monthly | Increase potassium for cherry development |
| Maintenance/mature | Balanced with higher K | 2–3 times/year | Adjust rates according to yield and leaf analysis |
Use leaf and soil testing to fine-tune applications and avoid over-fertilization, which can harm the environment and plant health.

Pruning and training
Pruning shapes trees for manageable size, better light penetration, and higher yields. Young trees are often trained to 3–4 main scaffold branches to form a stable structure, and older trees receive periodic renewal pruning to remove old wood and stimulate new branches.
Prune after harvest or during a dry period to reduce disease spread, and use clean, sharp tools. Remove vertical suckers and overly dense inner branches to improve airflow.
Stumping and rejuvenation
If trees become unproductive, stumping (cutting back to a lower height) can rejuvenate growth and stimulate a productive flush. Stumping is often done every 4–6 years in production systems, but timing depends on tree vigor and health.
Give stumped trees good post-cut care: water, fertilize, and prevent pests during regrowth. Expect a temporary drop in yield as the tree recovers.
Pest and disease management
Knowing common pests and diseases helps you spot problems early and act effectively. Monitor trees regularly for signs of infestation or infection and use integrated pest management (IPM) strategies to reduce chemical reliance.
| Pest/Disease | Symptoms | Cultural controls | Biological/chemical controls |
|---|---|---|---|
| Coffee leaf rust (Hemileia vastatrix) | Yellow-orange powdery spots on leaves, defoliation | Prune for airflow, plant resistant cultivars, remove infected debris | Fungicides, copper-based sprays (follow local rules) |
| Coffee berry borer | Small holes in berries, reduced bean quality | Harvest promptly, remove infested berries, use traps | Biological control (Beauveria bassiana), insecticides where permitted |
| Nematodes | Stunted growth, root damage, yellowing | Solarize soil, rotate crops, use resistant rootstocks | Soil fumigants or nematicides (follow safety guidelines) |
| Root rot (Phytophthora) | Wilting, brown root tissue, dieback | Improve drainage, avoid waterlogging, sanitize tools | Fungicides, planting in raised beds |
Implement sanitation: remove fallen cherries and infected leaves, maintain good spacing, and avoid overhead watering which can spread spores. Use biological controls and cultural measures before resorting to chemicals.
Mulching and ground cover
Mulch conserves moisture, moderates soil temperature, suppresses weeds, and gradually adds organic matter. Use 5–10 cm of organic mulch like straw, wood chips, or shredded leaves, keeping it a few centimeters from the trunk to prevent rot.
Cover crops and living mulches can improve soil fertility and structure while supplying habitat for beneficial insects. Choose non-competitive species that won’t steal too much water or nutrients from young coffee trees.
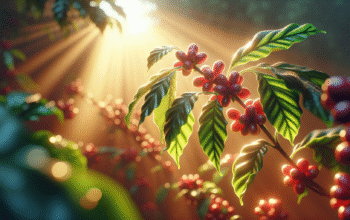
Harvesting coffee cherries
Harvest cherries when they’re ripe and deep red (for most cultivars). The best flavor comes from selectively picking ripe cherries rather than stripping all cherries at once, though selective picking requires more labor.
Harvesting is typically done once or twice per season depending on the climate. In many tropical regions cherries ripen over several weeks to months, so expect multiple picking rounds to maximize quality.
Post-harvest processing: wet and dry methods
Processing methods greatly impact final cup quality. The two primary methods are wet (washed) and dry (natural).
- Wet processing: Remove pulp with a pulper, ferment the mucilage for 12–48 hours, wash, and dry the parchment. This method tends to produce cleaner, brighter flavors.
- Dry processing: Dry whole cherries with the skin and mucilage intact, then thresh to remove the dried outer layers. This method can give fruitier, heavier-bodied flavors.
Both methods require careful drying to avoid mold and fermentation defects. Choose the method that suits your equipment and flavor goals.
Drying and storage
Dry cherries or parchment should be dried to a stable moisture content (typically 10–12% for green beans) to prevent spoilage. Sun drying on raised beds or patios works well with frequent turning; mechanical dryers provide control in wetter climates.
Store dried parchment or green beans in cool, dry, pest-free conditions. Use airtight containers or bags if long-term storage is needed, and avoid high humidity and strong odors which can affect cup quality.
Common mistakes and how to avoid them
New growers often make predictable mistakes, but you can sidestep them with proper practices.
- Planting in poorly drained soil — improve drainage or use raised beds.
- Overwatering young plants — water consistently but avoid soggy soil.
- Neglecting shade in hot climates — provide temporary shade until trees mature.
- Skipping pruning — maintain tree structure and airflow with scheduled pruning.
- Harvesting unripe cherries — wait for full color for best flavor.
Addressing these issues early saves time and increases your chances of success.
Troubleshooting guide
When problems arise, a systematic approach helps you find the cause and fix it quickly.
- Leaves yellowing: check watering, nutrient levels, and pH; perform a soil test and adjust fertilizer.
- Poor flowering or fruit set: look for nutrient imbalance (particularly phosphorus), irregular watering, or excessive shade.
- Spots and lesions on leaves: inspect for rust or fungal disease and prune affected parts, then apply appropriate fungicide if needed.
- Stunted trees: examine root health and soil compaction; consider transplanting or root pruning if necessary.
Regular observation and recording conditions (weather, fertilization, pests) helps you identify patterns and intervene sooner.
Expected timeline and yields
Your timeline will depend on propagation method and species. Here’s a typical schedule to set expectations and plan care:
| Stage | Timeframe | What to expect |
|---|---|---|
| Germination (seed) | 1–3 months | Seedlings emerge, slow early growth |
| Nursery growth | 6–12 months | Seedlings reach transplantable size |
| Establishment | 1–2 years post-plant | Root system develops, limited fruiting |
| First harvest | 2–4 years | Small yields from young trees |
| Mature production | 4–7 years | Peak yields with proper care |
| Productive life | 20+ years | Trees can be productive for decades with renewal pruning |
Yields vary by species, cultivar, climate, and management. A well-managed arabica tree might produce 0.5–2 kg of green coffee per year when mature, while robusta can yield more in optimal lowland conditions.
Sustainable and organic practices
You can cultivate coffee with environmentally responsible approaches that support biodiversity and soil health. Use compost, organic mulches, and nitrogen-fixing shade trees to reduce synthetic inputs. Encourage beneficial predators and use traps or biological controls for pests.
Alley cropping, integrating fruit trees, and preserving canopy trees are ways to maintain habitat and increase resilience to climate variability. Certification programs exist for organic and sustainable coffee, but even small-scale actions improve sustainability without certification.
Final tips and resources
Start small and learn as you go; growing coffee is a long-term commitment that rewards careful observation and adaptation. Keep records of planting dates, inputs, pruning, pest outbreaks, and yields to refine your approach each season.
Seek local knowledge from extension services, coffee cooperatives, or gardening groups to tailor practices to your climate. Read specialized resources and experiment with small processing batches to find flavors you enjoy.
If you want, here are a few practical next steps you can take right now:
- Test your soil to determine pH and nutrient needs.
- Choose a cultivar recommended for your altitude and climate.
- Start a small nursery or order a few healthy seedlings for trial.
- Plan a shaded site and prepare soil with compost before planting.
Growing coffee is a journey that teaches patience and fosters a deeper appreciation for every cup you make. With regular care, the right site, and an eye for detail, you can enjoy the satisfaction of producing your own coffee cherries and tasting the results of your work.