Want to make a Starbucks Mocha at home that tastes just like the one you get at the café?
How to Make a Starbucks Mocha at Home
You can recreate a Starbucks-style mocha in your kitchen using a few straightforward techniques and the right ingredients. This guide walks you through everything from ingredients and equipment to step-by-step recipes for hot and iced mochas, plus troubleshooting and customization tips so your drink matches your taste.
What Is a Starbucks Mocha?
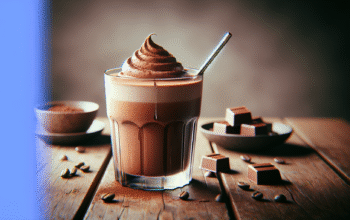
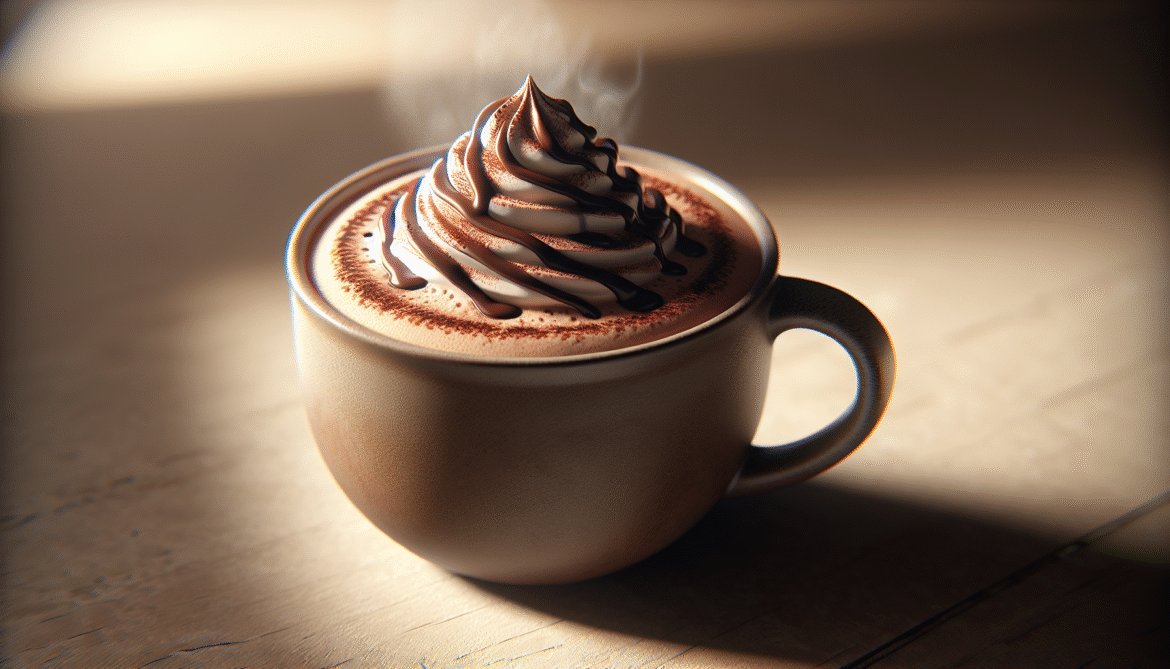
A Starbucks Mocha, often called a Caffè Mocha, is a balance of espresso, steamed milk, and chocolate sauce, usually finished with whipped cream and a chocolate drizzle. It’s essentially a chocolate-flavored latte with richer sweetness and a chocolate-forward flavor profile that complements the espresso.
Ingredients You’ll Need
You’ll want to use fresh ingredients for the best result: freshly roasted espresso beans (or a strong concentrate alternative), cold milk (or your preferred dairy-free option), mocha sauce or chocolate syrup, and optional whipped cream and chocolate shavings. Below is a quick reference table with approximate ingredient amounts for the three common Starbucks sizes.
| Item | Tall (12 oz) | Grande (16 oz) | Venti (20 oz hot / 24 oz iced) |
|---|---|---|---|
| Espresso shots | 1 shot | 2 shots | 2 shots (hot) / 3 shots (iced) |
| Milk (total volume) | ~10 oz | ~14 oz | ~18 oz (hot) / ~20 oz (iced) |
| Mocha sauce / chocolate syrup | 3 pumps (about 1.5 oz) | 4 pumps (about 2 oz) | 5 pumps (about 2.5 oz) |
| Whipped cream | Optional | Optional | Optional |
| Ice (for iced) | N/A | N/A | Fill cup with ice above liquid level (for iced) |
These amounts aim to mimic Starbucks’ flavor balance—espresso-forward but still sweet and chocolaty. Pumps and shot counts are estimates that mirror typical Starbucks standards; use them as a starting point and adjust to taste.
Equipment You’ll Need
You don’t need professional café gear to make a delicious mocha, but some tools make it easier to get the texture and temperature right. Below is a compact equipment list and why each item helps.
| Equipment | Why it helps |
|---|---|
| Espresso machine (or moka pot/Aeropress/French press) | Produces concentrated coffee or espresso shots for authenticity |
| Milk frother or steam wand | Creates microfoam for creamy texture and heat control |
| Saucepan or microwave-safe bowl | For melting chocolate sauce or heating milk without a steamer |
| Measuring spoons or a small scale | For consistent proportions |
| Tall spoon or small whisk | For thoroughly mixing chocolate and espresso |
| Tall glass cups or latte cups | For correct serving sizes and presentation |
If you don’t have an espresso machine, you can still make a very good mocha using alternative brewing methods discussed below.

Understanding Starbucks Ratios and Pumps
Starbucks uses standardized shot counts and pump numbers across their menu, which helps maintain consistency across stores. Understanding these ratios will help you replicate the drink at home:
- Espresso shots: Tall = 1, Grande = 2, Venti hot = 2, Venti iced = 3.
- Flavored pumps: Tall = 3, Grande = 4, Venti = 5 (this applies to syrup pumps and generally to mocha sauce too).
- Milk fills the remainder of the cup after espresso and chocolate are combined; steaming or heating to about 150–160°F (65–71°C) for dairy milk produces the right texture.
Knowing these basic ratios helps if you want to scale the recipe up or down, or tailor the drink to your preferred sweetness or strength.
Step-by-Step: Hot Starbucks-Style Mocha
This step-by-step process will help you create a creamy, balanced hot mocha with properly mixed chocolate and silky steamed milk. Take your time for the best texture.
-
Prepare the espresso:
- Pull 1–2 shots of espresso depending on cup size. Use freshly ground beans and clean equipment for optimal flavor.
- If you don’t have an espresso machine, use one of the alternative methods below to make a concentrated brew.
-
Add mocha sauce or chocolate:
- Put the measured mocha sauce or chocolate syrup into your cup first. This prevents clumping and helps the coffee dissolve the chocolate evenly.
- Typical starting amounts: Tall = 3 pumps, Grande = 4, Venti = 5. Adjust for sweetness.
-
Pour espresso over the chocolate:
- Pour the hot espresso directly onto the mocha sauce and stir until fully dissolved. This ensures an even chocolate flavor and avoids pockets of undissolved syrup.
-
Steam and texture the milk:
- Steam milk to 150–160°F (65–71°C) while introducing small amounts of air initially to create microfoam, then submerge the wand and polish the milk. Aim for a silky, glossy texture.
- If you don’t have a steamer, heat milk on the stove to 150°F and froth with a hand frother or whisk until slightly foamy.
-
Combine milk and chocolate-espresso:
- Pour steamed milk into the cup, holding back foam with a spoon. Finish with a small layer of foam on top.
-
Top and garnish:
- Add whipped cream if desired, then finish with a drizzle of chocolate syrup or chocolate shavings to mimic Starbucks presentation.
Tips:
- Mix chocolate with espresso before adding milk—this ensures complete dissolving and avoids granularity.
- For a richer flavor, choose a chocolate sauce rather than a simple syrup, or add a small amount of cocoa powder dissolved in a little hot water.
Step-by-Step: Iced Starbucks-Style Mocha
Iced mochas require slightly different technique to avoid watering down the flavor. The goal is a cold, balanced drink where chocolate doesn’t sink or separate.
-
Prepare espresso:
- Pull espresso shots and allow them to cool slightly. For iced drinks, Starbucks uses an extra shot in Venti size, so consider matching that if you prefer a stronger caffeinated drink.
-
Mix chocolate with a splash of hot water or hot espresso:
- If using cocoa powder, dissolve it in 1–2 tablespoons of hot water first to make a paste. If using syrup, it will mix more easily with slightly warm espresso. Combine until smooth.
-
Combine espresso and chocolate in a shaker or jar:
- Pour espresso and chocolate into a shaker or lidded jar and give it a few vigorous shakes to cool and aerate slightly. This helps emulsify the mixture and keeps the chocolate from settling.
-
Assemble the drink:
- Fill the cup with ice, pour the espresso-chocolate mixture over the ice, and then add cold milk. Stir gently to combine.
-
Top and finish:
- Add whipped cream and chocolate drizzle if you like.
Tips:
- Use less ice and slightly more liquid than you might think, because ice displaces volume. Adjust syrup amounts upward if you find the flavor diluted.
- Cold foam or frothed milk alternatives can be used for a creamier mouthfeel.
Making Mocha Without an Espresso Machine
You don’t need an espresso machine to get a great mocha. The key is a concentrated, strong coffee base. Here are reliable alternatives, with steps for each.
-
Moka Pot (Stovetop Espresso Maker)
- Grind coffee a bit finer than drip grind but not as fine as espresso.
- Fill the bottom chamber with water, insert the filter with coffee, and heat on medium-low until you hear a sputtering sound.
- Use the strong moka coffee as your espresso substitute. Use the same ratio of 1–2 “shots” (each moka pot extraction is fairly strong).
-
Aeropress
- Use a fine grind and a short brew time (inverted method works well). Add 15–18 grams of coffee and about 60–80 ml of water to mimic an espresso shot.
- Press to extract, and use this concentrated coffee as your shot.
-
French Press (Concentrated Brew)
- Use a coarse grind but increase the coffee-to-water ratio (e.g., 1:8 instead of 1:15).
- Steep for 4 minutes, press, and use the concentrated brew.
-
Strong Drip or Pour-Over Concentrate
- Use double the coffee grounds you normally would when brewing the same volume to create a concentrate.
-
Instant Espresso Powder
- Dissolve 1–2 teaspoons of instant espresso powder in 1–2 oz of hot water per shot. This is the least authentic but efficient and consistent.
Each of these methods will produce a concentrated base that works well with the chocolate and milk, and will let you replicate the mocha experience without a high-end espresso machine.

Homemade Mocha Sauce Recipe
Making your own mocha sauce gives you control over sweetness, chocolate intensity, and ingredients. Here’s a simple, reliable recipe.
Ingredients:
- 1 cup (200 g) granulated sugar
- 1 cup (240 ml) water
- 1 cup (85 g) unsweetened cocoa powder, sifted
- 2 tsp vanilla extract
- Pinch of salt
Method:
- Combine sugar and water in a saucepan over medium heat, stirring until sugar dissolves.
- Whisk in cocoa powder until smooth and slightly thickened.
- Simmer gently for 3–5 minutes, then remove from heat.
- Stir in vanilla extract and salt. Let cool.
- Store in a clean jar in the refrigerator for up to 2 weeks.
Notes:
- For a thicker, richer sauce, reduce water slightly or add a tablespoon of corn syrup to keep it glossy.
- To make it vegan/alternative-sweetener friendly, replace sugar with a simple syrup made from your preferred sweetener and adjust to taste.
Cocoa Powder vs Chocolate Syrup vs Mocha Sauce
Choosing between cocoa powder, chocolate syrup, and mocha sauce affects taste, texture, and how well the chocolate integrates with coffee and milk.
- Cocoa powder: Offers the most authentic chocolate flavor but requires fat and sugar to fully round out the taste. Use a small amount dissolved in hot liquid or mixed with a syrup to prevent graininess.
- Chocolate syrup: Convenient, sweet, and mixes easily into hot or iced drinks. It’s typically thinner and sweeter than mocha sauce.
- Mocha sauce: Typically richer and thicker than syrup, mocha sauce often has cocoa, sugar, and sometimes corn syrup or glucose for shine and mouthfeel. It mimics Starbucks’ commercial sauce most closely.
If you want Starbucks-like results, mocha sauce is closest; chocolate syrup or a cocoa paste will also work if you know how to dissolve and emulsify it properly.
Milk Alternatives and Frothing Tips
You can make an excellent mocha with plant-based milks; however, each alternative behaves differently when heated and frothed.
- Whole milk: Best for a creamy, stable foam and rich mouthfeel. Steam to ~150°F.
- 2% milk: Slightly less creamy but still produces good microfoam.
- Oat milk: One of the best plant-based options for lattes and mochas; it froths well and has a creamy texture.
- Soy milk: Froths well but can become slightly beany if overheated; avoid boiling.
- Almond milk: Can be thin and harder to foam; barista blends perform much better.
- Coconut milk: Gives a tropical flavor and richness but can separate if overheated; use creamier blends.
Frothing tips:
- Aim for small, controlled amounts of air at the start of steaming, then submerge the wand to create a velvety microfoam.
- Avoid overheating milk; above 170°F (77°C) you’ll lose sweetness and risk scalding.
- If you don’t have a steam wand, use a hand frother, French press, or whisk after heating milk to 150°F.
Customizations and Flavor Variations
One reason Starbucks’ mochas are so popular is the ease of customization. Try these variations to suit seasonal tastes and personal preferences:
- White Chocolate Mocha: Swap mocha sauce for white chocolate sauce. Use the same pump ratios.
- Peppermint Mocha: Add 1–2 pumps of peppermint syrup to the mocha sauce for a holiday twist.
- Caramel Mocha: Add a pump of caramel syrup and finish with a caramel drizzle.
- Sugar-free or lower sugar: Use sugar-free chocolate syrup and sugar-free syrups, and reduce or omit whipped cream.
- Extra chocolate: Stir in 1 tsp of quality cocoa powder or ½ oz melted dark chocolate for depth.
- Spiced Mocha: Add a pinch of cinnamon or nutmeg to the mocha sauce for warmth.
Experiment with pump counts and shot counts until the balance matches your palate.
Nutrition and Calories
Nutrition varies widely depending on milk choice, amount of mocha sauce, and toppings. Below are approximate calorie and sugar ranges for standard versions. These are estimates; exact values depend on brands and homemade sauces.
| Size | Typical Calories (whole milk, whipped cream) | Approx. Sugar (g) |
|---|---|---|
| Tall (12 oz) | 300–350 kcal | 30–40 g |
| Grande (16 oz) | 400–450 kcal | 40–50 g |
| Venti (20/24 oz) | 450–600 kcal | 50–65 g |
Lower-calorie options:
- Use nonfat milk or almond milk and skip whipped cream to reduce calories by ~100–200 kcal.
- Use a sugar-free or reduced-sugar mocha sauce to cut sugar significantly.
Troubleshooting Common Problems
If your homemade mocha doesn’t taste like the café version, these fixes usually help.
-
Problem: Chocolate doesn’t dissolve and tastes grainy.
- Fix: Dissolve cocoa or syrup first in hot espresso or a bit of hot water. Use a fine whisk or spoon to fully incorporate.
-
Problem: Milk tastes burned or overly sweet after steaming.
- Fix: Don’t overheat milk. Aim for 150–160°F. Use a thermometer or learn to judge by touch (milk pitcher should be very warm but not scalding).
-
Problem: Mocha tastes thin or weak when iced.
- Fix: Make a stronger coffee concentrate or increase chocolate amount slightly. Use less ice or pre-chill espresso before pouring over ice.
-
Problem: Plant-based milk separates or doesn’t foam.
- Fix: Use barista-specific plant milks formulated for steaming, or use cold foam for iced drinks instead.
-
Problem: Drink too sweet or too bitter.
- Fix: Adjust syrup pumps or mocha sauce; use more espresso for coffee-forward flavor or more sauce for sweetness. Use higher-quality dark chocolate to reduce bitterness without extra sugar.
Make-Ahead Tips, Storage, and Scaling
If you’re making several mochas for guests or want to prepare elements in advance, these tips will keep things smooth.
- Make mocha sauce in batches and store in the refrigerator for up to two weeks.
- Pre-brew concentrated coffee and keep it refrigerated for 24–48 hours. Reheat or use cold for iced drinks.
- Steamed milk is best fresh; it will separate if held too long. For iced drinks, keep milk cold until assembly.
- Scale the mocha sauce recipe by multiplying ingredients proportionally if you plan a party.
For parties, consider setting up a mocha station with pre-measured sauce in pumps or pour spouts, a hot water/espresso dispenser, chilled milk, and cups with labels for easy customization.
Final Tips to Get That Starbucks Finish
Presentation and small details make a big difference in recreating the Starbucks experience.
- Use the cup size that matches the shot and pump ratio you’re using.
- Add whipped cream and a chocolate drizzle for an authentic café finish.
- Garnish with chocolate shavings, cocoa dusting, or a light sprinkle of cinnamon.
- Serve immediately for hot mochas; iced mochas taste best when assembled right before serving to avoid dilution.
- Use fresh beans and grind immediately before brewing for the best espresso flavor.
Recap: Quick Recipes at a Glance
This compact table shows quick hot and iced recipes to reference while you’re making mochas.
| Recipe | Espresso Shots | Chocolate | Milk | Method |
|---|---|---|---|---|
| Hot Tall Mocha | 1 | 3 pumps mocha sauce | Steam ~10 oz milk | Add sauce to cup, pour espresso, stir, add steamed milk, top whipped cream |
| Hot Grande Mocha | 2 | 4 pumps mocha sauce | Steam ~14 oz milk | Same as above with 2 shots and more milk |
| Iced Grande Mocha | 2 | 4 pumps mocha sauce | 14 oz cold milk + ice | Dissolve sauce with hot espresso, cool, pour over ice, add milk, stir, top |
| DIY with Moka Pot | 1–2 moka extractions | 3–5 tbsp homemade sauce | Steam or heat milk | Use moka coffee as espresso substitute; follow hot or iced method |
Closing Notes
You can absolutely make a delicious Starbucks-style mocha at home with attention to ingredient quality and a few technique adjustments. You’ll find that small tweaks—like dissolving chocolate in espresso first, steaming milk to the right temperature, and matching pump and shot ratios—transform the drink from “good” to café-worthy. Experiment with variations and keep notes on ratios you prefer so you can recreate your perfect mocha every time.
If you want, you can tell me what equipment and ingredients you have, and I’ll give you a tailored recipe that fits what’s in your kitchen.