Have you ever thought about growing your own coffee beans at home and enjoying truly fresh coffee you nurtured from seed to cup?

How to Grow Coffee Beans at Home
Growing coffee at home can be a deeply rewarding project that connects you with the plant-to-cup process. You’ll learn plant care, patience, and taste differences in beans you process and roast yourself. This guide walks you through every step, from choosing a species to roasting your first batch of beans.
Choosing the Right Coffee Plant
Selecting the right species and cultivar sets the stage for success. Your choice should match your climate, space, and desired flavor profile.
Arabica vs Robusta
Arabica and Robusta are the two main commercial species, and they differ in growth needs, flavor, and resilience. Choose based on taste preference and growing conditions.
| Feature | Arabica (Coffea arabica) | Robusta (Coffea canephora) |
|---|---|---|
| Flavor | Softer, more aromatic, complex | Stronger, more bitter, higher caffeine |
| Altitude preference | 600–2,000 m (temperate to cool in tropics) | Lowland, warmer climates |
| Temperature range | 15–24°C (59–75°F) ideal | 20–30°C (68–86°F) tolerant |
| Disease resistance | More susceptible | More resistant |
| Bean yield | Generally lower | Higher |
Other Species and Cultivars
You’ll also find cultivars developed for disease resistance, taste, or compact size. Varieties like Typica, Bourbon, Caturra, SL28, and Geisha offer distinct cup profiles. If space is limited, look for dwarf or compact cultivars suited to containers or indoor growth.
Getting Seeds or Seedlings
Deciding whether to start from seed or buy seedlings will influence timing and difficulty. Both routes work; seeds offer more variety, seedlings get you to fruit faster.
Buying Seeds vs Collecting Cherries
If you buy seeds, choose fresh, properly stored, viable seed lots. If you collect cherries from ripe coffee, be aware seeds lose viability quickly and need prompt processing. Purchasing seedlings from a reputable nursery reduces early losses and shortens the time to first harvest.
How to Store Seeds
Keep seeds cool, moist (but not wet), and shaded until planting. A breathable bag in a refrigerator crisper (not freezer) at around 10–15°C (50–59°F) works for short-term storage. Label and use within a few weeks for best germination rates.
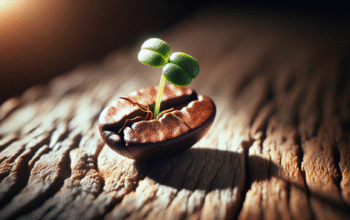
Fresh Seed Germination
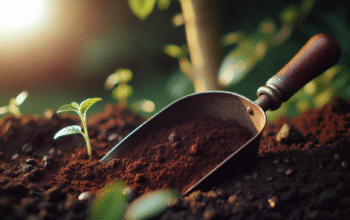
Fresh seeds germinate best within weeks of harvesting. You’ll need to remove the cherry pulp if you collected your own and sow quickly. Plant seeds about 1–2 cm deep in a moist seed-starting medium and maintain warm, humid conditions for consistent germination.
Germination and Early Care
Seedling care sets the foundation for a healthy tree. You’ll focus on steady moisture, warm temperatures, and gentle light.
Soaking and Pre-germination
Soaking seeds for 12–24 hours can help rehydrate dried seeds. For faster germination, you can also use a moist paper towel or sphagnum moss to pre-germinate seeds until the radicle appears, then transfer to soil. This reduces losses and speeds early growth.
Germination Methods
You can sow directly in small pots or germination trays, or use the paper towel method then pot. Keep the medium consistently moist, not waterlogged, and maintain temperatures around 20–25°C (68–77°F). Germination can take 2–8 weeks depending on freshness and conditions.
Soil Mix for Seedlings
Seedlings need a light, well-draining, nutrient-rich medium. A simple mix combines potting soil with components that improve drainage and aeration.
| Component | Proportion |
|---|---|
| Peat moss or coconut coir | 40% |
| High-quality potting soil | 30% |
| Perlite or pumice | 20% |
| Compost or aged manure | 10% |
This mix keeps moisture without becoming soggy and supplies gentle nutrients for the first months.
Temperature, Humidity, Light for Seedlings
You’ll want warm temperatures (20–25°C / 68–77°F), steady humidity around 60–80%, and bright, indirect light. Avoid direct midday sun on tender seedlings — a sheer curtain or indirect light source works well indoors.
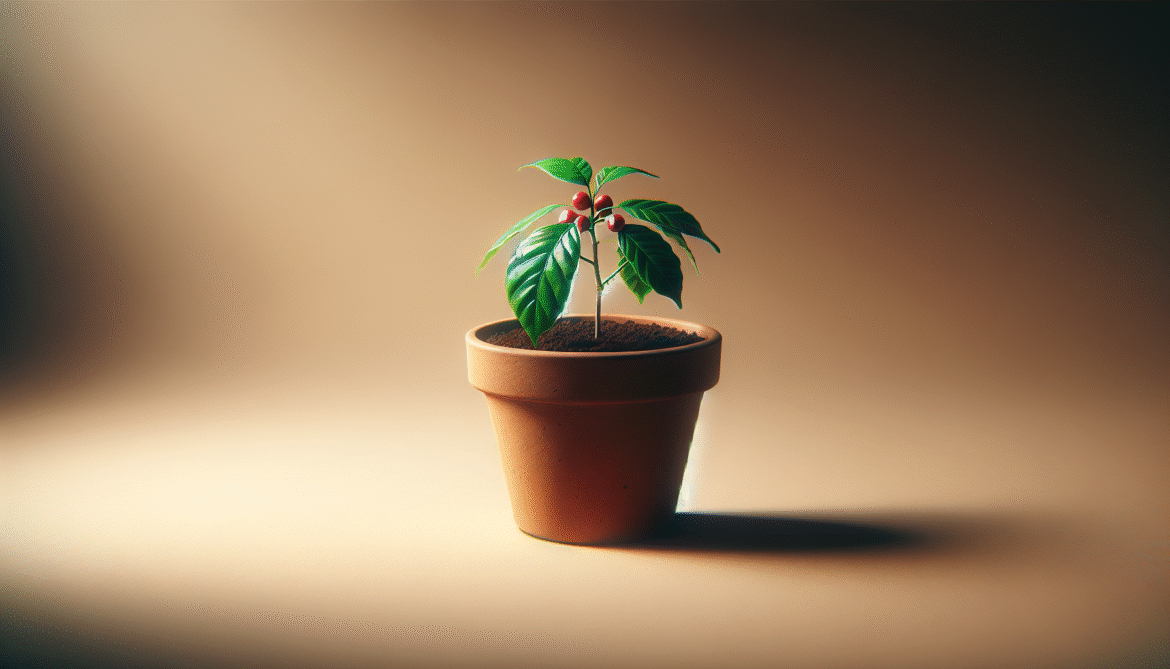
Potting and Containers
Container choice affects root development, watering frequency, and mobility. You’ll need to balance space with the plant’s eventual size.
Choosing Pot Size and Material
Start seedlings in small 8–12 cm (3–5 in) pots and gradually move to larger containers as roots fill the pots. For long-term container growth, choose pots 20–40 liters (5–10 gallons) or larger. Terracotta breathes well but dries faster; plastic retains moisture. If you plan to move plants often, lighter plastic may be easier.
Repotting Schedule
Repot young plants every 12–18 months until they reach a long-term container size or go into the ground. Increase pot diameter by 5–10 cm (2–4 in) each time to avoid shock. When repotting, refresh potting mix and check roots for any issues.
| Stage | Pot size | Frequency |
|---|---|---|
| Seedling | 8–12 cm (3–5 in) | Initial stage until 6–12 months |
| Young plant | 15–25 cm (6–10 in) | Every 12–18 months |
| Mature container plant | 20–40+ liters (5–10+ gal) | Long-term, repot every 2–3 years as needed |
Soil, pH, and Drainage
Soil chemistry and structure strongly influence uptake of nutrients and plant health. You’ll need a slightly acidic, well-aerated, fertile mix.
Ideal Soil Composition
Coffee plants prefer loamy, porous soil rich in organic matter. Aim for a mix that drains well but retains some moisture. Incorporate compost and organic matter to feed microbes and provide slow-release nutrients.
pH and How to Adjust
The ideal pH is slightly acidic: 6.0–6.8. If your water or soil is alkaline, lower pH with elemental sulfur or aluminum sulfate slowly. To raise pH, use crushed limestone (agricultural lime) sparingly. Test pH periodically and adjust gradually to avoid shocking the plant.
Drainage and Perlite Usage
Good drainage prevents root rot and aerates roots. Use perlite, pumice, or coarse sand in the potting mix, and ensure pots have adequate drainage holes. If water pools on the surface or drains extremely slowly, amend the mix with more inorganic components.
Light, Temperature, and Humidity
Light, temperature, and humidity create the microclimate your coffee plant needs. Manage these factors for best growth and fruiting.
Indoor vs Outdoor Light Needs
Coffee plants thrive in bright, indirect light. Indoors, place plants near east or north-facing windows or use grow lights to supplement. Outdoors, provide morning sun and afternoon shade. Avoid intense full sun in hot climates, which can scorch leaves.
Temperature Range and Winter Care
Aim for a daytime temperature range of 18–24°C (65–75°F) and nighttime no lower than 13°C (55°F). If you live in a temperate region, grow coffee as a potted indoor plant or move it inside during cold months. Frost will damage or kill coffee trees, so provide frost protection if necessary.
Humidity Tips
Coffee enjoys higher humidity (60–80%). Increase humidity with pebble trays, grouping plants, misting occasionally, or using a humidifier. Be cautious with constant leaf wetness in cool conditions, as this can encourage fungal issues.
Watering and Moisture Management
Watering is a balance: coffee likes steady moisture but not waterlogged roots. Your schedule will vary with pot size, medium, and climate.
Frequency and Methods
Water when the top 2–3 cm (1 inch) of potting mix feels slightly dry. Water thoroughly until water runs from drainage holes, then allow moderate drying. In hot, dry conditions you’ll water more often; in cool, humid conditions, less. For outdoor plants in the ground, maintain consistent soil moisture with mulching.
Signs of Over- or Under-watering
Knowing symptoms helps you correct mistakes quickly. Leaves and root health are good indicators.
| Symptom | Likely cause | What to do |
|---|---|---|
| Yellowing lower leaves, soft, dropping | Overwatering/root rot | Check drainage, reduce watering, repot with fresh mix if roots rotted |
| Wrinkled, drooping leaves, dry soil | Underwatering | Increase watering frequency, soak deeply and mulch |
| Brown leaf tips, salt build-up on soil surface | High soluble salts/overfertilization | Flush soil with clean water, reduce fertilizer strength |
| Stunted growth, pale leaves | Inconsistent moisture or nutrient deficiency | Stabilize watering, check fertilizer schedule |
Feeding and Fertilizing
Coffee plants have steady nutrient needs and respond well to balanced feeding. You’ll adjust feeding based on growth stage and whether the plant is in a pot or ground.
NPK Ratios and Timing
Use a balanced fertilizer with slightly higher nitrogen for leaf growth when plants are young, then switch to more balanced formulas when flowering begins. Slow-release granular fertilizers or regularly applied liquid feeds both work.
| Stage | NPK Recommendation | Frequency |
|---|---|---|
| Seedling/vegetative | 8-4-6 or balanced 10-10-10 at half strength | Every 4–6 weeks (granular) or monthly liquid |
| Pre-flowering | Balanced 10-10-10 | Every 6–8 weeks |
| Fruit set and development | Slightly higher potassium (e.g., 6-4-8) | Every 6–8 weeks |
| Winter/rest (if indoor) | Reduced feeding | Once every 8–12 weeks or stop if dormant |
Organic vs Synthetic Options
Organic fertilizers (compost, worm castings, fish emulsion, bone meal) build soil health and reduce salt buildup. Synthetic options provide precise nutrient ratios and are convenient. If you use synthetic fertilizers, occasionally flush the soil with water to prevent salt accumulation.
Foliar Feeding
Foliar sprays provide quick nutrient uptake, especially for micronutrients like iron, zinc, or manganese. Apply foliar sprays in the morning on dry leaves and avoid spraying in intense sun to prevent leaf burn.
Pruning and Shaping
Pruning maintains manageable size, encourages branching, and helps fruit production. Regular light pruning keeps the plant healthy and productive.
When to Prune and How
Prune in spring or after harvest for shape and to remove dead or crossing branches. Cut back to a lateral branch or bud, and sterilize tools to avoid disease spread. Remove suckers and low branches to maintain airflow.
Training and Bonsai-style Pruning
You can train coffee into a tabletop specimen or keep it compact with repeated tip pruning. For bonsai-styled plants, prune roots during repotting and reduce foliage proportionally. Training helps you manage flowering height and harvest ease.
Flowering, Pollination, and Fruit Set
Flowering is the exciting prelude to cherries. You’ll encourage blooms and ensure pollination for fruit set.
Encouraging Flowering
Coffee flowers often follow changes in moisture and temperature—mimicking rainy season patterns can trigger bloom. Avoid over-fertilizing with high nitrogen before expected flowering, as excess nitrogen promotes leaf growth over blooms.
Pollination
Most coffee is self-fertile, but pollination by insects improves fruit set. If you have few pollinators indoors, hand pollinate by using a soft brush to transfer pollen between flowers. Gently brush the interior of open flowers and repeat across flowers to increase set.
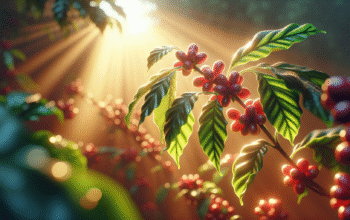
Cherry Development and Harvesting
After flowering, cherries develop over months. You’ll monitor color changes and pick at optimal ripeness.
How to Tell Ripeness
Coffee cherries ripen from green to yellow, then orange or red depending on cultivar. Fully ripe cherries are typically bright red and slightly soft to the touch. Harvest ripe cherries selectively rather than stripping the branch, as unripe cherries impact cup quality.
Harvesting Methods and Schedules
For small plants, hand-picking ripe cherries every few weeks during harvest season ensures quality. On larger plants, selective harvesting is still ideal but may be more labor-intensive. Keep harvested cherries cool and process them promptly to preserve bean quality.

Processing Coffee Cherries to Beans
Processing transforms cherries into stable green beans. You’ll choose a method that fits your available space and taste preference.
Wet (Washed) Processing Steps
Washed processing yields a cleaner, brighter cup. Steps include pulping, fermenting to remove mucilage, washing, and drying.
- Pulp cherries to separate skin and pulp from parchment seeds.
- Ferment parchment in water for 12–48 hours (time varies with temperature) to loosen mucilage.
- Rinse thoroughly to remove mucilage.
- Dry parchment until moisture reaches about 10–12%.
Dry (Natural) Processing Steps
Natural processing is simpler and suits small-scale home setups, but requires careful monitoring to avoid defects.
- Spread whole cherries on raised beds, trays, or clean flat surfaces in thin layers.
- Turn cherries several times a day for even drying and to prevent molding.
- Dry until cherries are fully dry and parchment inside reaches about 10–12% moisture.
- De-pulp (hull) the dried cherries to remove dried skin and parchment.
Honey Processing Overview
Honey processing is an intermediate method where part of the mucilage is left on the parchment during drying. It can produce sweeter, fruity cup notes and requires careful drying to prevent fermentation problems.
Drying, Hulling, and Storing Green Beans
Drying and storage significantly affect eventual cup quality. Aim for even drying and proper storage to preserve flavors.
Drying Methods and Moisture Targets
Dry coffee to a stable moisture content around 10–12%. Use sun drying on raised beds in dry climates or low-temperature ovens/dehydrators for controlled drying. Avoid rapid drying at high temperatures because it can create defects.
Hulling and Parchment Removal
Once dried, remove the parchment layer (hulling) to reveal green beans. Small home huller machines or manual methods exist. Be careful not to damage beans during hulling.
Storage Conditions for Green Beans
Store green beans in airtight containers, in a cool, dark place away from strong odors. Maintain stable humidity and temperatures; vacuum-sealing or one-way valve bags are helpful. Green beans age slowly and are best used within 6–12 months for peak flavor, though proper storage can extend that.
Roasting Basics
Roasting transforms green beans to flavorful brown beans. Home roasting is accessible with small roasters or simple DIY methods.
Small-batch Home Roasting Methods
You can roast with a dedicated electric home roaster, stovetop popcorn popper (careful with oils), skillet, or oven. Electric roasters provide more control and safety. Experiment with small batches to learn profiles.
Roasting Profile and Degrees of Roast
Roasting progresses through stages: drying, Maillard reaction (flavor development), first crack (light roast), development time, second crack (medium-dark to dark roast). Monitor time and bean color and listen for cracks as cues. Lighter roasts preserve origin flavors; darker roasts emphasize roast character.
Cooling and Resting Roasted Beans
Cool roasted beans quickly to stop roasting, using a colander or cooling tray and fan. Allow beans to degas 12–48 hours before brewing for best flavor. Store in airtight containers out of direct light.
Troubleshooting Common Problems
Problems are common but usually fixable with adjustments to water, light, or nutrients. Diagnosing quickly prevents long-term damage.
| Problem | Likely cause | Fix |
|---|---|---|
| Yellowing leaves (overall) | Nitrogen deficiency or root issues | Check fertilizer, test soil, repot if roots damaged |
| Brown leaf edges | Low humidity, fluoride in water, over-fertilization | Increase humidity, use filtered water, flush soil |
| Leaf spots and lesions | Fungal infection or pests | Improve airflow, remove infected leaves, use fungicide or organic copper |
| Poor flowering/no fruit | Too much nitrogen, insufficient light, stress | Reduce N, increase light, stabilize care |
Pests and Diseases
Pests and diseases can affect your plants. Early detection and integrated management reduce damage.
Common Pests and Organic Controls
Common pests include aphids, scale, spider mites, and mealybugs. Use insecticidal soaps, neem oil, or horticultural oils, and encourage predatory insects if possible.
| Pest | Signs | Organic control |
|---|---|---|
| Aphids | Sticky honeydew, curled leaves | Spray with water, neem oil, insecticidal soap |
| Scale | Hard bumps on stems/leaves | Remove manually, apply horticultural oil |
| Spider mites | Fine webbing, stippled leaves | Increase humidity, spray with water and insecticidal soap |
| Mealybugs | Cottony white masses | Dab with alcohol, use neem oil, introduce predators |
Fungal and Bacterial Issues and Treatment
Leaf rust and root rot are serious. For leaf rust (common in some regions), remove infected material and improve airflow; copper fungicides may help. For root rot from overwatering, improve drainage and repot into fresh mix, prune damaged roots.
Propagation from Cuttings and Air Layering
If you want more plants of the same parent, cuttings and air layering are effective methods. They let you clone desirable traits like flavor or compact growth.
How to Take Cuttings
Take semi-hardwood cuttings 10–15 cm (4–6 in) long with several leaf nodes. Remove lower leaves, dip the cut end in rooting hormone, and plant in a moist rooting medium (perlite/peat or coir). Keep high humidity and moderate light until roots form, usually several weeks.
Air Layering Method
Air layering encourages roots on a branch while still attached to the parent. Make a ring cut or remove a strip of bark, apply rooting hormone, wrap with moistened sphagnum and plastic, and wait for roots to form before cutting and potting. This produces a well-rooted clone faster than cuttings in many cases.
Growing in Small Spaces or Containers
You can grow coffee successfully in apartments, balconies, or small yards with some adaptations. Container growth and compact varieties make this practical.
Balcony, Patio, and Indoor Tips
Use dwarf cultivars or keep standard varieties pruned to size. Provide bright, indirect light indoors and full morning sun on balconies with shade in the afternoon. Choose pots with good drainage and use casters to move plants with seasons.
Dwarf Varieties and Bonsai Coffee
Dwarf and naturally compact varieties suit small spaces. You can also train coffee into bonsai; this requires careful pruning and root trimming during repotting but results in an attractive, productive plant suitable for tabletop growing.
Timeline: From Seed to First Harvest
Understanding the timeline helps you set realistic expectations. Coffee is a patient crop but can be productive for many years.
| Stage | Approximate time |
|---|---|
| Germination to seedling establishment | 2–12 weeks |
| Seedling to small plant (20–30 cm tall) | 6–12 months |
| Flowering begins (young plants) | 2–3 years (may vary by cultivar) |
| First reasonable harvest | 2–4 years for seedlings; sooner (1–2 years) if grafted/seedlings bought |
| Peak productivity | 4–8 years, then maintained for many years with care |
Sustainability, Ethics, and Composting Pulp
Processing cherries and managing plant waste can be sustainable and beneficial to your garden. Use pulp and husks as compost feedstock and practice ethical sourcing if buying seeds.
Using Pulp, Making Fertilizer, Composting, Worm Bin
Coffee pulp is rich in organic matter but can be acidic; compost it mixed with other green and brown materials or add to a worm bin in moderation. Aerobic composting breaks down pulp and reduces odors; composted pulp makes great soil amendment for your coffee plants and other garden plants.
Final Tips and Summary
Growing coffee beans at home is a rewarding blend of horticulture and culinary craft. You’ll need patience, attention to water, light, and nutrients, and a willingness to learn through small experiments. With the right care, your home-grown coffee can become a unique and delicious expression of your efforts.
Quick practical checklist:
- Choose Arabica for flavor and cooler conditions; Robusta for heat tolerance.
- Use fresh seeds or healthy seedlings for faster success.
- Keep soil slightly acidic, well-draining, and rich in organic matter.
- Provide bright, indirect light, stable temperatures, and high humidity.
- Water consistently but avoid waterlogging; feed with balanced fertilizer.
- Harvest cherries at full ripeness and process promptly to preserve quality.
- Dry to 10–12% moisture, store green beans properly, and roast small batches at home.
If you stick with a steady care routine and treat each season as a learning opportunity, you’ll be rewarded with the experience of brewing coffee you literally grew yourself.