Would you like to make a cozy peppermint mocha coffee creamer at home that turns ordinary mornings into a small celebration?

Homemade Peppermint Mocha Coffee Creamer for Cozy Mornings
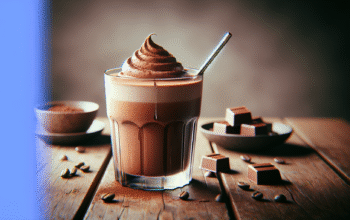
You can make a creamy, chocolatey, minty coffee creamer that tastes like a café version but with control over ingredients and sweetness. This recipe is flexible, and you’ll find options for dairy, plant-based, and sugar-free versions so your creamer fits your preferences.
Why make your own creamer?
Making your own creamer lets you control sweetness, quality of ingredients, and dietary needs while saving money over store-bought specialty creamers. You’ll also be able to customize flavors, intensity, and texture to suit your morning ritual.
What is peppermint mocha coffee creamer?
Peppermint mocha creamer is a flavored liquid you add to coffee to impart chocolate and mint notes while adding creaminess. It combines elements of chocolate (cocoa or melted chocolate), peppermint (extract or syrups), sweetener, and a base liquid like milk or cream.
Ingredients — Basic Recipe
Below is a straightforward, crowd-pleasing recipe that yields about 2 cups (480 ml) of creamer — enough for roughly 20–24 tablespoons, depending on how much you use.
| Ingredient | Amount | Purpose |
|---|---|---|
| Whole milk or half-and-half | 1 1/2 cups (360 ml) | Creaminess and body |
| Heavy cream (optional for richer) | 1/2 cup (120 ml) | Adds richness (optional) |
| Unsweetened cocoa powder | 2 tbsp (15 g) | Chocolate flavor |
| Granulated sugar (or preferred sweetener) | 1/3 cup (67 g) | Sweetness |
| Pure peppermint extract | 1/2–1 tsp | Peppermint flavor |
| Vanilla extract | 1 tsp | Rounds and warms flavor |
| Pinch of salt | 1/8 tsp | Enhances chocolate and sweetness |
You can substitute plant-based milks and sweeteners; see the variations section for details.
Ingredient notes
Cocoa powder gives a mocha flavor without adding much fat; melted chocolate creates a silkier texture but can thicken more. Peppermint extract is potent — start with less and adjust. Sugar is straightforward, but liquid sweeteners (maple, agave) can change thickness and flavor.
Equipment you’ll need
You don’t need fancy equipment; most items are common kitchen tools. Use equipment that you’re comfortable with to get consistent results.
- Small saucepan for heating and dissolving ingredients
- Whisk to blend cocoa and sugar without clumps
- Heatproof measuring cup or bowl
- Airtight jar or bottle for storage (mason jars work well)
- Fine mesh strainer (optional, for smoothing melted chocolate or candy bits)
Step-by-step recipe: Classic Peppermint Mocha Coffee Creamer
This step-by-step method keeps things simple and reliable. Read through once before beginning so you can move smoothly.
- Combine the base liquids. Pour 1 1/2 cups milk (or milk alternative) and 1/2 cup heavy cream into a saucepan. Heat gently over medium-low heat until warm but not boiling — about 3–4 minutes. Warming helps the cocoa and sugar dissolve evenly.
- Whisk in cocoa and sugar. Add 2 tablespoons unsweetened cocoa and 1/3 cup sugar. Whisk continuously until the cocoa is fully incorporated and the sugar is dissolved, about 1–2 minutes.
- Simmer briefly. Reduce heat to low and let the mixture simmer just long enough to blend flavors — about 1 minute. Do not boil, especially with dairy or some plant milks that can curdle.
- Remove from heat and add extracts. Take the pan off the heat and stir in 1 tsp vanilla extract and 1/2–1 tsp peppermint extract. Start with the lower peppermint amount and adjust after tasting.
- Cool and strain. Let the creamer cool to room temperature. If you used melted chocolate or crushed peppermint candy, strain through a fine mesh sieve into a jar to remove solids.
- Bottle and refrigerate. Seal the jar and chill for at least 1 hour to let flavors settle. Shake well before each use.
Yield: about 2 cups (480 ml) Prep time: 5–10 minutes Cook time: 5 minutes Chill time: 1 hour
Tips for best texture and flavor
A few small tweaks keep the creamer smooth and flavorful. You’ll get a better result with minimal extra effort.
- Heat gently. High heat can scald milk or cause separation in some non-dairy milks.
- Dissolve completely. Whisk cocoa and sugar thoroughly to avoid grainy texture.
- Adjust peppermint with care. Peppermint is strong, so a little goes a long way; always start small and taste.
- Use high-quality cocoa or chocolate. Better chocolate or Dutch-process cocoa makes a richer mocha flavor.
- Chill before using. Cold creamer blends more predictably in hot or iced coffee and flavors meld after resting.
Variations and substitutions
You can adapt the basic recipe to suit dietary needs, sweetness preferences, and flavor intensity. Below are some popular and practical swaps.
Vegan / dairy-free version
Use a creamy plant-based milk and a plant-based fat source for richness.
- Base: 1 1/2 cups oat milk or full-fat coconut milk beverage
- Fat boost (optional): 1/4 cup canned full-fat coconut milk or 2 tbsp neutral oil (avocado or light coconut)
- Sweetener: maple syrup or coconut sugar
- Cocoa: same amount
Coconut milk adds extra richness and can produce a slightly tropical undertone. Oat milk gives a neutral, creamy base ideal for coffee.
Sugar-free or low-sugar version
Use a granulated erythritol blend or liquid sweetener that tolerates heat.
- Replace sugar with 1/3 cup erythritol blend (or equivalent sweetness)
- If using liquid sweeteners like stevia or monk fruit syrup, reduce heating time and taste as you go
Note: Some sugar alcohols can recrystallize and cause cooling aftertaste; try small batches until you find a sweetener you like.
Extra-mocha (richer chocolate)
For a deeper chocolate flavor:
- Replace cocoa with 2 tbsp cocoa + 1 oz melted bittersweet chocolate
- Alternatively use 3 tbsp cocoa for stronger chocolate presence
Melt chocolate into the warm mixture off heat and whisk until smooth.
Candy-cane-infused version
If you enjoy the texture and aroma of crushed peppermint candy:
- After heating the milk mixture, stir in 2 tbsp finely crushed candy canes and let sit off heat for 5–10 minutes.
- Strain out the solids before bottling.
Crushed candy can add a festive look but can cause graininess if not fully dissolved or strained.
Peppermint syrup instead of extract
Swap extract for 2–3 tbsp peppermint syrup for a sweeter, syrupy mint flavor. Reduce sugar in the base accordingly.
Table of easy substitutions
| If you want | Use this | Notes |
|---|---|---|
| Dairy-free | Oat milk, soy milk, almond milk, or coconut beverage | Oat or full-fat coconut give best creaminess |
| Less sugar | Erythritol blends, stevia, monk fruit | Adjust amounts and taste as you go |
| Richer texture | Add heavy cream or canned coconut milk | Adds calories but produces barista-style mouthfeel |
| Strong mint | Increase peppermint extract by 1/4 tsp increments | Be conservative — strong mint can overpower coffee |
| Deeper chocolate | Add melted bittersweet chocolate | Melt off heat and whisk thoroughly |

How to use your creamer
Your homemade creamer is versatile and works beyond your morning cup. You’ll find it enhances many drinks and recipes.
- Coffee and espresso drinks: Add to brewed coffee, Americanos, or drip coffee. For lattes, heat and froth as you would milk.
- Iced coffee: Shake with ice in a jar or pour over cold brew for an instant iced peppermint mocha.
- Hot chocolate: Use as a base for hot chocolate, adding extra cocoa if needed.
- Baking and desserts: Replace part of milk in recipes for muffins, pancakes, or brownies for a subtle mocha-mint flavor.
- Cocktails and mocktails: Use as a creamy mixer in dessert-style cocktails or mocktails.
Scaling the recipe
You can easily make smaller or larger batches depending on consumption. Use the table below for common batch sizes so you don’t have to recalculate every ingredient.
| Batch size | Milk/Alternative | Heavy cream | Cocoa powder | Sugar | Peppermint extract | Yield |
|---|---|---|---|---|---|---|
| Small (1 cup) | 3/4 cup | 1/4 cup | 1 tbsp | 3 tbsp | 1/4–1/2 tsp | ~1 cup |
| Standard (2 cups) | 1 1/2 cups | 1/2 cup | 2 tbsp | 1/3 cup | 1/2–1 tsp | ~2 cups |
| Large (1 quart) | 3 cups | 1 cup | 4 tbsp | 2/3 cup | 1–2 tsp | ~1 quart |
Tips when scaling: maintain ratios for cocoa and sweetener, and always taste after adding peppermint extract. Larger batches may need slightly longer heating to dissolve ingredients, but avoid boiling.
Nutrition and allergen information
Exact nutrition varies by ingredients and portion size. Below are approximate values for one tablespoon (15 ml) of classic creamer made with half-and-half and sugar. Use this as a guideline.
| Nutrient (per tbsp) | Approximate amount |
|---|---|
| Calories | 30–45 kcal |
| Fat | 2.5–3.5 g |
| Saturated fat | 1.5–2.5 g |
| Carbohydrates | 2.5–4 g |
| Sugars | 2–4 g |
| Protein | <0.5 g< />d> |
If you use heavy cream or canned coconut milk, calories and fat will increase. Sugar-free versions will reduce carbohydrate and calorie counts substantially. Note allergens: dairy, soy, nuts (if using nut milks). Always label jars if you share or gift your creamer.
Storage and shelf life
Treat homemade creamer like a dairy product for safety. Proper storage keeps it tasty and safe.
- Refrigeration: Store in an airtight container in the refrigerator at 40°F (4°C) or lower.
- Shelf life: Use within 7–10 days for standard dairy-based creamer. For higher-fat preparations made with heavy cream, aim to use within 5–7 days.
- Freezing: You can freeze creamer in ice cube trays for 1–2 months, then thaw and use within 3 days. Note: freezing may change texture, particularly for emulsified plant-based milks.
- Signs of spoilage: Sour or off smell, curdling, or separated appearance that doesn’t come back together after shaking means discard.
Troubleshooting common issues
If something doesn’t turn out how you expected, these solutions can help you fix it quickly.
- Grainy texture: Cocoa or sugar didn’t dissolve fully. Reheat gently, whisk vigorously, and strain through a fine mesh sieve.
- Separation in non-dairy milks: Some plant milks separate when heated. Use a lower heat, whisk continuously, or try a different milk (oat or barista blends are more stable).
- Too weak mint flavor: Add peppermint extract 1/8–1/4 tsp at a time, tasting between additions.
- Overly minty: Dilute with more base liquid (milk or cream) or add extra cocoa and a touch more sweetener to balance.
- Too thick: Thin with a few tablespoons of milk or water and whisk until desired consistency.
- Too thin: Add a tablespoon of powdered nonfat milk for body, or increase the ratio of heavy cream in the next batch.
Frequently asked questions (FAQ)
These are common questions you might have when making or using homemade creamer.
Q: Can I use espresso instead of brewed coffee when testing the creamer in a cup? A: Yes. Espresso will show the creamer’s body and flavor intensity immediately. Use a small amount to test whether peppermint and chocolate balance the coffee taste.
Q: How much creamer should I add to my coffee? A: Typical usage is 1–2 tablespoons for a standard 8-ounce cup, but you can adjust to your taste. Iced drinks often handle slightly more creamer.
Q: Does peppermint extract lose potency over time? A: Extracts are stable but can lose some volatile aroma with long storage. Keep bottles sealed and store in a cool, dark place for best longevity.
Q: Can I heat the creamer in the microwave? A: Yes, gently. Use short intervals (15–20 seconds), stir between intervals to prevent overheating and curdling.
Q: Is peppermint oil the same as extract? A: No. Peppermint oil is concentrated and can be much stronger and potentially irritating. Use food-grade peppermint extract or food-grade peppermint oil in tiny amounts per manufacturer guidance.
Pairing suggestions
Think about what you’ll pair with your peppermint mocha creamer to enhance flavor combinations.
- Pastries: Shortbread, biscotti, and chocolate croissants complement the mocha-mint profile.
- Spices: Cinnamon or orange zest can add warmth if you want a holiday twist.
- Chocolate types: Milk chocolate creamer pairs well with light roasts; dark chocolate leans nicely with medium or dark roasts.
Gift jars and labeling
If you plan to give creamer as a gift, presentation makes it feel special. Use decorative jars, handwritten labels, and include storage and use instructions.
- Label example: “Peppermint Mocha Creamer — Refrigerate. Use within 7 days. Shake before use.”
- Personalize with recipe variations and suggested pairings.
Final notes and encouragement
You’re in an excellent position to tailor your peppermint mocha creamer to your perfect cup. With basic ingredients and simple steps, you can create a homemade creamer that feels indulgent and fits your dietary needs. Try small adjustments in sweetness and peppermint strength to find your ideal balance, and don’t be afraid to experiment with plant milks or richer creams.
If you make a batch, taste it in a simple brewed coffee first, then tweak. Keep notes about what you liked and what you changed so your next jar is even better. Enjoy the cozy mornings you create with your homemade peppermint mocha creamer.