Want to make a warm, chocolatey mocha latte at home that feels like a café treat and brightens your mornings?

Homemade Mocha Latte Recipe for Cozy Mornings
You can make a mocha latte that’s both comforting and customizable to your taste without leaving your kitchen. This guide walks you through ingredients, equipment, techniques, and tasty variations so you can craft a perfect cup every time.
What is a Mocha Latte?
A mocha latte combines espresso, steamed milk, and chocolate to produce a creamy, slightly sweet coffee drink with a rich chocolate undertone. You’ll often see it called a “mocha” or “caffè mocha,” and it’s essentially a latte with chocolate added.
Why Make Mocha at Home?
Making a mocha in your own kitchen saves money, lets you control ingredients, and gives you the freedom to customize sweetness, milk type, and chocolate intensity. You’ll also be able to scale recipes and recreate favorite café versions while adjusting for dietary needs.
Ingredients Overview
You’ll need coffee or espresso, a chocolate component, milk, and optional sweeteners or flavorings to make a classic mocha latte. Below is a concise list of the primary ingredients and typical quantities for different serving sizes.
| Ingredient | Single (8–12 oz) | Double (16–24 oz) | Small Batch (4 servings) |
|---|---|---|---|
| Espresso (shot) or strong brewed coffee | 1 shot (30–60 ml) | 2 shots | 8 shots |
| Milk (any type) | 8–10 oz | 16–20 oz | 40 oz |
| Chocolate (syrup, cocoa + sugar, or melted chocolate) | 1–2 tbsp | 2–4 tbsp | 8 tbsp |
| Sweetener (optional) | 0–2 tsp | 0–4 tsp | 8 tsp |
| Vanilla extract or other flavoring (optional) | 1/4 tsp | 1/2 tsp | 1 tsp |
You can adapt quantities based on how strong or chocolatey you like your mocha, your cup size, and whether you prefer a milk-forward or espresso-forward balance.
Equipment You’ll Need
Having the right tools makes the process faster and helps you produce better results, but you can improvise if you don’t own specialty gear. Below is a practical equipment list with common alternatives.
| Purpose | Recommended Tool | Alternative |
|---|---|---|
| Brew espresso or strong coffee | Espresso machine | Moka pot, Aeropress, strong drip, or French press |
| Steam or heat milk | Steam wand | Microwave or stovetop + milk frother, whisk, or French press |
| Frothing | Handheld electric frother or steam wand | Mason jar shaking or whisking by hand |
| Measuring | Kitchen scale and spoons | Measuring cups and spoons |
| Serving | Latte cup or mug | Any heatproof cup |
If you’re missing one item, don’t worry—you can still make a great mocha with simple kitchen tools.
Coffee Base Options
You’ll choose between espresso, very strong brewed coffee, or instant espresso depending on your equipment and preference. Each option changes body, crema, and intensity, so pick what suits your morning routine.
Espresso
Espresso gives you the authentic concentrated coffee flavor and the crema that adds texture and aroma. If you have an espresso machine, use a fine grind and 18–20 seconds of extraction for a balanced shot.
Moka Pot or Aeropress
A moka pot produces a strong, concentrated coffee that’s an excellent espresso substitute for mochas. Aeropress can also yield intense coffee when you use a finer grind and less water, and it’s portable and easy to clean.
Strong Brewed Coffee or Instant Espresso
If you don’t have espresso tools, brew coffee stronger than usual or mix instant espresso powder with a small amount of hot water. This delivers a concentrated base that blends well with chocolate and milk.
Chocolate Options and How They Change the Mocha
The chocolate component defines the mocha’s character: syrup yields a smooth, sweet flavor, cocoa powder gives a lighter and more bitter profile, and solid chocolate creates depth and richness. Each choice impacts sweetness and texture differently.
Chocolate Syrup
Chocolate syrup is convenient and dissolves instantly in hot coffee, giving a consistent sweetness and viscosity. Use high-quality syrup for better flavor and less artificial aftertaste.
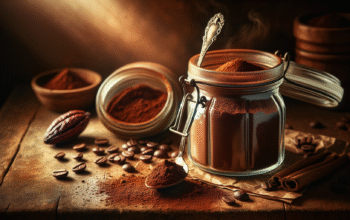
Cocoa Powder (with sugar)
Cocoa powder gives a more chocolatey, slightly bitter flavor and allows you to control sweetness by adding sugar or sweetener. To prevent graininess, make a paste with hot water or espresso before mixing into milk.
Melted Dark or Milk Chocolate
Melting chocolate (chips, bars) into the hot espresso gives a luxurious texture and deeper chocolate notes. Dark chocolate will be less sweet and more intense; milk chocolate will be creamier and sweeter.
Milk Choices and Frothing Tips
The type of milk you choose affects texture, sweetness, and foam stability. Whole milk steams and foams best for a creamy latte, but plant-based milks can be excellent if you know how to handle them.
Whole and Reduced-Fat Dairy Milk
Whole milk produces a creamy mouthfeel and stable microfoam for latte art. Reduced-fat milk will be lighter but still frothable; the foam may be slightly less rich.
Oat Milk
Oat milk is a popular plant-based option with a naturally sweet profile and creamy texture when heated. Choose barista-style oat milk for better frothing and stability.
Almond, Soy, and Other Plant Milks
Almond milk can be thinner and may separate unless you use a barista blend; soy milk often foams similarly to dairy but can taste beany; coconut milk has unique flavor and can be rich but may produce unstable foam. If you use plant milk, warm it gently and use a frother for the best texture.
Step-by-Step Classic Mocha Latte Recipe
This section gives you a clear, reproducible method to make a classic mocha latte using espresso and steamed milk. Follow the sequence and adjust to taste.
Step 1 — Prepare the Espresso or Strong Coffee
Brew one shot (about 30–60 ml) of espresso or 1/3 cup of very strong coffee per serving. If you’re using a moka pot or Aeropress, aim for a concentrated brew so the coffee stands out against the milk and chocolate.
Step 2 — Add and Dissolve the Chocolate
Place your chocolate syrup, cocoa paste, or melted chocolate into the cup and pour the hot espresso over it. Stir vigorously until the chocolate is fully dissolved and you have a smooth, chocolatey base.
Step 3 — Steam or Heat the Milk
Steam milk to around 60–65°C (140–150°F) if you have a thermometer; otherwise heat until hot but not boiling. Create velvety microfoam with a steam wand or frother to achieve a creamy texture that blends well with the espresso-chocolate base.
Step 4 — Combine Milk and Chocolate-Espresso
Pour the steamed milk into the cup, holding back foam with a spoon and then topping with foam, or pour with a steady hand to create a layered look. Gently stir if you prefer the chocolate fully mixed; otherwise allow a bit of chocolate swirl on top for presentation.
Step 5 — Add Final Touches
Add a light dusting of cocoa, shaved chocolate, or a sprinkle of cinnamon for aesthetics and an extra flavor note. Taste and adjust sweetener if needed, and serve immediately for best texture and aroma.
Proportions and Ratios for Consistency
Maintaining proportion helps you replicate results. Below is a simple ratio model you can use to scale your mocha for different cup sizes.
| Component | Ratio (by volume) | Example for 8–12 oz cup |
|---|---|---|
| Espresso/Strong coffee | 1 part | 1 shot (30–60 ml) |
| Milk | 3–4 parts | 8–10 oz |
| Chocolate (syrup) | 1/2–1 part | 1–2 tbsp |
| Sweetener (if using) | 0–1/4 part | 0–2 tsp |
Use the table above as a baseline and tweak chocolate and espresso strength to suit your taste.
Sweeteners and Flavor Additions
You can add sugar, simple syrup, flavored syrups (vanilla, caramel), or spices to personalize your mocha. Each addition will change the overall sweetness and aroma, so add sparingly and taste as you go.
Vanilla and Caramel
Vanilla extract or vanilla syrup enhances the chocolate notes, while caramel syrup adds a buttery sweetness that pairs well with dark chocolate. A small splash of vanilla extract (about 1/4 tsp) is enough for most single servings.
Spices and Extracts
A pinch of cinnamon, nutmeg, or a drop of almond extract can add complexity and seasonal warmth. These accents work well with mocha’s natural chocolatey profile and are great for cold mornings.
Variations You Can Make
A mocha is versatile, and you can create many variations to match seasonal flavors or dietary needs. Try the iced version in warm weather or a peppermint mocha for holiday mornings.
| Variation | Key Changes | When to Try It |
|---|---|---|
| Iced Mocha | Use cold brewed or cooled espresso, add chocolate syrup, pour over ice, top with cold milk | Hot days or when you want a chilled treat |
| Peppermint Mocha | Add 1/4–1/2 tsp peppermint extract or syrup and top with whipped cream | Holiday season or if you like mint-chocolate |
| Vegan Mocha | Use any plant-based milk and dairy-free chocolate | If you follow a plant-based diet |
| Sugar-Free Mocha | Use unsweetened cocoa + non-caloric sweetener or sugar-free syrup | If you want to reduce sugar |
Experiment with small adjustments to find the version that becomes your personal favorite.

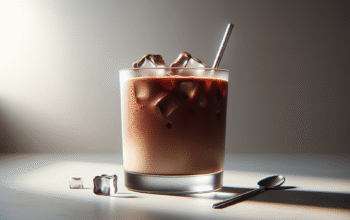
Iced Mocha (Detailed)
To make an iced mocha, start with cold espresso or strongly brewed coffee and chocolate syrup in a glass filled with ice. Stir to combine, then add cold milk and top with whipped cream or cold foam if you like an indulgent finish.
Iced Mocha Tips
Use cold-brew concentrate for smooth flavor with less acidity, and pre-chill your milk to avoid quick melting of ice. If you prefer less dilution, use fewer ice cubes or make coffee ice cubes in advance.
Vegan and Dairy-Free Options
Switching to plant milk and vegan chocolate is easy and preserves the mocha experience while aligning with dietary preferences. Choose barista blends for better texture and heat stability.
Making It Creamy Without Dairy
Oat milk and full-fat canned coconut milk (used sparingly) are good options for creaminess. Soy and almond barista blends can also create stable foam if you use a frother or steam wand.
Frothing Without a Steam Wand
You don’t need a commercial espresso machine to get lovely foam. Several inexpensive methods will give you microfoam or creamy froth at home.
Mason Jar Method
Pour warm milk into a mason jar, screw on the lid, and shake vigorously for 30–60 seconds until frothy. Remove the lid, microwave for 15–20 seconds to stabilize foam, and spoon over your mocha.
Handheld Frother or French Press
A handheld electric frother is quick and effective; a French press can also froth by pumping the plunger up and down for about 30 seconds. Both methods create a silky texture that blends well into the drink.
Common Problems and Fixes
When making mochas at home, you may run into issues like grainy cocoa, flat foam, or bitter flavor. The following table lists frequent problems and straightforward solutions.
| Problem | Likely Cause | Fix |
|---|---|---|
| Grainy cocoa | Cocoa powder not dissolved | Make a chocolate paste with hot water/espresso first |
| Bitter mocha | Over-extracted espresso or too much dark chocolate | Shorten extraction time, adjust chocolate amount, add sweetener |
| Flat foam | Milk too hot or wrong milk | Heat milk to ~60–65°C / 140–150°F and use a barista milk or proper frothing technique |
| Too sweet | Too much syrup or sugar | Reduce syrup or unsweetened cocoa; balance with stronger coffee |
| Separation in plant milk | Milk not barista-style | Use barista-specific plant milk or whisk immediately before serving |
These small adjustments will help you troubleshoot quickly so your mocha turns out well every time.
Nutrition Information (Approximate)
Nutrition varies widely based on milk type, chocolate choice, and added sweeteners. Below are approximate values for a typical 12 oz mocha made with whole milk and chocolate syrup.
| Component | Approximate Value (12 oz mocha) |
|---|---|
| Calories | 200–350 kcal |
| Fat | 6–14 g |
| Carbohydrates | 25–45 g |
| Protein | 6–10 g |
| Sugar | 20–35 g |
If you want to reduce calories or sugar, use low-fat milk, unsweetened cocoa, or sugar alternatives and adjust chocolate amount accordingly.
Storage and Reheating
Making mocha fresh is best, but you can store leftover components if needed. Keep brewed coffee in the fridge for up to 48 hours and milk for its usual shelf life.
Reheating Tips
Reheat gently on the stovetop or in short microwave bursts to avoid scalding, then re-froth the milk to restore texture. Avoid reheating the mocha multiple times because milk texture and flavor will degrade.
Serving Suggestions and Pairings
A mocha pairs nicely with a variety of baked goods and breakfast items, enhancing both sweet and savory flavors. Consider pairing with almond croissants, banana bread, shortbread cookies, or a savory ham-and-cheese pastry depending on whether you want a sweet or balanced pairing.
Seasonal Pairings
During colder months, pair your mocha with spiced or nutty treats like cinnamon rolls or pecan scones. In warmer weather, lighter pastries or fruit tarts provide a refreshing contrast to the chocolate-coffee richness.
Cleaning and Maintenance of Equipment
Caring for your espresso machine, milk frother, and other tools extends their life and keeps flavors clean. Regular cleaning prevents coffee oil buildup and ensures consistent performance.
Espresso Machine and Moka Pot Care
Purge and wipe steam wands after each use and run water through group heads to remove residue. For moka pots, disassemble and rinse after each use and descale periodically to maintain flavor.
Frother and Handheld Tools
Rinse frothers and milk pitchers immediately after use to prevent milk film buildup, and deep-clean removable parts weekly. For electric frothers, follow manufacturer cleaning instructions to avoid damage.
Frequently Asked Questions (FAQ)
This section answers common questions you might have while making mocha lattes at home.
Can I use instant coffee to make a mocha?
Yes, instant espresso or finely ground instant coffee can be mixed with hot water to create a concentrated base. It won’t produce crema like espresso, but it will still blend nicely with chocolate and milk.
How do I make a mocha less sweet?
Use unsweetened cocoa powder or reduce the syrup amount and increase espresso strength slightly. You can also select dark chocolate instead of milk chocolate to reduce sweetness naturally.
Is there a recommended temperature for steaming milk?
Aim for 60–65°C (140–150°F) for optimal texture and sweetness without scalding. Overheating milk (above 70°C / 158°F) can cause a burnt flavor and thin foam.
How can I make latte art on a mocha?
Start with good microfoam, pour steadily into the center of the cup, and practice wrist movement to create hearts or rosettas. Because mocha has chocolate mixed in, contrast may be subtler than a plain latte, but you can finish with shaved chocolate for decoration.
Can I prepare mochas for a party?
Yes—prepare a chocolate-espresso concentrate and warm milk separately, then combine when serving. Consider setting up a small DIY station with syrups, toppings, and milk options so guests can customize their drinks.
Troubleshooting Flavor Balance
Achieving balance between coffee strength, chocolate richness, and milk creaminess is the key to a satisfying mocha. Adjust one element at a time—espresso strength, chocolate amount, or milk quantity—to find your preferred ratio.
How to Calibrate Taste
Start with the base recipe and taste before adding sweetener or more chocolate. If the drink tastes weak, increase espresso or reduce milk; if it tastes overly sweet, cut back on syrup or use darker chocolate.
Final Tips for a Better Morning Mocha
Small habits improve your mocha consistently: fresh coffee beans, quality chocolate, proper milk temperature, and timely serving. Use a thermometer while you learn, clean equipment regularly, and keep a small tasting notebook to track what you liked or changed.
Personalization Ideas
Make a signature mocha by experimenting with extracts, garnishes, and different chocolate types until you discover what you love. Write down your favorite combo and method so you can repeat it easily on future cozy mornings.
Conclusion
You now have a detailed blueprint for making a homemade mocha latte that suits your taste and routine. With a little practice and the right ingredients, you’ll be able to enjoy a café-style mocha at home any morning you choose.