Have you ever wondered how to keep a full grown coffee bean plant healthy, productive, and attractive in your home or garden?
Caring for a full grown coffee bean plant
This guide will walk you through everything you need to know to maintain a mature coffee bean plant. You’ll learn practical steps for light, water, soil, nutrients, pruning, pests, flowering, fruiting, harvesting, and more, all presented in a friendly, actionable way.
Understanding your full grown coffee bean plant
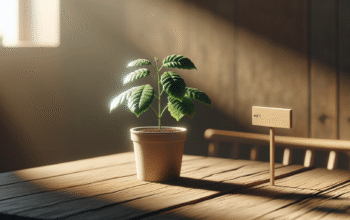
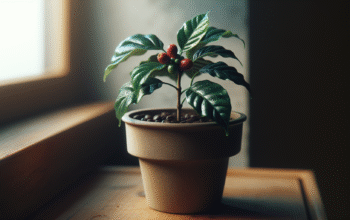
A full grown coffee bean plant typically refers to a mature specimen of species like Coffea arabica or Coffea canephora (robusta). These plants can reach 6–12 feet outdoors in the right climate, though potted plants are often kept smaller with pruning.
You’ll find it helpful to understand the plant’s lifecycle, basic anatomy, and native habitat because these factors influence how you care for it. Coffee plants come from subtropical to tropical highlands, so their needs reflect that origin.
Growth habits and size
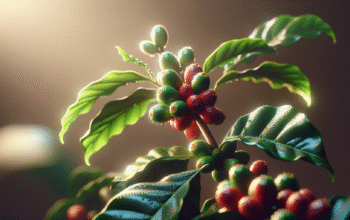
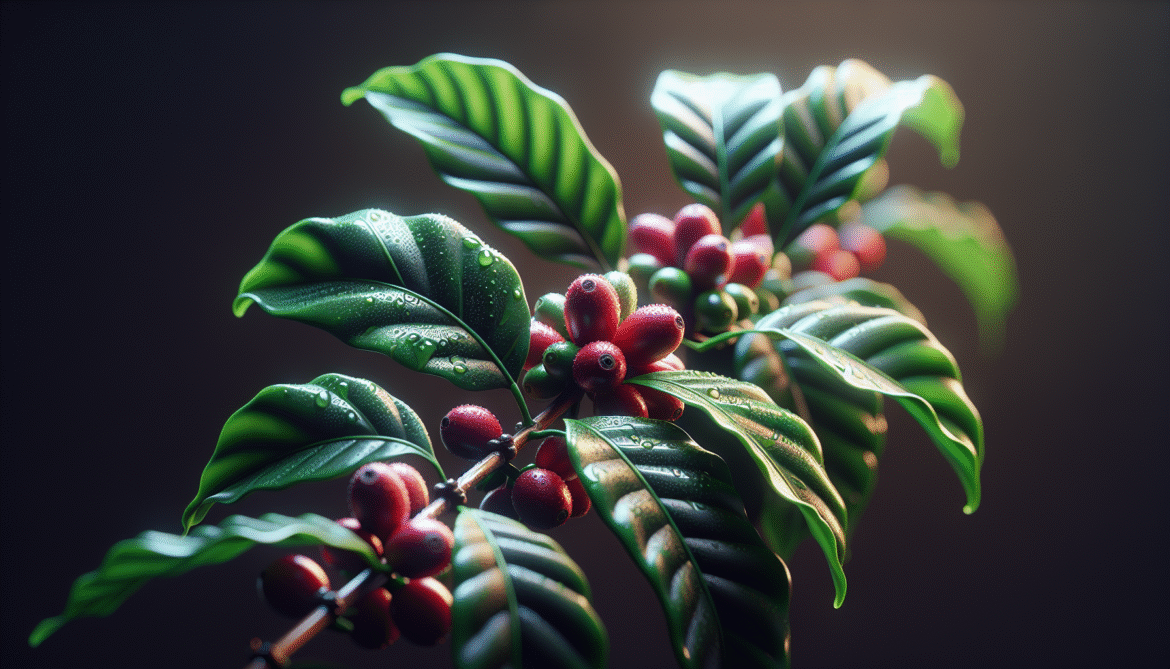
Mature coffee plants produce multiple stems, a dense canopy of glossy leaves, and seasonal clusters of fragrant white flowers followed by red to yellow cherries. You’ll notice that growth rates slow after maturity, and energy shifts from vegetative growth to flowering and fruiting.
Keeping a mental image of the plant’s natural form helps you make pruning and placement choices that support health and yield. Your goal is to mimic the plant’s preferred conditions while managing the space it occupies.
Common species and varieties
Coffea arabica is prized for flavor and prefers higher elevation and cooler nights, while Coffea canephora (robusta) tolerates warmer, more humid conditions and is generally hardier. There are many cultivars within each species that vary in size, flavor profile, and disease resistance.
Knowing which species and cultivar you have helps you tailor watering, temperature, and feeding needs more precisely. If you’re unsure, a photo or nursery label can often reveal the identity.
Light requirements
Coffee plants are understory plants in their native habitat, so they do best with bright, indirect light rather than full, direct sun. You’ll want to provide a balance between sufficient light for photosynthesis and protection from scorching.
Indoors, place your plant near an east- or north-facing window or behind sheer curtains on a brighter exposure. Outdoors in warm climates, provide dappled shade or morning sun with afternoon protection.
How much light is enough?
A mature coffee plant typically needs 3–6 hours of bright indirect light daily. In stronger sunlight regions, aim for filtered light for most of the day. If you notice leaf bleaching or curling, it’s likely getting too much direct sun.
If you have lower light conditions, supplemental grow lighting can help maintain vigor and flowering. Use full-spectrum LED fixtures and position them to provide even illumination.
Signs of too little or too much light
Under low light, you’ll see leggy growth, larger spacing between nodes, and reduced flowering. Too much light causes yellowing or browning of leaf margins and leaf drop. You’ll learn to read these cues and adjust placement or shading accordingly.
Consistent lighting improves stability in growth and reduces stress that can make the plant more vulnerable to pests and diseases.
Temperature and humidity
Coffee plants prefer daytime temperatures of 65–75°F (18–24°C) with slightly cooler nights, ideally 55–65°F (13–18°C). They’re sensitive to frost and extreme heat, so protect the plant if temperatures fall outside this range.
Because they evolved in humid forests, maintaining moderate to high humidity (50–80%) supports glossy leaves and healthy growth. You can increase humidity indoors with trays, humidifiers, or grouping plants together.
Managing seasonal temperature changes
If you keep a coffee plant outdoors seasonally, bring it inside before night temperatures drop toward freezing. When moved indoors, allow the plant to acclimate gradually to changes in light and humidity to reduce shock.
Avoid placing the plant near drafty windows, heating vents, or air conditioners where rapid temperature changes can lead to leaf drop. Aim for steady conditions to keep the plant comfortable.
Humidity tips that work
Misting can temporarily raise humidity around the plant, but it’s not a long-term solution. Instead, use a pebble tray with water or an electric humidifier for consistent humidity. You’ll also get benefits from grouping several plants, which creates a microclimate with higher local humidity.
Watering your full grown coffee bean plant
Watering is one of the most critical and commonly mishandled aspects of coffee plant care. You want soil that is consistently moist but never waterlogged. Overwatering causes root rot; underwatering leads to leaf drop and poor fruit set.
The simplest guideline is to water when the top 1–2 inches of soil feel slightly dry, adjusting frequency for season, pot size, and environmental conditions. Use room-temperature water and water thoroughly until excess drains from the pot.
Watering schedule table
This table gives a general watering frequency based on season and climate. Adjust based on your observations of soil moisture and plant response.
| Condition | Typical frequency | How to check |
|---|---|---|
| Warm, dry indoor conditions (summer) | Every 4–7 days | Finger test: top 1–2 inches dry |
| Cooler indoor conditions (winter) | Every 10–14 days | Finger test: top 1–2 inches dry |
| Outdoor warm/humid | Every 3–6 days | Soil surface and weight of pot |
| Outdoor cool/moist | Every 7–14 days | Finger test plus drainage timing |
Always allow the pot to drain completely after watering. Standing water in a saucer for long periods invites root problems and pests.
Water quality and temperature
Use filtered or rain water if your tap water is heavily chlorinated or high in salts. Cold water shocks the roots, so aim for water at room temperature. If you must use hard tap water, occasionally flush the pot with distilled water to prevent mineral buildup in soil.
If your leaves develop brown tips or margins, consider water quality as a possible contributor.

Soil and repotting
A mature coffee plant needs well-draining, fertile soil with good organic matter. A classic mix includes peat or coco coir for moisture retention, perlite or pumice for aeration, and compost or well-rotted manure for nutrients.
You’ll want to repot only when rootbound or when the potting mix has degraded. For full grown plants in permanent outdoor beds, amending the soil annually with organic matter is usually sufficient.
Potting mix recipe for potted plants
Use a mix that balances water retention and drainage. A good starting recipe is:
- 40% potting compost or commercial houseplant mix
- 30% coco coir or peat moss
- 20% perlite or pumice
- 10% well-rotted compost or worm castings
This combination gives structure, moisture retention, and slow-release fertility to support the plant.
When and how to repot
Repot a potted mature coffee plant every 2–4 years, or when roots begin circling the pot walls. Choose a pot that’s 2–4 inches larger in diameter than the current container. Repot in spring or early summer to give the plant a full growing season to recover.
When repotting, inspect roots for rot and trim any dead or mushy roots. Replace the mix completely to refresh nutrients and improve drainage.
Fertilizing and feeding schedule
A full grown coffee plant is a moderate feeder that benefits from regular but balanced fertilization. Choose a balanced fertilizer such as 10-10-10 or a formulation labeled for acid-loving plants, and supplement with organic options like compost tea or fish emulsion.
You’ll want to feed lightly and consistently during the active growing season and reduce or stop fertilizer during winter dormancy or slow growth.
Recommended feeding schedule
Use this feeding schedule as a starting point and adjust based on leaf color and growth rate.
| Season | Fertilizer type | Frequency |
|---|---|---|
| Spring (active growth) | Balanced granular or liquid fertilizer | Every 4–6 weeks |
| Summer | Balanced or slightly higher nitrogen for growth | Every 4–6 weeks |
| Autumn | Lower nitrogen, higher potassium to support fruit | Every 6–8 weeks |
| Winter | Minimal to no fertilizer | Only if growth occurs |
Organic slow-release granules can be applied once in spring and again midseason. For liquid feeds, dilute to half strength to avoid root burn, and avoid fertilizing immediately after repotting.
Micronutrients and pH
Coffee plants prefer slightly acidic soil (pH 6.0–6.5). If you notice yellowing between veins, consider testing for iron chlorosis, which can be remedied with iron chelates or acidifying amendments like elemental sulfur or peat.
Periodic soil tests help you keep macronutrients and micronutrients balanced. You’ll keep the plant healthier if you correct deficiencies early.
Pruning and shaping
Pruning helps control size, improve air circulation, and encourage branching and fruiting. You should prune lightly on a mature plant to remove dead, diseased, or crossing branches, and to shape for accessibility when harvesting.
Time major pruning for early spring after the cold risk has passed, but you can make minor corrective cuts anytime.
Pruning techniques
Focus on these core pruning actions: remove dead wood, thin dense areas to allow light penetration, cut back long vertical shoots to encourage lateral branching, and remove suckers from the base if you want a single-stem form.
Always use clean, sharp tools and make cuts at a 45-degree angle just above a node. Sterilize tools between cuts if you suspect disease to prevent spreading pathogens.
Rejuvenation pruning
If your full grown plant becomes woody and unproductive, you can perform a rejuvenation prune by removing up to one-third of the oldest growth to stimulate new shoots. Do this in a single action only if the plant is healthy and has sufficient root mass.
After a major prune, provide consistent water and nutrients to support recovery and new growth.
Flowering and fruiting
Mature coffee plants produce fragrant white flowers in clusters, typically after a period of rainfall or increased humidity. The flowers are followed by cherries that take several months to ripen, changing from green to yellow, orange, or red depending on the variety.
You’ll find that flower set and cherry development depend strongly on consistent care—especially light, water, and nutrients.
Encouraging blossom production
To encourage flowering, avoid overfertilizing with high nitrogen during the flowering period, since excess nitrogen promotes leaf growth over flowers. Provide slightly drier conditions before bloom to mimic a natural dry spell that triggers flowering in some coffee species.
Maintaining steady humidity and avoiding stress also increases the likelihood of a good flower set.
Pollination and fruit set
Coffee flowers are generally self-fertile but benefit from insect pollinators. If your plant is indoors, you can hand-pollinate by gently brushing flowers with a soft brush to transfer pollen, which can improve fruit set and yield.
Expect that not every flower will set a cherry; a modest percentage becoming fruit is normal. Once cherries form, protect them from pests and birds if the plant is outdoors.
Harvesting coffee cherries
Harvest typically occurs when cherries reach full color and are slightly soft to the touch. For the best flavor, harvest ripe cherries selectively rather than stripping all fruit at once. You’ll want to plan multiple harvests over a few weeks as cherries ripen at different times.
Handle cherries gently during harvest to avoid bruising, and process them soon after picking to maintain quality.
Harvesting methods
Selective picking by hand is slow but yields the best-quality beans. If you have many cherries, you can perform a semi-selective harvest where you pick ripe cherries and a second pass for later ripening ones.
For small home growers, manual picking is practical and lets you inspect each cherry for ripeness and pests.
Yield expectations
A mature, well-cared-for plant can produce several hundred cherries per season, depending on size, variety, and environmental conditions. Expect variability year-to-year, and remember that yield often increases with consistent, long-term care.
Productivity typically stabilizes once the plant is several years old, but you can increase yield with pruning, feeding, and optimal conditions.

Processing harvested cherries
Once you harvest cherries, you’ll need to process them to extract the green coffee beans. Two common methods are the wet (washed) and natural (dry) processes. Each affects the flavor profile of the final coffee beverage.
At home, you can experiment with either method on small batches to learn how processing influences taste.
Natural (dry) process
In the natural process, you spread whole cherries on drying racks or clean surfaces and dry them slowly until the outer fruit and skin are brittle, then remove the dried pulp to reveal the beans. This method imparts fruity, heavy-bodied flavors but requires consistent drying conditions to prevent fermentation and mold.
Turn cherries frequently and protect them from rain and pests. Drying can take 2–4 weeks depending on humidity and temperature.
Washed (wet) process
The washed process removes the pulp shortly after harvest, then ferments the beans briefly to break down remaining mucilage before washing and drying. This cleaner method often yields brighter acidity and clearer flavors than the natural process.
Fermentation times vary; monitor carefully to avoid over-fermentation, which can produce off-flavors.
Roasting and using your beans
Green coffee beans must be roasted before brewing. Home roasting ranges from simple pan roasting to using dedicated small roasters. Roasting time and temperature control the flavor development, so keep notes on each batch you roast.
You’ll taste the results and adjust roast profiles to your preference for light, medium, or dark roasts.
Basic home roasting steps
Start with small batches of green beans. Heat gradually until you hear the first crack (a popping sound); light to medium roasts end shortly after the first crack, while dark roasts continue to the second crack. Cool beans quickly to stop the roast.
Store roasted beans in an airtight container away from light and heat, and use within a couple of weeks for peak flavor.
Pest and disease management
Common pests include mealybugs, scale, aphids, and spider mites, while diseases can include fungal root rot, leaf rust (Hemileia vastatrix), and various leaf spot pathogens. Vigilance and early intervention are key to managing problems before they become severe.
You’ll want to maintain plant vigor, inspect regularly, and use integrated pest management (IPM) strategies to reduce chemical reliance.
Identification and treatment
- Mealybugs and scale: Look for cottony masses or hard bumps on stems and leaves. Treat with insecticidal soap, horticultural oil, or by gently wiping with alcohol-dipped cotton swabs.
- Aphids: Small, soft-bodied insects often on new growth. Rinse with a strong spray of water, use neem oil, or apply insecticidal soap.
- Spider mites: Fine webbing and stippled leaves indicate mites. Increase humidity, wash leaves, and use miticides if severe.
- Fungal diseases: Improve drainage and airflow; remove affected tissue and apply fungicides if necessary.
Always quarantine new plants and inspect nursery stock to avoid introducing pests or diseases into your collection.
Preventative cultural practices
Good sanitation, proper spacing, correct watering, and clean tools reduce disease risk. Avoid overhead watering on foliage when wet conditions prevail and remove fallen leaves and fruit promptly.
If you keep multiple coffee plants, rotate watering and monitor each plant’s microclimate to minimize outbreaks.
Troubleshooting common problems
You’ll face issues like yellow leaves, leaf drop, slow growth, or poor fruit set. Diagnosing the underlying cause depends on looking at soil moisture, light, nutrient status, pests, and recent environmental changes.
Use a methodical approach: check roots, soil, leaves, and environment, and rule out the most common problems first.
Troubleshooting table
This table summarizes common symptoms, likely causes, and quick fixes.
| Symptom | Likely cause | Quick fixes |
|---|---|---|
| Yellowing leaves with green veins | Iron deficiency or high pH | Lower pH, apply iron chelate |
| Brown leaf tips | Low humidity or salt buildup | Increase humidity, flush soil with water |
| Leaf drop | Overwatering, underwatering, or temperature stress | Adjust watering, stabilize temperature |
| Stunted growth | Nutrient deficiency, pot-bound roots, low light | Fertilize appropriately, repot, increase light |
| Spots on leaves | Fungal or bacterial infection | Remove affected leaves, improve airflow, apply appropriate treatment |
| Sticky residue on leaves | Honeydew from sap-sucking insects | Treat pests, wash leaves with soap solution |
Always test solutions one at a time and allow time to see results before making additional changes.
Propagation from cuttings or suckers
If you want to create more plants, your mature coffee plant can be propagated from semi-hardwood cuttings or from suckers (basal shoots). Propagation allows you to maintain the genetics of a favored plant.
You’ll need a warm, humid environment for cuttings to root; a propagation tray with bottom heat and a humidity dome often improves success.
Steps for cutting propagation
Take 4–6 inch semi-hardwood cuttings with 2–3 nodes, remove lower leaves, dip the cut end in rooting hormone, and insert into a moist, well-draining medium like coco coir with perlite. Keep the cuttings humid and warm, and provide bright, indirect light.
Rooting can take several weeks; check gently for resistance as a sign of root development.
Using suckers
If your plant produces basal suckers, you can separate them with some root attached once they reach a reasonable size. Use a sharp, clean tool to sever, plant the sucker in an appropriate mix, and keep it humid and shaded until established.
Suckers rooted this way tend to establish quickly because they already have some root development.
Seasonal care and annual checklist
Maintain a predictable seasonal plan to keep your mature coffee plant happy year-round. This approach keeps you proactive rather than reactive to issues.
Below is a practical checklist organized by season.
Seasonal care table
| Season | Key tasks |
|---|---|
| Spring | Repot if needed, prune lightly, begin regular feeding, inspect for pests |
| Summer | Maintain consistent watering, provide shade from intense sun, monitor pests |
| Autumn | Reduce nitrogen, increase potassium to support fruit, harvest ripe cherries |
| Winter | Reduce watering and fertilizer, protect from cold, provide humidity indoors |
Follow this annual rhythm and adjust based on your local climate and whether the plant is indoors or outdoors.
Tools and supplies you’ll find useful
Having the right tools improves the quality of care you provide and reduces plant stress. Keep basic supplies on hand for routine tasks and emergencies.
Some essentials include sharp pruning shears, a hand trowel, moisture meter, pH test kit, humidifier or pebble tray, quality potting mix, and appropriate fertilizers and pest treatments.
Storage and maintenance of tools
Clean and sterilize tools after pruning or when moving between plants to avoid disease spread. Store tools clean and dry to maintain longevity, and keep blades sharp for clean cuts that heal quickly.
A small kit with essentials helps you respond quickly to issues.
Final tips and common mistakes to avoid
Consistency is the most important principle in caring for a mature coffee bean plant. Avoid abrupt changes in light, water, or temperature, as these stressors lead to leaf drop and reduced fruiting. Don’t overfertilize or allow soil to remain waterlogged.
Listen to the plant: gradual changes and regular observation will let you anticipate needs and correct problems before they become severe. Trust your observations and adjust care modestly rather than making dramatic changes.
Conclusion
Caring for a full grown coffee bean plant is rewarding and manageable when you understand the plant’s basic needs for light, water, soil, nutrients, and protection from pests and disease. You’ll enjoy fragrant flowers, ornamental foliage, and the possibility of harvesting your own coffee cherries when you provide consistent, attentive care.
Approach each season with a predictable plan, learn from each harvest and roast, and treat the plant as a living partner that responds best to steady, thoughtful care. With patience and practice, your mature coffee plant will thrive and reward you with both beauty and beans.