?Are you planning to germinate Coffea arabica seeds and want to maximize the health and vigor of your seedlings?

Optimizing Coffea arabica Germination for Healthy Seedlings
You’re about to learn practical, research-informed steps for germinating Coffea arabica seeds so you consistently raise vigorous seedlings. This guide covers seed biology, collection and processing, pre-sowing treatments, nursery practices, disease prevention, and troubleshooting so you can get reliable results whether you’re a hobbyist or managing a nursery.
Why germination quality matters
Healthy germination sets the foundation for uniform, vigorous plants that establish quickly in the field and produce well. Poor germination wastes seed, labor, and time and can lead to uneven stands and increased susceptibility to pests and disease. By controlling seed handling, substrate, environment, and nursery hygiene, you directly improve seedling survival and later crop performance.
Understanding Coffea arabica seed biology
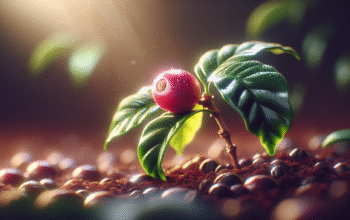
You should know how arabica seeds behave biologically to treat them correctly. Coffea arabica seeds are relatively short-lived and respond best to warm, moist conditions for germination.
Coffea arabica seeds are often described as “recalcitrant” compared to truly orthodox seeds, meaning they are sensitive to desiccation and don’t store long without losing viability. This reality affects how you collect, store, and sow them.
Seed structure and what it means for handling
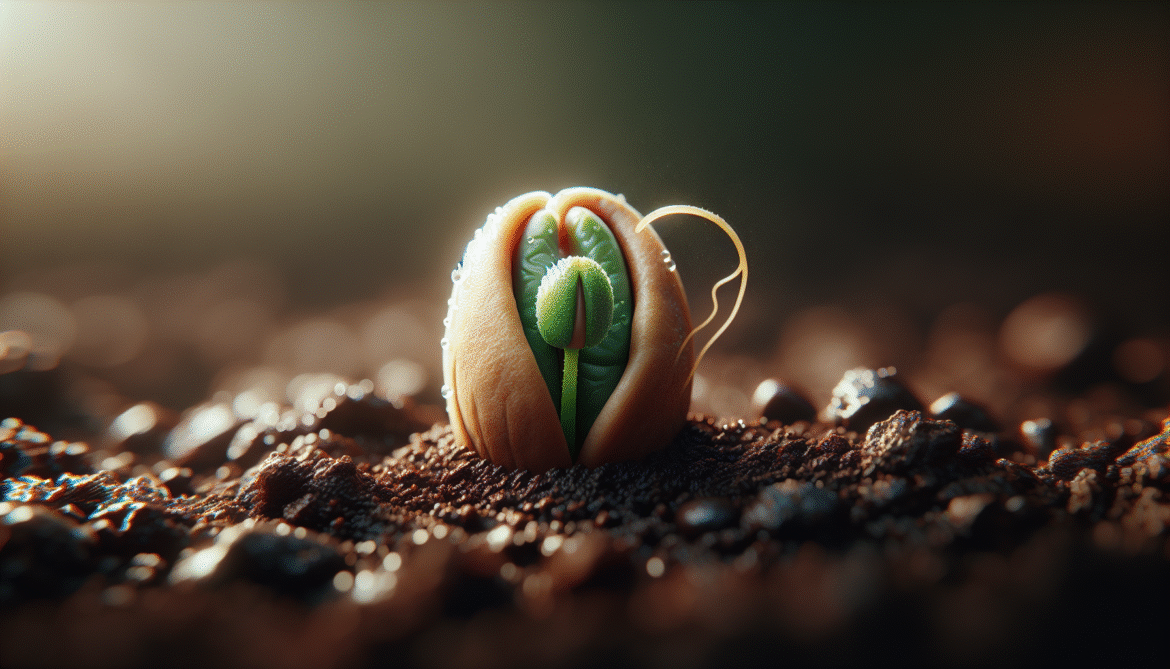
A coffee “bean” is actually a seed enclosed in a parchment layer and surrounded originally by pulp and mucilage. You need to remove these layers before sowing to prevent fungal growth and allow uniform water uptake.
The embryo is relatively large and cotyledonary, so seeds require moderate sowing depth and steady moisture to allow the radicle to emerge and the first leaves to develop.
Seed viability and longevity
You should treat fresh seed as a priority because viability declines rapidly once seeds dry and cool. If you must store seeds, short-term storage under cool, moderately humid conditions will slow deterioration, but germination quality still declines over months.
Plant within days to a few weeks for best results. If you need to hold seeds longer, maintain them at around 10–15°C with 40–60% relative humidity in airtight containers with a moist medium (e.g., slightly damp sawdust) — but expect some viability loss.
Collection and processing of seeds
Proper collection and processing directly affect germination rates. You should collect mature, healthy cherries and remove pulp and mucilage promptly.
Harvest only fully ripe cherries, which are deep red (or other cultivar-specific color). Overripe, under-ripe, or pest-damaged cherries reduce germination and increase disease risk.
Depulping and mucilage removal
You should remove the pulp and mucilage to prevent fermentation issues and fungal growth in the nursery. Common methods are:
- Wet processing: depulp cherries mechanically and ferment for 12–24 hours to loosen mucilage, then wash thoroughly.
- Manual depulping: scrub or rub seed to remove pulp and mucilage, followed by washing.
Ensure seeds are rinsed clean after mucilage removal to avoid residues that promote pathogens.
Drying for handling and short-term storage
You should dry seeds gently if you must hold them briefly, but avoid over-drying. Air-dry seeds in shade on raised racks for a day or two until surface moisture is gone; do not sun-dry to brittle dryness.
Aim for slightly moist, not bone-dry, seeds for short-term storage. Over-drying reduces viability; under-drying increases mold and insect problems.
Seed storage best practices
If you can’t plant immediately, correct storage will maintain viability longer. However, storing coffee seed is always suboptimal compared with planting fresh.
Short-term storage (days to a few weeks): keep seeds cool (15–20°C), in breathable containers or bags, away from direct sunlight. Place seed in moist, clean burlap or perforated plastic to maintain slightly elevated humidity.
Medium-term storage (weeks to a few months): aim for 10–15°C and 40–60% RH in sealed containers. Include a slightly moist packing medium (damp sawdust) to reduce desiccation stress. Check seeds periodically for mold.
Avoid freezing or extremely low humidity; coffee seeds are sensitive to desiccation and chilling injury.
Testing seed viability before sowing
You should test viability so you know expected germination rates and can adjust sowing density accordingly. Two practical tests are:
- Float test: discard obviously floated debris and non-dense material, but remember floatation is not fully reliable for arabica seed and can discard viable seeds. Use with caution.
- Germination test: place a random sample (e.g., 100 seeds) on moist germination paper or in moist sand at nursery temperature and record germination over 4–8 weeks; use results to estimate sowing rates.
A simple germination trial gives the most informative result for planning.
Pre-sowing treatments to improve germination
You should use gentle, biologically safe treatments to increase germination uniformity and reduce disease. Pre-soaking, surface sterilization, and microbial treatments are commonly used.
Soaking and imbibition
Soak seeds in clean water for 12–48 hours at room temperature to hydrate them and speed germination. Replace water if it becomes cloudy. Avoid extended soaking beyond 48 hours as anaerobic conditions can cause rot.
Soaking helps overcome variable dormancy and promotes more uniform radicle emergence.
Surface sterilization
You should sterilize seed surfaces to remove fungal spores and bacteria that cause damping-off and seed rot. Typical options:
- Diluted household bleach (sodium hypochlorite 1:9 to 1:19; ~0.5–1% available chlorine) for 5 minutes, then rinse thoroughly in clean water.
- Hydrogen peroxide 3% soak for 10–15 minutes, then rinse.
- Hot-water treatment is used by some for insect control, but it can reduce viability if not done carefully; avoid high temperatures and long exposure.
Test any treatment on a small sample to ensure it doesn’t reduce germination in your cultivar.
Biological seed treatments
You should consider beneficial microbial treatments like Trichoderma spp. or commercial bio-fungicides applied to seed or substrate to suppress soil-borne fungi. These products often reduce damping-off and improve early vigor without harming seedlings.
Apply according to manufacturer instructions and follow nursery hygiene best practices.
Sowing methods and seeding systems
You can germinate coffee seed in several ways: direct sowing in nursery beds, sowing in trays or polybags, and using germination beds with sand/soil mixes. Each method has pros and cons for space, uniformity, and transplant stress.
Nursery beds (traditional)
Nursery beds are built raised and shaded; you sow seeds thinly in fine, well-drained substrate and cover lightly. Beds are low-cost and work well for large volumes, but root disturbance at transplanting can stress seedlings.
Use raised beds to improve drainage and airflow; maintain even moisture and protect from heavy rain.
Trays and containers
Trays or small pots allow individual seedlings to be transplanted with minimal root disturbance. You should plant one seed per cell or pot and transplant to larger polybags at the right size.
This method increases cost and labor but improves uniformity and reduces root damage at transplant.
Polybags (direct to bag)
Sow seed directly into small polybags or tubes that will remain as the planting container until the field. This minimizes handling and root disturbance at transplant, and is commonly used in commercial nurseries.
Use sturdy, well-drained bags and a good substrate mix to encourage strong root development.
Substrate and potting mix recommendations
A well-draining, fertile substrate encourages root growth and prevents damping-off. You should use a mix tailored to your nursery resources.
Table — Recommended substrate mixes for Coffea arabica seedlings
| Use case | Composition (by volume) | Notes |
|---|---|---|
| Basic, low-cost | 2 parts topsoil : 1 part compost : 1 part coarse sand | Good drainage, moderate fertility. Sieve topsoil to remove clods. |
| Nursery-grade mix | 1 part topsoil : 1 part well-rotted compost : 1 part coconut coir or peat : 1 part coarse sand/perlite | Better water retention and aeration; ideal for trays/polybags. |
| Sterile germination mix | 2 parts fine river sand : 1 part sterilized compost or coco coir | Low pathogen load; use for initial germination and transplant after 2–3 true leaves. |
| Organic-focused | 2 parts topsoil : 1 part compost : 0.5 part worm castings : 0.5 part rice husk | High microbial activity and nutrients; ensure good drainage to avoid waterlogging. |
You should aim for a substrate pH around 5.5–6.5, with moderate organic matter and excellent drainage. Adjust pH with lime or sulfur only after testing.
Environmental conditions: temperature, light, and humidity
You should manage temperature, shading, and humidity for uniform germination and healthy early growth. Coffea arabica germinates best in warm, humid, but well-ventilated conditions.
Table — Optimal environmental conditions for Coffea arabica germination and nursery growth
| Parameter | Optimal range | Notes |
|---|---|---|
| Soil/substrate temperature for germination | 20–25°C (68–77°F) | Warmth speeds germination; avoid temperatures consistently above 30°C. |
| Ambient temperature | 18–25°C | Stable, moderate temperatures reduce stress. |
| Relative humidity | 70–90% (initial) then 60–80% | High humidity helps germination; reduce gradually during hardening. |
| Light | Indirect bright light; 50–70% shade in early nursery stages | Seedlings tolerate shade; avoid full sun until hardened off. |
| Air circulation | Moderate | Good airflow reduces fungal issues, but avoid strong drying winds. |
Monitor temperatures with a thermometer and use shade cloth (50–70%) to maintain light and temperature conditions, decreasing shade progressively as seedlings grow.
Shade and light management
You should use shade nets or natural shade to protect young seedlings from direct sun and excessive heat. Start with 60–70% shade and gradually reduce to 30–50% before transplanting.
Excessive shade causes leggy, weak seedlings; too much sun causes leaf scorch and slows development.
Humidity and watering
You should maintain consistent substrate moisture without waterlogging. Use gentle watering (micro-sprays or bottom watering for trays) to avoid displacing seed. Keep high ambient humidity during germination but increase ventilation gradually to prevent fungal disease.
Watering frequency depends on substrate and climate—check moisture daily; the surface should appear damp but not saturated.
Sowing depth, spacing, and labeling
Correct sowing depth and spacing lead to even germination and easier transplanting. You should sow coffee seeds relatively shallow.
- Sowing depth: 1–2 cm (0.4–0.8 in). Cover seeds lightly with fine substrate or sand.
- Spacing: in nursery beds, allow 4–6 cm between seeds initially. In trays or bags, one seed per cell/bag.
- Labeling: label trays and bags with cultivar, date of sowing, and seed lot number so you can track performance.
Shallow sowing ensures the radicle can break through substrate without excessive energy expenditure.

Nursery management and fertilization
Good nursery practice encourages steady growth without shock or disease. You should focus on sanitation, balanced nutrition, and careful handling.
Fertilization schedule
Start light feeding once seedlings show true leaves. Use a balanced, dilute fertilizer to support root and leaf growth without burning tender roots.
- Starter feed: begin with a soluble 10-10-10 NPK or similar, at 1/4 to 1/2 recommended strength, applied every 2–4 weeks.
- Later nursery feed: increase to a full strength slow-release fertilizer or two applications of a balanced fertilizer over several months.
- Organic options: compost tea, diluted fish emulsion, or worm tea applied sparingly will supply nutrients and beneficial microbes.
Always avoid over-fertilizing, which predisposes seedlings to burning and soft-tissue disease.
Sanitation and disease prevention
You should keep the nursery clean: remove fallen debris, avoid crowded beds, and sterilize tools. Preventive steps include:
- Use pasteurized or sterilized substrate where feasible.
- Allow adequate drainage to prevent standing water.
- Use biological control agents like Trichoderma to reduce fungal loads.
- Rotate seed batches and avoid reusing contaminated soil.
Damping-off pathogens (Pythium, Rhizoctonia, Fusarium) are the most common threats in nurseries; prevention is far easier than treatment.
Common pests and diseases and their management
You should recognize and manage pests and diseases early. Healthy nursery practices reduce most problems, but some monitoring and treatment are necessary.
Table — Common nursery problems and recommended actions
| Problem | Symptoms | Management |
|---|---|---|
| Damping-off (Pythium, Rhizoctonia) | Sudden collapse of seedlings, stem lesions at soil line | Use sterile substrate, improve drainage, reduce humidity, apply Trichoderma or approved fungicide, remove affected plants. |
| Seed rot | Seeds become soft, discolored, foul smell | Improve sanitation, use surface sterilization, avoid over-soaking seeds. |
| Leaf spots (various fungi) | Small lesions on leaves, spreading under humid conditions | Improve ventilation, remove infected leaves, apply biological fungicides or copper-based fungicides if needed. |
| Aphids/mites in nursery | Distorted leaves, sticky residues, visible pests | Use gentle sprays (soapy water, neem oil) and encourage predatory insects; avoid broad-spectrum insecticides that harm beneficials. |
| Root-binding or stunted growth | Restricted roots in small containers | Transplant to larger bags early; use appropriately sized containers. |
Monitor seedlings daily and remove affected plants promptly to prevent spread.
Hardening off and acclimatization
You should harden seedlings before transplanting to field conditions to minimize shock and transplant losses. Hardening gradually exposes plants to lower humidity and higher light.
Start reducing shade and watering frequency 2–4 weeks before transplanting, and increase ventilation to toughen leaves. Move seedlings to more sun for a few hours per day, increasing exposure progressively over 2–4 weeks.
Proper hardening improves leaf cuticle thickness, root strength, and overall stress tolerance.
Transplanting seedlings to the field
Transplant at the beginning of the rainy season or when soil moisture is reliable. You should select seedlings with a well-developed root system and 20–30 cm height for planting.
Handle seedlings gently to keep the root ball intact. Plant at the same depth as the nursery container, firm soil around roots, and water in to remove air pockets. Provide temporary shade or mulch to reduce moisture stress and protect young plants from direct sun.
Space and layout depend on your agroforestry or plantation design; typical spacing for arabica ranges depending on altitude, management, and cultivar (e.g., 2–3 m spacing in many systems).
Troubleshooting common germination and seedling problems
You should diagnose and correct issues early to salvage seedlings and improve future batches.
- Low germination: likely old or poorly stored seeds, incorrect temperature, or poor substrate. Use fresh seed, warm and humid conditions, and check pre-sowing treatments.
- Uneven germination: inconsistent seed quality or uneven moisture. Soak uniformly, use consistent substrate, and maintain steady temperature/humidity.
- High seedling mortality/damping-off: usually fungal—improve drainage, use sterile substrate, reduce humidity, and consider Trichoderma.
- Leggy seedlings: insufficient light; reduce shade gradually and increase light exposure.
- Poor root development: compacted or nutrient-poor substrate, or root-bound containers. Use looser mixes and transplant to larger bags as needed.
Record-keeping on failures helps you adjust and refine your techniques.
Practical step-by-step germination protocol (one recommended workflow)
You can follow this stepwise protocol to standardize your nursery operations and get consistent results.
- Select high-quality, mature cherries and remove pulp and mucilage by depulping and washing.
- Air-dry seeds in shade for 24–48 hours to remove surface moisture without over-drying.
- Perform a small germination test with a sample of 50–100 seeds to estimate expected germination.
- Soak seeds in clean water for 12–24 hours to imbibe; change water if cloudy.
- Surface-sterilize by soaking in diluted bleach (approx. 0.5–1% available chlorine) for 5 minutes, then rinse thoroughly, or use 3% hydrogen peroxide for 10–15 minutes.
- Prepare substrate (e.g., 2:1:1 topsoil:compost:sand) and fill trays, beds, or bags; moisten evenly.
- Sow seeds at 1–2 cm depth and cover lightly with fine substrate. Label trays/bags with date and variety.
- Place trays/beds under 50–70% shade and keep substrate consistently moist using gentle watering.
- Maintain substrate temperature at 20–25°C and high ambient humidity; ventilate lightly to prevent stagnation.
- Once radicles have emerged and seedlings show true leaves, lighten shade to 50% and begin weak fertilization at quarter strength.
- Transplant seedlings to larger bags once they have 2–4 pairs of true leaves and are 20–30 cm tall, or keep in trays until field-ready.
- Hardening off: gradually reduce shade and watering over 2–4 weeks before transplanting to field.
Follow these steps and adapt them based on local climate and seedlot behavior.
Frequently asked questions
You should refer to practical answers for common concerns when raising arabica seedlings.
- How long until seeds germinate? Germination usually begins 2–4 weeks under optimal conditions; full emergence can occur over 6–12 weeks.
- Can I plant seeds directly in the field? You can, in shaded, well-prepared nurseries or directly in polybags. Direct field sowing risks predation and uneven microclimate unless well-managed.
- Is hot-water treatment necessary? It’s optional and can control pests, but it risks lowering viability if misapplied. Use surface sterilization methods first and test hot-water treatments on a sample.
Record-keeping and continuous improvement
You should keep detailed records of seed lot, processing, germination rates, and nursery conditions. These data help you refine techniques and choose the best-performing seed sources.
Track variables such as sowing date, seed source, germination percentage, mean germination time, substrate used, and any treatments. Over time, data-driven changes will produce more consistent results.
Final recommendations and summary
You should prioritize fresh seed, clean processing, appropriate substrate, and steady environmental control to optimize Coffea arabica germination. Preventive nursery hygiene and gentle hardening practices will produce seedlings that establish quickly and resist early threats.
By applying the protocols above, testing small adjustments on each seedlot, and keeping careful records, you’ll maximize germination efficiency and produce healthy seedlings that translate into better field performance and yield consistency.