Have you ever wanted rich, concentrated coffee from a small stovetop pot without owning an espresso machine?

Mastering the Moka Coffee Maker
You’re about to learn everything that makes the Moka coffee maker a beloved appliance in kitchens around the world. This article guides you through history, parts, technique, troubleshooting, maintenance, and recipe variations so you can make the best coffee with your Moka pot consistently.
What the Moka Coffee Maker Is
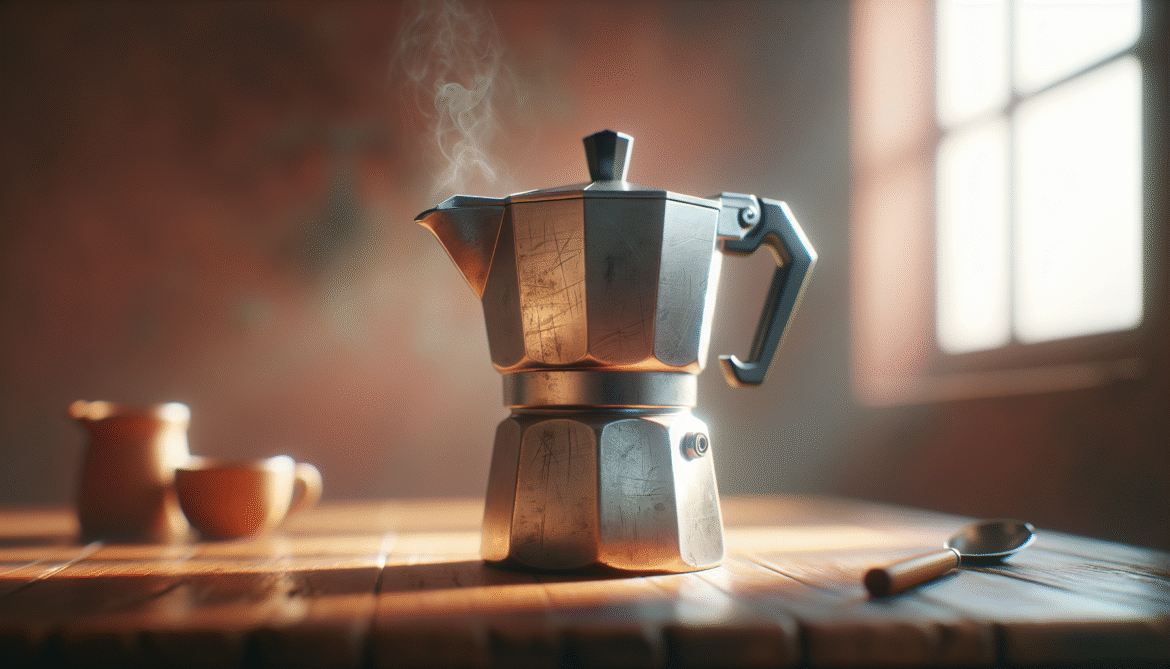
The Moka coffee maker, often called a Moka pot or stovetop espresso maker, is a simple stove-top brewer that forces hot water through coffee grounds using steam pressure. You’ll get a concentrated, bold cup that sits stylistically between drip coffee and espresso.
Why You Might Choose a Moka Pot
You’ll appreciate the Moka pot for its affordability, compact size, durability, and the strong, aromatic coffee it produces. If you want something more concentrated than drip coffee but don’t have or want an espresso machine, the Moka pot is an excellent middle ground.
A Brief History You’ll Appreciate
You’ll find history helps explain design choices. The Moka pot was invented in 1933 by Alfonso Bialetti in Italy and became a household staple, especially in Europe and Latin America. Its octagonal aluminum body and iconic silhouette made it both functional and stylish.
The Evolution of Design
Over the decades, you’ll notice variations in materials (aluminum vs. stainless steel), sizes, and handle designs. Modern versions sometimes include pressure gauges or thermometers, but the basic three-chamber design has remained the same.
Understanding the Moka Pot: Parts and Function
Knowing the parts helps you assemble and clean the pot properly. The Moka pot consists of three main parts: the bottom water chamber, the funnel-shaped coffee basket (filter), and the upper collecting chamber.
Bottom Chamber (Water Reservoir)
You fill the bottom chamber with water up to the safety valve level. The chamber heats and builds steam pressure that drives the water upward through the coffee grounds.
Funnel Basket (Filter)
The basket holds the coffee grounds. It’s perforated to allow water to pass through while keeping the grounds contained. You’ll avoid tamping; the grounds should be level but not compacted.
Upper Chamber (Collecting Chamber)
Extracted coffee collects here. A safety valve on the side of the bottom chamber prevents excessive pressure buildup. The lid often has a gasket that needs occasional replacement.
Types, Materials, and Sizes to Choose From
You’ll pick a pot based on material, capacity, and stovetop compatibility. The most common options are aluminum and stainless steel.
Aluminum vs. Stainless Steel
- Aluminum: Classic, lightweight, and conducts heat quickly. It develops a patina over time that some people like. Avoid using harsh detergents that strip the seasoning.
- Stainless Steel: Durable, dishwasher-safe, and compatible with induction cooktops. It won’t develop the same patina and often has a sleeker finish.
Capacity Options
Moka pots are sized by “cups,” which are smaller than regular coffee cups. Typical sizes include 1, 3, 6, 9, and 12-cup models. Choose a size that matches how much coffee you usually make; brewing a pot much larger than you consume can degrade flavor.
How the Moka Pot Works — The Physics in Simple Terms
Understanding the process helps you control it. As water in the bottom chamber heats, steam pressure builds and forces water up a central column through the coffee grounds. Extracted coffee collects in the top chamber.
Key Variables in the Brew Cycle
- Heat level: Controls the speed of extraction.
- Grind size: Controls how quickly water passes through the grounds.
- Coffee dose: Impacts strength and concentration.
- Water temperature and quality: Influence extraction and flavor.
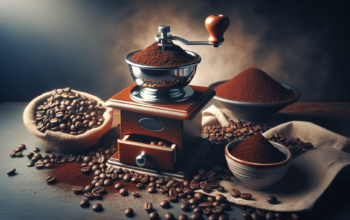
Selecting Coffee Beans and Roast Profiles
Your beans deeply shape the result. You’ll choose beans and roast levels based on the flavor you want.
Roast Level Recommendations
- Medium-dark roasts: Often ideal because they have body and sweetness without excessive bitterness.
- Dark roasts: Fan favorites for a bold, smoky cup, but they can be oily and mask subtle flavors.
- Light roasts: Can work but may produce a thinner, brighter cup that’s less traditional for Moka pots.
Bean Freshness
Use freshly roasted beans within 2–4 weeks for best flavor. Grind just before brewing.
Grind Size: The Most Crucial Variable You Control
Grind size significantly affects extraction. Unlike espresso, you want a grind slightly coarser than espresso but finer than drip.
Grind Size Guide
| Brew Method | Typical Grind |
|---|---|
| Espresso | Very fine |
| Moka pot | Fine — slightly coarser than espresso |
| Aeropress | Fine to medium |
| Drip | Medium |
| French press | Coarse |
You’ll aim for a texture similar to table salt or slightly finer. If your coffee tastes sour or under-extracted, grind finer; if it tastes bitter or overly strong, grind coarser.
Water Quality and Temperature: Don’t Ignore These
You’ll notice water is 98–99% of your final cup. Use filtered water if your tap water tastes off. Minerals in water help extraction; very soft or distilled water can produce flat flavors.
Ideal Water Temperature
Start with warm (not boiling) water in the bottom chamber if you want more control over extraction. Preheating the water to around 80–90°C (176–194°F) reduces the time grounds are exposed to high heat and can reduce burnt or bitter flavors. If you use cold water, the extraction can be overly aggressive toward the end.
Coffee Dose and Ratios for Balanced Extraction
Getting the dose right is about consistency. You’ll measure coffee by weight when possible.
Standard Dosing Guidelines
- For a balanced strength: use approximately 7–8 grams of coffee per “cup” capacity of your Moka pot (this varies by manufacturer; many 3-cup pots hold about 150–200 mL).
- For a 3-cup pot: roughly 15–20 grams of coffee is a good starting point.
- Use a scale for accuracy; measurement by scoop varies too much.
Example Ratios Table
| Moka Pot Size | Water Volume (approx.) | Coffee Weight (starting point) |
|---|---|---|
| 1 cup | ~50–60 mL | 7–8 g |
| 3 cup | ~150–170 mL | 15–18 g |
| 6 cup | ~300–350 mL | 30–36 g |
Adjust slightly to your taste; more coffee increases strength but can highlight bitterness.
Step-by-Step Brewing Method You’ll Use Every Time
Follow a consistent method for repeatable results. These steps focus on the most reliable technique.
What You’ll Need
- Moka pot, clean and dry
- Freshly roasted beans and a grinder
- Kettle or source of hot water
- Scale (recommended)
- Timer (optional)
- Spoon or brush for leveling grounds
Preparation Steps
- Preheat water (optional): Heat water to near-boiling, then remove from heat—aim for 80–90°C if you want to use warm water.
- Grind coffee: Grind to a fine consistency—slightly coarser than espresso.
- Fill the bottom chamber: Pour preheated water into the bottom chamber up to the safety valve level.
- Add coffee to the basket: Fill the funnel-shaped basket without tamping. Level the grounds by gently shaking or using a knife edge.
- Assemble the pot: Place the basket into the bottom chamber and screw the top on snugly. Avoid over-tightening; it should be secure but not forced.
Brewing on the Stove
- Place on heat: Put the Moka pot on a medium-low burner. If your stove runs hot, use a lower setting; you want gentle pressure, not a violent boil.
- Monitor the process: You’ll hear gurgling and see coffee begin to fill the top chamber. Keep the lid open enough to smell and watch if you like, but be careful of splashes.
- Remove from heat: When the coffee flow slows to a sputter and the sound changes, remove the pot from heat. This prevents overheating and bitter flavors.
- Stir and serve: Stir the brewed coffee in the top chamber with a spoon to homogenize flavors, then pour immediately into cups.
Timing Guidelines
The full process typically takes 4–8 minutes depending on size and heat level. Faster extraction usually means higher heat and a risk of burned or bitter coffee; slower extraction tends to yield smoother results.
Two Alternative Methods You Can Try
You’ll experiment with these once you master the basic method.
Inverted Method
Turn the Moka pot upside down during brewing, with the filter and top chamber on the bottom and the water chamber on top. This reduces the time grounds are exposed to high heat and can minimize burnt flavors. It requires caution and a tight seal to avoid leaks.
Preheating the Water
Starting with preheated water speeds up the cycle and reduces contact time between grounds and hot metal. It’s one of the simplest ways to improve flavor if you’re getting bitter results.
Troubleshooting Common Problems
You’ll likely encounter issues at first. This troubleshooting guide helps you diagnose and fix common faults.
Troubleshooting Table
| Problem | Likely Cause | Fix |
|---|---|---|
| Sour/under-extracted coffee | Grind too coarse, water too cool, too fast extraction | Grind finer, use warmer water, lower heat to lengthen extraction |
| Bitter/over-extracted coffee | Grind too fine, excessive heat, coffee exposed to metal for too long | Grind coarser, reduce heat, remove from stove earlier, preheat water |
| Weak coffee | Not enough coffee, low dose, wrong grind | Increase dose, check grind, ensure proper water level |
| Burnt/metallic taste | Overheating, old pot with oil buildup, thin metal heating too quickly | Reduce heat, clean pot thoroughly, consider switching to stainless steel |
| Gurgling/sputtering | Too high heat, water boiling too vigorously | Lower heat; remove from heat earlier |
| Leaking from seal | Damaged gasket, loose assembly, cracked filter plate | Replace gasket, tighten carefully, inspect for cracks |
| Coffee grounds in cup | Overfilled basket, grind too fine, broken filter | Level grounds, coarsen grind slightly, replace damaged filter |

Cleaning and Maintenance You’ll Want to Do Regularly
Keeping your Moka pot clean ensures better flavor and longer life. Maintenance is simple and quick.
Daily Cleaning
- Rinse all parts with warm water after each use. Avoid soap if your pot is aluminum; it can strip the patina and affect flavor.
- Dry components thoroughly to avoid corrosion or mold in the gasket.
Deep Cleaning (Monthly or As Needed)
- Disassemble the pot and soak in warm water to loosen oils.
- Inspect and clean the safety valve; use a pin to clear blockages gently.
- Replace the rubber gasket if it’s cracked, hardened, or leaking.
- For stainless steel pots, you can use mild detergent; rinse thoroughly.
Maintenance Schedule Table
| Frequency | Task |
|---|---|
| After every use | Rinse and dry parts |
| Weekly | Inspect gasket, wipe with clean cloth |
| Monthly | Deep clean, check safety valve |
| As needed | Replace gasket or filter plate, replace worn parts |
Safety Tips You Should Always Follow
You’ll handle pressurized hot water and metal, so safety matters.
- Never put the Moka pot on high heat unattended.
- Always check the safety valve for blockages.
- Screw the top and bottom together securely, but don’t over-tighten.
- Use oven mitts or handle protectors to avoid burns.
- Replace worn gaskets to prevent leakage and pressure failure.
Accessories That Improve Your Experience
You’ll find accessories that make brewing easier and more precise.
- Burr grinder: Enhances consistency and flavor.
- Scale: For accurate dosing.
- Heat diffuser or flame tamer: For gas stoves to distribute heat evenly.
- Spare gaskets and filters: For quick replacements.
- Stainless steel or induction-compatible pots: If you use induction cooktops.
Buying Guide: How to Choose the Right Moka Pot
If you’re shopping, consider these factors to make a good choice.
Key Considerations
- Material: Aluminum for classic feel and rapid heating, stainless steel for durability and induction compatibility.
- Size: Choose a size that matches your daily consumption.
- Build quality: Look for a solid safety valve, thick base, and comfortable handle.
- Brand reputation: Long-standing brands often offer reliable parts and replacements.
Flavor Tweaks and Advanced Tips You’ll Appreciate
Fine-tuning small details yields big flavor improvements.
Pre-infusion
Pour a small amount of warm water over grounds before assembling and let them bloom briefly. This can reduce trapped gases and promote even extraction.
Stirring at the End
Once brewing is complete, stir the top chamber to equalize concentration and temperature. It helps balance flavor.
Combining With Milk-Based Drinks
You’ll get an espresso-like concentrate ideal for milk drinks. Use a 1:2 or 1:3 ratio of coffee concentrate to milk depending on strength preference.
Mixing Beans
Blend a brighter light roast with a sweeter medium-dark roast to add complexity. You can also try single-origin beans for unique flavors.
Recipes You Can Make with Your Moka Pot
You’ll be able to make a range of drinks beyond a straight concentrate.
Straight Moka (Concentrate)
- Brew a Moka pot using the steps above.
- Serve straight in small cups, optionally with a small spoonful of sugar.
Moka Lungo (Long)
- Use a larger water volume in the bottom chamber (but not exceeding the safety level).
- This produces a less concentrated, slightly smoother cup.
Moka Macchiato
- Brew your Moka concentrate.
- Add a small dash of steamed milk or foamed milk on top.
Moka Latte
- Brew double-strength Moka concentrate and combine with steamed milk (ratio 1:3 coffee to milk) for a milk-forward drink.
Iced Moka
- Brew at half strength or dilute slightly with cold water, then pour over ice.
- Add milk or sweetener as you like.
Storing Coffee and the Moka Pot
You’ll protect both your beans and your pot for best taste.
Bean Storage
- Store beans in an airtight container away from light and heat.
- Avoid the fridge for long-term storage; keep beans at room temperature in a dark cupboard.
Moka Pot Storage
- Store disassembled to allow ventilation and avoid stale smells.
- Make sure it’s completely dry to prevent corrosion or mildew.
Common Myths You’ll Hear and the Real Facts
You’ll often hear incorrect tips. Here are clarifications.
- Myth: You must tamp grounds in a Moka pot like an espresso machine.
- Fact: Tamping restricts flow too much and can cause over-extraction or blockage.
- Myth: Moka is the same as espresso.
- Fact: Moka yields a concentrated brew, but it lacks the crema and full pressure extraction of espresso machines.
- Myth: Only dark roast works.
- Fact: Medium-dark roasts are very well-suited, but you can use a range of roasts to get different flavors.
FAQs You’ll Want Quick Answers For
Q: Can I use pre-ground coffee? A: Yes, but make sure it’s ground to the right fineness for Moka pots. Pre-ground coffee often isn’t ideal for best freshness.
Q: Why does my Moka coffee taste metallic? A: New aluminum pots can have a metallic note. That often fades with seasoning and repeated use. If it persists, check water quality and clean the pot.
Q: How often should I replace the gasket? A: Inspect it monthly if you use the pot frequently and replace when it appears cracked or hard. For heavy users, every 6–12 months is common.
Final Tips to Help You Master the Moka Pot
You’ll get better every time you brew. Keep a log of grind, dose, water temperature, and heat level so you can replicate your favorite results. Start with the basic method, then make small changes—grind size or heat—to refine the cup. Patience, consistency, and good beans are the keys.
You now have a complete roadmap to mastering the Moka coffee maker—from choosing beans and grinding to troubleshooting and advanced techniques. Use the guidance here as a foundation and adjust to your taste preferences. Happy brewing, and enjoy the ritual of making great stovetop coffee.