Craving a rich, silky mocha that tastes like it came from a specialty café but that you can make easily at home?

Silky Mocha Coffee Recipe — Overview
This Silky Mocha Coffee Recipe teaches you how to make a luxurious chocolate-coffee drink that balances richness and smoothness. You’ll learn ingredient choices, techniques for perfect texture, and variations to match your preferences. The goal is to give you everything you need to brew a café-quality mocha in your own kitchen.
What makes a mocha “silky”?
A silky mocha combines velvety steamed milk with well-balanced chocolate and bold espresso. Texture comes from proper milk steaming or frothing and the right chocolate form (syrup, powder, or melted). Balance means chocolate enhances the coffee rather than overpowering it. You’ll learn how to achieve both texture and taste below.
Ingredients Summary
This section lists the ingredients needed for a classic silky mocha. You’ll find options for both dairy and plant-based versions, plus suggestions for chocolate type and sweetness level.
Basic ingredients for one 12 oz (350 ml) mocha
- 2 shots (60 ml) of espresso or 1/2 cup strong brewed coffee
- 1 to 1.5 tablespoons cocoa powder or 1 to 1.5 tablespoons chocolate syrup (adjust to taste)
- 8-10 oz (240-300 ml) milk or plant-based milk
- 1 to 2 teaspoons sugar or sweetener (adjust to taste)
- Whipped cream or chocolate shavings for garnish (optional)
Ingredient options and notes
- Espresso: Offers concentrated coffee flavor. Use freshly ground beans if possible.
- Cocoa powder vs chocolate syrup: Cocoa powder gives a purer chocolate flavor with more control over sweetness; chocolate syrup is fast and already sweetened.
- Milk choices: Whole milk steams to the creamiest texture; lower-fat milks are lighter. Oat milk is a good plant-based option for foam and creaminess.
- Sweeteners: Use white sugar, brown sugar, honey, or flavored syrups. Adjust to your taste.
Equipment You’ll Need
You don’t need a professional café machine to make a delicious mocha, but some tools help with texture and consistency.
Essential tools
- Espresso machine or strong coffee maker (Moka pot, Aeropress, or French press can work)
- Milk frother or steam wand, or a manual whisk and small saucepan
- Heatproof pitcher for steaming and pouring
- Spoon and small saucepan (if melting chocolate)
- Thermometer (optional) to monitor milk temperature
Equipment alternatives and tips
If you don’t have an espresso machine, use a Moka pot or Aeropress to get concentrated coffee. For milk texture without a steam wand, you can heat milk gently and whisk vigorously or use a handheld frother. A French press can also froth warmed milk by pumping the plunger vigorously.
Step-by-Step Classic Silky Mocha Recipe
Follow these steps for a single 12 oz mocha. Adjust quantities if you’re making multiple servings.
1. Prepare the coffee
Brew two shots of espresso if you have an espresso machine. If not, prepare 1/2 cup of strong coffee using a Moka pot, Aeropress, or concentrated French press. Use freshly ground beans for best flavor. You want a robust base that won’t be lost under the chocolate.
2. Mix chocolate and sweetener
If using cocoa powder, combine it with a small amount of hot water (about 1-2 tablespoons) to form a smooth paste before adding to the coffee. This prevents clumps and ensures even chocolate distribution. If using chocolate syrup, stir it directly into the hot coffee. Add your chosen sweetener here and taste for balance.
3. Steam or heat milk
Heat your milk to about 60–65°C (140–150°F) for a creamy texture. If you have a steam wand, create microfoam by positioning the wand just below the surface and stretching the milk slightly before submerging the tip to heat. For handheld frothers, heat milk on the stove just until steaming and then froth until silky and thick.
4. Combine coffee and milk
Pour the chocolate-coffee mixture into your serving cup, then add the steamed milk while holding back the foam with a spoon. Spoon a small layer of microfoam on top for a smooth finish. If you like latte art, practice pouring technique to form a simple heart or rosette.
5. Garnish and serve
Top with a small dollop of whipped cream and a light dusting of cocoa powder or chocolate shavings if desired. Serve immediately while hot and silky.
Ingredient Tables for Clarity
Use these tables to adjust quantities and compare options quickly.
Ingredient amounts per serving (12 oz / 350 ml)
| Ingredient | Amount | Notes |
|---|---|---|
| Espresso or strong coffee | 2 shots (60 ml) / 1/2 cup | Use espresso for most authentic flavor |
| Cocoa powder | 1–1.5 tbsp | Mix with hot water first |
| Chocolate syrup | 1–1.5 tbsp | Use in place of cocoa + sugar |
| Milk | 8–10 oz (240–300 ml) | Whole milk for creaminess; oat milk for plant-based |
| Sugar / sweetener | 1–2 tsp | Adjust to taste |
| Optional garnish | Whipped cream, cocoa powder, chocolate shavings | Adds presentation and richness |
Milk options comparison
| Milk Type | Creaminess | Foam Quality | Best Use |
|---|---|---|---|
| Whole milk | High | Good microfoam | Classic silky texture |
| 2% milk | Medium | Fair | Lighter option |
| Skim milk | Low | Good foam, less cream | Aerated foam, less richness |
| Oat milk | High (for plant-based) | Good microfoam | Vegan-friendly, creamy |
| Almond milk | Low | Poor foam | Lighter, nutty flavor |
| Soy milk | Medium | Fair | Stable foam, beany notes |
Chocolate Choices and How They Affect Flavor
The type and form of chocolate significantly influence your mocha’s flavor profile. You’ll want to understand the differences to tailor the drink.
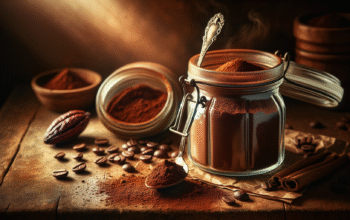
Cocoa powder
Using unsweetened cocoa powder lets you control sweetness and adds a rich chocolate flavor. Dutch-processed cocoa gives a smoother, less acidic taste, while natural cocoa is brighter and more acidic. Mix into a paste before adding to coffee to avoid lumps.
Chocolate syrup
Syrups are convenient and already sweetened. They blend smoothly into hot coffee and are good for quick preparation. Be mindful of sweetness—reduce added sugar when using syrup.
Melted chocolate (chips or chopped bar)
Melting high-quality dark or milk chocolate into the coffee gives depth and a luxurious mouthfeel. Use 60–70% dark chocolate for a balanced bittersweet flavor. Melt in a small saucepan with a splash of milk to make a smooth ganache before adding to coffee.
White chocolate
White chocolate provides creamy, sweet flavor but lacks cocoa solids and distinct chocolate bitterness. Use sparingly or pair with a shot of espresso to avoid an overly sweet drink.

Milk Textures and How to Achieve Silkiness
Texture is the key to a silky mocha. This section explains how to create and handle microfoam for the best mouthfeel.
What is microfoam?
Microfoam is steamed milk with very small, uniform bubbles that create a smooth and glossy texture. It’s what gives textured milk that silk-like consistency and allows for latte art.
Steaming technique
- Purge the steam wand to remove condensation.
- Submerge the tip just below the milk surface and turn on steam to introduce air for the first 1–3 seconds.
- Lower the pitcher so the wand tip is deeper to continue heating without adding more air.
- Stretch the milk by keeping the tip near the surface briefly, then fully submerge to whirlpool and break down larger bubbles.
- Stop steaming at about 60–65°C (140–150°F) for the best texture. Tap the pitcher and swirl to smooth any remaining bubbles.
Frothing without a wand
Warm milk on the stove to steaming, then whisk vigorously, use a French press to pump air into the milk, or use a handheld frother. It’s harder to get true microfoam this way, but you can still achieve a silky mouthfeel with practice.
Variations on Silky Mocha
Customize your silky mocha with these approachable variations. Each one includes simple swap ideas to change flavor, texture, or dietary suitability.
Vegan/plant-based silky mocha
Use oat milk for the creamiest plant-based option and choose a vegan chocolate syrup or cocoa powder sweetened with a plant-based sweetener. Steam oat milk carefully to avoid overheating. Garnish with coconut whipped cream if desired.
White chocolate mocha
Replace cocoa or dark chocolate with 1–1.5 tablespoons white chocolate syrup or melted white chocolate. Because white chocolate is sweeter, reduce or omit added sugar. Pull stronger espresso to balance the sweetness.
Peppermint mocha
Add 1/2 teaspoon peppermint syrup or a crushed peppermint candy rim for seasonal flair. Use dark chocolate syrup to prevent the drink from becoming overly sweet. Garnish with a small candy cane for presentation.
Spiced mocha
Stir in 1/4 teaspoon of warming spices like cinnamon, cardamom, or a pinch of cayenne for a Mexican-style mocha. Adjust to taste and be cautious with strong spices so they don’t overpower the chocolate and coffee.
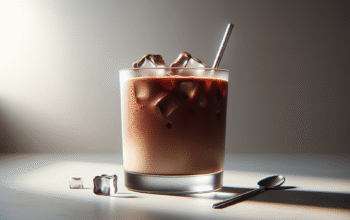
Iced silky mocha
Cool a strong shot of coffee or espresso, then prepare a chocolate syrup base. Fill a tall glass with ice, add chocolate-coffee mixture, then pour cold milk. Stir and top with cold foam or whipped cream. For better texture, shake milk and chocolate with ice in a cocktail shaker and strain into glass.
Troubleshooting Common Problems
If your mocha isn’t turning out as expected, check these common issues and fixes.
Problem: Chocolate clumps in the coffee
Cause: Cocoa powder wasn’t mixed into a paste or was added to liquid that was not hot enough.
Fix: Make a smooth paste with hot water before adding to coffee. Use a small whisk or milk frother to emulsify.
Problem: Milk is too foamy or too flat
Cause: Over-aeration causes big bubbles; under-aeration or overheating causes flat milk.
Fix: Introduce air briefly at the start, then fully submerge the wand to create a whirlpool. Don’t heat milk past 65°C (150°F). Tap and swirl the pitcher to eliminate larger bubbles.
Problem: Drink tastes too sweet or too bitter
Cause: Too much chocolate syrup or under-extracted coffee.
Fix: Use darker chocolate or lessen syrup for a less sweet drink. If coffee is bitter, check grind size and extraction time—espresso that’s over-extracted becomes harsh; under-extracted tastes sour.
Troubleshooting quick reference table
| Issue | Likely Cause | Fix |
|---|---|---|
| Clumpy chocolate | Cocoa not pre-mixed | Make a paste with hot water or melt chocolate first |
| Too foamy milk | Too much air introduced | Reduce air time; create a whirlpool for microfoam |
| Flat or thin milk | Overheated or not aerated correctly | Reheat gently and re-froth; avoid exceeding 65°C |
| Overly sweet mocha | Too much syrup or sugar | Reduce syrup; use unsweetened cocoa |
| Bitter mocha | Over-extracted coffee | Adjust grind/espresso shot time; use a milder roast |
Flavor Pairings and Serving Suggestions
Pairing and presentation enhance your mocha experience. Consider texture, aroma, and companion foods.
Best food pairings
- Pastries: Croissants, almond or chocolate croissant.
- Cookies: Shortbread, biscotti, or chocolate chip.
- Fruit: Sliced apples or pears pair well with dark chocolate notes.
Garnishes for presentation
- Cocoa powder dusting or chocolate shavings
- Whipped cream and a drizzle of chocolate syrup
- A sprig of mint for peppermint mocha
- Ground cinnamon or nutmeg for spiced variations
Nutritional Considerations
A mocha can range from a light pick-me-up to a calorie-rich treat. Knowing the components helps you adjust.
Typical calorie estimate (12 oz mocha)
| Component | Approx Calories |
|---|---|
| 2 shots espresso | 5 |
| Whole milk (8 oz) | 150 |
| Chocolate syrup (1.5 tbsp) | 80–90 |
| Sugar (1 tsp) | 16 |
| Whipped cream (1 tbsp) | 15–25 |
| Total (approx) | 266–286 |
You can reduce calories by using low-fat milk, a sugar substitute, or less syrup. Plant-based milks vary: oat milk is more caloric than almond milk but offers better creaminess.
Make-Ahead and Storage Tips
While a mocha is best served fresh, you can prepare components in advance for convenience.
Preparing components ahead
- Chocolate syrup or paste: Make a larger batch and refrigerate for up to 2 weeks. Reheat gently before mixing with hot coffee.
- Cold brew espresso concentrate: Store in the fridge for up to a week and use for iced mochas.
- Whipped cream: Stabilize with a little powdered sugar and keep refrigerated for up to 24 hours.
Reheating tips
Reheat already combined mocha gently on the stove over low heat or in a microwave in short bursts, stirring between intervals to maintain texture. Re-froth milk if necessary to restore some creaminess.
Frequently Asked Questions (FAQ)
These answers address common curiosities and practical tips.
Can I use instant coffee?
Yes, but instant coffee yields a different flavor profile than espresso and lacks the body of brewed espresso. Use a high-quality instant or make a strong concentrate to get closer to the classic mocha taste.
How can I make a mocha without a steam wand?
Heat milk to steaming temperature, then whisk vigorously, use a French press to pump air into the milk, or use a handheld frother. While you may not achieve the exact microfoam of a steam wand, you can still get a pleasant silky texture.
Is mocha the same as a latte with chocolate?
A mocha is essentially a latte with chocolate added, but classic mochas use stronger coffee and a higher chocolate-to-milk ratio, producing a richer, more chocolate-forward flavor.
What’s the best chocolate percentage for a homemade mocha?
For melted chocolate, 60–70% dark chocolate gives balance between sweetness and bitterness. Use milk chocolate for sweeter, creamier mochas and white chocolate for a very sweet, dessert-like drink.
Advanced Techniques for Coffee Enthusiasts
If you want to refine your silky mocha beyond the basics, these techniques help you reach a more polished result.
Tamping and espresso extraction
If you use an espresso machine, consistent tamping and even distribution of grounds improves extraction and avoids channeling. Aim for 25–30 seconds extraction time for a double shot, adjusting grind size as needed.
Emulsifying chocolate and milk
For ultimate silkiness, create a chocolate milk emulsion: melt chocolate with a small amount of milk on low heat, whisk until smooth, then incorporate the rest of the milk. This ensures even chocolate distribution and a glossy texture.
Using a milk thermometer
Practice overheating prevention by using a thermometer. Milk beyond 65°C (150°F) loses sweetness and can scald, resulting in a flat taste. 60–65°C is ideal for most milk types.
Final Tips and Summary
Make your silky mocha by focusing on three elements: quality coffee, the right chocolate form, and perfected milk texture. Small adjustments to chocolate amount, milk type, and steaming technique let you customize the drink to your exact taste. Keep tasting as you go, and don’t be afraid to experiment with spices, syrups, and different chocolate percentages.
You now have a complete guide to making a Silky Mocha Coffee Recipe at home, from ingredient choices and equipment to techniques, variations, and troubleshooting. Try a few variations and refine your method until your at-home mocha matches what you love at your favorite cafe. Enjoy the process—and your delicious, silky cup.