Do you want to learn how to make a silky, perfectly balanced mocha latte that feels indulgent but is easy to recreate at home?

Silky Mocha Latte Bliss
You’ll find that a mocha latte is a comforting marriage of espresso, chocolate, and steamed milk, with a texture and flavor that can be tailored to your taste. This article guides you through the origin, the science, the recipes, and the small techniques that make a mocha latte truly silky and blissful.
What is a Mocha Latte?
A mocha latte combines the espresso-based latte with chocolate, creating a drink that is both caffeinated and dessert-like. You’ll generally get espresso, steamed milk, and chocolate syrup or cocoa, topped with foam or a light layer of crema for a smooth finish.
The mocha sits somewhere between a latte and a hot chocolate, so you can treat it as a daily coffee ritual or a rich treat. You’ll learn how to control sweetness, chocolate intensity, and texture to suit your personal preferences.
Brief History and Origins
You might be curious where the mocha concept came from and why it’s called “mocha.” The name traces back to the port city of Mocha in Yemen, which was famous for coffee beans with naturally chocolaty notes. Over time, chocolate was deliberately added to coffee, and the mocha as you know it evolved.
In modern coffee culture, the mocha has been shaped by European cafés and later by coffee houses worldwide, becoming a popular flavored espresso drink. Knowing the history gives you a deeper appreciation for how chocolate and coffee pair so well.
Key Components of a Silky Mocha Latte
You’ll achieve the best results by understanding three core components: the espresso, the chocolate element, and the milk. Each component influences flavor balance, mouthfeel, and sweetness.
Espresso
Espresso provides the backbone of the mocha, giving concentration, bitterness, and aroma. You’ll want a shot (or two) of freshly pulled espresso with a rich crema to complement the chocolate.
If you don’t have an espresso machine, you can use strong brewed coffee like Moka pot or a concentrated pour-over, but adjust chocolate and milk ratios to keep balance.
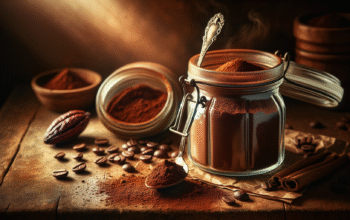
Chocolate
Chocolate is the character of the mocha—it can be syrup, melted chocolate, or cocoa powder mixed with sweetener. You’ll choose between milk chocolate for creaminess or dark chocolate for a more pronounced cocoa note.
Cocoa powder gives a slightly different mouthfeel and intensity compared with syrup. Each option alters your mocha’s sweetness, viscosity, and chocolate clarity.
Milk
Milk controls the texture and foam of your mocha. Whole milk yields a creamy, silky body while lower-fat milk produces lighter foam. Non-dairy milks (oat, almond, soy) each create distinct textures and flavor interactions with chocolate and espresso.
You’ll learn how to steam and froth milk to create microfoam that feels velvety on your palate, which is central to a “silky” latte experience.
Ingredients and Equipment
Below are clear ingredient and equipment lists to make a classic silky mocha latte. Use this as a base and adjust to your taste.
| Ingredient | Quantity (for one 12 oz/350 ml mocha) | Notes |
|---|---|---|
| Freshly pulled espresso | 1–2 shots (30–60 ml) | Use double shot for stronger espresso flavor |
| Chocolate syrup or melted chocolate | 20–30 ml syrup or 20–25 g melted chocolate | Adjust by taste and chocolate intensity |
| Milk (whole milk recommended) | 250–300 ml | Non-dairy alternatives: oat, soy, almond |
| Optional sweetener | 1–2 tsp | Maple syrup, simple syrup, or sugar |
| Whipped cream or cocoa powder | As desired | For topping and garnish |
| Equipment | Purpose |
|---|---|
| Espresso machine or Moka pot | To make espresso or strong coffee |
| Milk steaming pitcher | For steaming and texturing milk |
| Milk thermometer | To monitor temperature (optional) |
| Frother (handheld) | For non-steam methods |
| Spoon and whisk | For mixing chocolate |
| Heatproof serving cup | 12–16 oz cup recommended |
Use a clean, tall pitcher for steaming and always purge steam wands if you’re using an espresso machine. If you don’t have an espresso machine, a Moka pot or Aeropress can produce concentrated coffee suitable for mochas.
Classic Silky Mocha Latte Recipe (Step-by-step)
This recipe aims for a 12 oz (350 ml) mocha with balanced chocolate and espresso. You’ll get clear steps so the result is smooth and well-integrated.
Ingredients for the recipe
You’ll prepare these ingredients before you start to make the process smooth.
- 1–2 shots of espresso (30–60 ml)
- 20–30 ml chocolate syrup or 20–25 g melted dark/milk chocolate
- 250–300 ml whole milk (or alternative)
- Optional: 1 tsp sugar or sweetener if needed
- Optional: whipped cream and cocoa powder for garnish
Method
Follow these steps carefully to ensure a silky texture and well-blended flavor.
- Pull the espresso: Brew 1–2 shots of espresso and pour into your serving cup. Fresh espresso is important for aroma and crema.
- Add chocolate: Mix chocolate syrup or melted chocolate into the hot espresso. Stir well until fully combined so the chocolate dissolves and integrates.
- Steam the milk: Steam the milk to about 60–65°C (140–149°F) while creating microfoam. Aim for a velvety texture rather than large bubbles.
- Combine: Pour the steamed milk over the espresso-chocolate mixture, using a spoon to hold back foam if you want less on top. Pour with a gentle wiggle to create a silky blend.
- Finish: Spoon a thin layer of microfoam on top, add whipped cream if desired, and dust with cocoa powder or chocolate shavings.
Take a moment to taste and adjust sweetness. You’ll find that small adjustments to chocolate or milk can dramatically shift the overall balance.
Tips for Achieving Silky Texture
Silkiness comes from properly textured milk and well-emulsified chocolate. You’ll want to master two small steps.
Milk temperature and microfoam
Heat the milk to 60–65°C (140–149°F). You’ll produce microfoam by introducing a small amount of air at the beginning of steaming, then submerging the steam wand to create whirlpool motion. This gives a smooth, velvety texture that integrates well with chocolate.
Avoid overheating milk; too hot milk scalds and loses sweetness, resulting in a flat or slightly burnt taste.
Emulsifying chocolate with coffee
Make sure the chocolate fully dissolves into the hot espresso before adding cold milk. You’ll whisk or stir vigorously to create a smooth emulsion. If you’re using powder, make a paste first with a little espresso before adding more liquid.
A properly emulsified chocolate prevents separation and ensures the mocha tastes cohesive in every sip.
Variations and Customizations
You’ll likely want to personalize your mocha. Below are popular variations with quick descriptions so you can choose one that fits your mood.
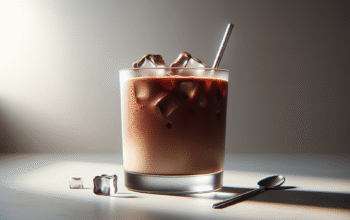
Iced Mocha
An iced mocha is refreshing and perfect for warm days. You’ll make it by cooling the espresso or using cold brew, mixing chocolate syrup, adding cold milk, and serving over ice.
Use less syrup if using sweetened iced coffee or cold brew, as ice dilutes concentration.
Vegan Mocha
You can craft a vegan mocha using plant-based milk like oat or soy and vegan chocolate or cocoa plus sweetener. Oat milk typically gives the creamiest mouthfeel and steams reasonably well.
Be mindful that almond milk may separate at high heat and soy milk can sometimes become beany in taste if overheated.
Sugar-Free or Low-Sugar Mocha
Use unsweetened cocoa powder with a sugar substitute or a low-calorie syrup to reduce sugar. You’ll need to balance bitterness from dark chocolate by choosing a suitable sweetener and possibly a creamier milk substitute.
Stevia, erythritol, or monk fruit syrups can work, but test small amounts to match your desired sweetness.
Spiced Mocha
Add spices like cinnamon, cardamom, or a pinch of cayenne for warmth and complexity. You’ll either mix spices into the chocolate or sprinkle them on top for aroma.
Spices can transform the mocha into a seasonal highlight, especially in cooler months.
Extra-Chocolate (Double Chocolate) Mocha
For chocolate lovers, add both cocoa powder and chocolate syrup, or mix melted chopped chocolate into the espresso in addition to syrup. You’ll get a denser, more dessert-like beverage.
Be careful not to overpower the espresso; keeping one shot helps maintain balance.
Nutty or Caramel Mocha
Add a small shot of hazelnut or caramel syrup for flavor complexity. You’ll enjoy a layered taste where nutty or caramel notes complement both chocolate and coffee.
Use sparingly to avoid turning the drink into a syrup-dominated milk beverage.

Substitutions and Ingredient Guide
You’ll sometimes need to substitute based on availability or dietary needs. The table below helps you choose appropriate replacements without sacrificing quality.
| Original Ingredient | Recommended Substitutions | Notes |
|---|---|---|
| Whole milk | Oat milk, whole soy milk | Oat for creaminess; soy steams well |
| Chocolate syrup | Melted chopped chocolate, cocoa + sugar | Use melted chocolate for depth; cocoa for lighter body |
| Espresso | Moka pot coffee, strong Aeropress | Increase concentration to mimic espresso |
| Sugar | Maple syrup, agave, sugar substitutes | Liquid sweeteners blend easily |
| Whipped cream topping | Coconut whipped cream, aquafaba | For vegan options |
You’ll notice that small tweaks in substitutes will require taste adjustments. Always taste before serving.
Troubleshooting Common Problems
If your mocha isn’t silky or balanced, check these common pitfalls and fixes. You’ll likely solve most issues with minor adjustments.
Chocolate not mixing or clumping
If chocolate clumps, the chocolate might be added to cool espresso or dry mixed incorrectly. Warm the espresso and create a paste with chocolate first, then emulsify with additional liquid.
Using syrup avoids this issue because it’s already liquid and mixes readily.
Milk tasting scalded or bitter
Overheating milk destroys natural sugars and produces an off taste. Keep the milk temperature between 60–65°C (140–149°F). If you’re steaming by ear, stop when the pitcher becomes too hot to touch for more than a couple seconds.
If you don’t have a thermometer, aim for a warm, not boiling, steam and keep the steam wand positioned to create whirlpool motion.
Separation of layers after pouring
Separation is usually from improper emulsification of chocolate or cold milk mixing too quickly with espresso. Warm the chocolate with the espresso and ensure milk is properly textured and poured slowly into the center.
If separation persists, use an immersion blender or frother briefly to re-emulsify the drink.
Foamy milk with big bubbles
Big bubbles mean too much air was introduced during steaming. You’ll want to lower the steam wand slightly above the surface initially and then submerge to create a smooth whirlpool, not a frothy aeration.
Practice helps—you’ll develop a feel for when to introduce and then close off air.
Serving and Presentation Tips
You’ll create a better experience by paying attention to serving temperature, glassware, and garnishes. Small touches make your mocha feel special.
- Use a pre-warmed cup so your mocha retains heat longer. A ceramic cup with a wide mouth is ideal for aroma.
- Garnish with cocoa powder, grated chocolate, or a light dusting of cinnamon for aroma and visual appeal.
- If you like latte art, practice pouring microfoam slowly to create simple hearts or rosettas over the mocha.
Presentation enhances perceived flavor, so small steps go a long way.
Pairings: Foods That Complement a Mocha Latte
Pairing a mocha with the right snack elevates the whole experience. You’ll find that chocolate and coffee pair well with a range of baked goods and fruits.
Popular pairings include:
- Almond biscotti or shortbread for a crunchy contrast
- Fresh berries to cut richness with acidity
- Banana bread or walnut muffins for complementary sweetness
- Dark chocolate squares for an intense chocolate-on-chocolate match
Think about texture and contrast: a crunchy cookie balances the smooth latte, while acidic fruit brightens the palate.
Nutrition and Calorie Considerations
You’ll want to be aware of calorie and macronutrient content, especially if you’re modifying the mocha for dietary reasons. The table below gives approximate values for a 12 oz mocha made with whole milk and chocolate syrup.
| Component | Approximate Value (12 oz mocha) |
|---|---|
| Calories | 220–360 kcal |
| Fat | 6–12 g |
| Carbohydrates | 30–45 g |
| Protein | 8–12 g |
| Caffeine | 60–120 mg (1–2 shots espresso) |
Switching to skim milk or plant-based milk will lower calories and fat but may alter texture. Sugar-free syrups and unsweetened cocoa can significantly reduce carbohydrate content.
Storage and Reheating
You’ll usually want to drink a mocha fresh, but if you must store leftovers, follow these tips to preserve quality.
- Refrigerate leftover milk-based mocha in a sealed container for up to 24 hours. Expect some separation; reheat and whisk or froth to recombine.
- For reheating, warm slowly on the stovetop or using a steam wand. Avoid high heat that scorches milk or over-brews coffee flavors.
- Iced mochas can be stored for 12–24 hours in the fridge; stir before serving and top with fresh foam if desired.
Fresh is best, but careful reheating and whisking will restore much of the original texture.
Advanced Techniques and Flavor Layering
If you want to elevate your mocha to café-quality, try these advanced techniques. You’ll get tips on chocolate selection, infusion, and texturing for professional results.
Chocolate tempering and layering
Using high-quality couverture chocolate melted to the right consistency adds depth. You’ll temper chocolate by melting, cooling slightly, and then warming a little if you want a glossy finish for garnishes.
Layering means adding a thin chocolate syrup at the bottom, espresso in the middle, and pouring milk carefully to create distinct but harmonious layers before swirling lightly.
Infusing chocolate with flavors
Infuse chocolate with vanilla bean, citrus zest, or spices by warming chocolate with the flavor agent and letting it steep. You’ll strain before combining to avoid texture issues.
Infusions add complexity without needing multiple syrups.
Using flavored bitters or extracts
A few drops of chocolate or coffee bitters, or a small drop of vanilla extract, can accentuate the mocha’s character. You’ll use such additions sparingly to avoid overpowering the drink.
These subtle touches are often what sets a great mocha apart from a good one.
Frequently Asked Questions (FAQs)
You’ll find answers to common questions that people often ask when making mochas at home.
Q: Can I make a mocha without an espresso machine? A: Yes—concentrated coffee from a Moka pot, AeroPress, or strong pour-over can substitute. Increase chocolate slightly to retain flavor balance.
Q: Is a mocha just chocolate and coffee? A: Essentially yes, but the milk and texture are what transform it into a latte-style drink. The balance among espresso, chocolate, and milk is key.
Q: How do I make an iced mocha less watery? A: Use cold-brewed coffee or double-strength espresso and chill before adding to ice. Reduce ice-to-liquid ratio and use chilled heavy milk or cream to maintain body.
Q: Which non-dairy milk steams best for mocha? A: Oat milk generally produces the creamiest texture and steams well. Soy is second-best, while almond tends to be thinner and can separate.
Q: How do I reduce sugar without losing flavor? A: Use unsweetened cocoa plus a natural sweetener like maple syrup, or try smaller amounts of sugar with added vanilla to trick the palate into perceiving more sweetness.
Final Thoughts
You’ll see that making a silky mocha latte at home is part technique, part ingredient quality, and part personal preference. With a few simple adjustments—better chocolate, proper milk texture, and thoughtful ratios—you can create a café-quality mocha that suits your taste.
Practice the steps, taste mindfully, and tweak chocolate intensity, milk type, and sweetness until you find your perfect silky mocha bliss. Enjoy creating and savoring each cup.