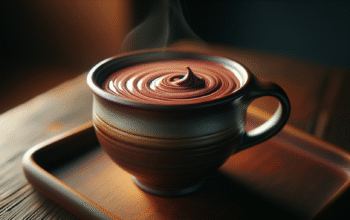
Have you ever wondered what turns a simple combination of coffee and chocolate into a silky mochaccino that feels like a small luxury in a cup?

Silky mochaccino bliss
This article walks you through everything you need to make a mochaccino with a luxurious, silky texture and balanced flavor. You’ll learn what a mochaccino really is, how it differs from related drinks, and how to reproduce café-quality results at home.
What is a mochaccino?
A mochaccino is a coffee-based drink that marries the rich flavors of espresso with chocolate and steamed milk, finished with a creamy foam layer. You’ll notice it sitting between a mocha and a cappuccino in style and taste, offering both chocolatey sweetness and velvety milk texture.
Origins and name
The name blends “mocha” (the chocolate-coffee flavor tradition) and “cappuccino” (the espresso-milk-foam structure). You’ll find variations around the world where the chocolate component and milk texture adapt to local preferences.
Mochaccino vs mocha vs cappuccino
It helps to compare these drinks so you can tailor your preparation. The table below clarifies the main differences so you can decide how to build yours.
| Drink | Key components | Typical texture | Chocolate presence |
|---|---|---|---|
| Mochaccino | Espresso + chocolate + steamed milk + foam | Silky microfoam with noticeable foam layer | Integral; melted chocolate or cocoa |
| Mocha | Espresso + chocolate + steamed milk (less foam) | Creamy, less emphasis on foam | Integral; often richer chocolate |
| Cappuccino | Espresso + steamed milk + thick foam | Thick foam, airy | None (unless added) |
The anatomy of silky texture
Silkiness in a mochaccino comes from microfoam — tiny, uniform bubbles inside steamed milk — and how chocolate integrates with coffee. You’ll need the right milk, the correct steaming temperature, and consistent technique to develop that glossy, velvety mouthfeel.
Milk and protein
Milk proteins stabilize tiny bubbles and create the shiny, dense texture you want in the foam. You’ll find that different milks behave differently because of their protein and fat content, influencing silkiness and sweetness.
Temperature and texture
The ideal serving temperature typically falls between 55–65°C (130–149°F) for optimal sweetness and texture without scorching. You’ll want to heat milk carefully; overheating breaks down proteins and destroys silkiness, while underheating won’t properly texture the milk.
Frothing technique
Creating microfoam requires introducing air initially, then rolling and stretching the milk to refine bubble size. You’ll watch for glossy, paint-like milk that pours smoothly, which signals that you’ve achieved good microfoam.
Ingredients you need
Choosing the right ingredients is the first step toward consistent results. You’ll want quality espresso, suitable chocolate, fresh milk (or alternatives), and optional sweeteners or flavorings.
| Ingredient | Role | Tips |
|---|---|---|
| Espresso (or strong coffee) | Base and bitterness to balance chocolate | Use fresh beans, ground just before brewing |
| Chocolate (melted, sauce, or cocoa) | Adds sweetness and chocolate flavor | Dark chocolate gives depth; cocoa powder gives quick mixing |
| Whole milk | Best for silkiness and sweetness | 3–4% fat yields stable, glossy microfoam |
| Milk alternatives | For dairy-free options | Oat and soy perform best for foam; almond is thinner |
| Sweeteners/syrups | Adjust sweetness and flavor | Simple syrup mixes easier than granulated sugar |
| Optional: spices/alcohol | Layer additional flavor | Cinnamon, vanilla, or a splash of liqueur for adult versions |
Equipment guide
You don’t need a commercial setup to make an excellent mochaccino, but the right tools make it easier. Below is a comparison to help you choose equipment that matches your budget and goals.
| Equipment | What it does | Pros | Cons |
|---|---|---|---|
| Espresso machine with steam wand | Extracts espresso and steams milk | Best control, professional results | Higher cost, learning curve |
| Automatic espresso machine | Brews and steams automatically | Consistent, convenient | Less control over steam texture |
| Milk frother (handheld or electric) | Aerates and heats milk | Affordable, easy | Harder to achieve true microfoam |
| Stovetop Moka pot + whisk/hand frother | Strong coffee base without espresso | Inexpensive, robust coffee | Lacks espresso crema and steam pressure |
| AeroPress + milk steamer | Intensified coffee with manual control | Portable, versatile | Requires practice for consistent results |
| French press (for frothing milk) | Creates foam by pumping | Simple, inexpensive | Produces larger bubbles than microfoam |
Step-by-step classic mochaccino recipe
This core recipe focuses on balance: a clear espresso backbone, good chocolate integration, and silky milk foam. You’ll be able to reproduce a consistent drink after a little practice.
Ingredients:
- 1 double shot (60 ml) espresso or 60–90 ml strong brewed coffee
- 20–30 g dark chocolate (60–72% cocoa) or 2 tbsp unsweetened cocoa + 2 tbsp sugar
- 150–180 ml whole milk
- Optional: 5–10 ml simple syrup or other sweetener
Steps:
- Prepare your espresso (or strong coffee) and keep it warm. You’ll want to extract into a preheated cup if possible.
- Melt the chocolate with a small splash of milk or heat the cocoa with sugar and a little hot water to make a paste. This helps the chocolate fully dissolve into the espresso.
- Combine the hot espresso and melted chocolate in the cup, stirring to integrate and create a smooth base.
- Steam and texture the milk: introduce a small amount of air at the start, then submerge the wand and roll the milk to create microfoam. Heat to 55–65°C (130–149°F).
- Pour the milk over the chocolate-espresso base, aiming for a glossy, even layer of foam on top. Use a steady wrist to create a smooth pour or simple latte art if you like.
- Optional: dust with cocoa or chocolate shavings and serve immediately.
Ingredient ratios and variations
Ratios help you scale recipes and maintain consistency. The table below gives a range of common ratios for different serving sizes and preferences.
| Style | Espresso | Chocolate | Milk | Foam |
|---|---|---|---|---|
| Standard single | 30 ml | 10–15 g | 120–150 ml | Thin microfoam |
| Standard double | 60 ml | 20–30 g | 150–180 ml | Silky microfoam |
| Strong (less milk) | 60 ml | 20–30 g | 100–120 ml | Dense foam |
| Lighter (more milk) | 30–60 ml | 10–20 g | 200–250 ml | Thinner foam |
Chocolate choices and techniques
How you add chocolate dramatically affects texture and flavor. You’ll want to choose an approach that suits your equipment and taste preferences.
Melted chocolate (bars)
Melted high-quality chocolate delivers depth and richness. You’ll melt it gently with a little milk to ensure it disperses smoothly and avoids graininess.
Cocoa powder
Cocoa powder is convenient and gives an immediate chocolate hit. You’ll mix it into a paste with hot water or a little hot espresso to prevent clumping before adding steamed milk.
Chocolate sauce or syrup
Chocolate syrup blends easily and remains smooth at cooler temperatures, making it useful for iced versions. You’ll get consistent sweetness and viscosity but slightly less complexity than melted chocolate.
Chocolate shavings and dusting
Finishing with shavings or cocoa dust adds aroma and visual appeal. You’ll get extra texture and a pleasant hint of chocolate on your lips with every sip.
Milk alternatives and how they affect silkiness
If you prefer dairy-free, several alternatives can approximate the silky texture, though each behaves differently. You’ll need to tweak techniques to get the best results.
Oat milk
Oat milk is currently the go-to dairy-free option for foam and taste. You’ll find it naturally sweet and good at producing microfoam that stays stable.
Soy milk
Soy milk foams well because of its protein content and gives a creamy mouthfeel. You’ll want barista or high-protein formulations for best results.
Almond milk
Almond milk tends to be thinner and less stable when steamed, producing larger bubbles. You’ll need careful steaming and perhaps an added emulsifier to improve texture.
Coconut milk
Coconut milk can be creamy and flavorful but may separate or deliver a thinner foam. You’ll likely notice a distinct coconut flavor that pairs with chocolate in interesting ways.
Tips for alternatives
You’ll get better results with barista-specific formulations because they contain stabilizers and emulsifiers designed for steaming. Pre-chill and shake alternatives to distribute solids before steaming.
Espresso and coffee bean selection
Choosing the right coffee is essential to balance chocolate sweetness and to avoid overpowering bitterness.
Roast level
Medium to medium-dark roasts often work best with chocolate, as they offer body and cocoa-like notes that harmonize with the chocolate. You’ll avoid very light roasts which might taste too acidic against the chocolate.
Bean origin
Central and South American beans tend to have chocolatey, nutty flavors that complement the drink. You’ll look for flavor notes that mention cocoa, caramel, hazelnut, or brown sugar.
Grind size and extraction
For espresso, grind fine and aim for a 25–30 second extraction for a double shot. You’ll adjust grind and dose to achieve balanced extraction: too fast = under-extracted (sour), too slow = over-extracted (bitter).
Crema
A good crema helps provide body and mouthfeel to the espresso base, enhancing how the chocolate integrates. You’ll want fresh beans and clean equipment to maximize crema quality.

Frothing and microfoam technique
Perfect microfoam is a combination of timing, technique, and feel. The following steps help you practice and improve.
- Start with cold milk and a chilled pitcher to give yourself control; fill the pitcher to one-third full. You’ll have room to expand the milk during steaming.
- Purge your steam wand to remove condensation. You’ll want a clean start to prevent water from entering the milk.
- Submerge the steam tip just below the surface and open the steam to introduce a small amount of air for the first 2–4 seconds until the pitch makes a paper tearing sound. You’ll hear the right amount of air and see the milk volume rise slightly.
- Lower the pitcher so the steam tip goes deeper and create a vortex by angling the pitcher. You’ll roll the milk to mix air and liquid.
- Stop steaming at 55–65°C (130–149°F) and wipe and purge the wand. You’ll feel the pitcher; it should be hot but not scalding.
- Polish the milk by tapping and swirling to integrate bubbles and create a glossy texture. You’ll end with paint-like milk that pours smoothly.
Troubleshooting common frothing problems
Even experienced home baristas run into issues. You’ll find quick fixes below.
- Large bubbles: You’re introducing too much air — lower the steam tip slightly and limit the initial aeration time.
- Burnt or scorched taste: You overheated the milk; aim for lower target temperatures and stop steaming when the pitcher is hot to the touch.
- Thin foam or collapsing foam: Your milk may be too warm or the proteins unsuitable (common with some plant milks); try different milk or barista-formulated alternatives.
- No foam at all: Ensure your steam wand has adequate pressure and that the tip isn’t blocked.
Iced mochaccino and cold variations
You can make a refreshing cold mochaccino with similar flavor balance, using cold foam, espresso over ice, or shaken cold brew with chocolate.
Classic iced mochaccino method:
- Dissolve chocolate or syrup in a small quantity of hot water to make a smooth paste.
- Pour cold espresso or strong coffee over ice in a glass.
- Add the chocolate paste and sweetener; stir until combined.
- Top with cold foam (frothed chilled milk or a milk alternative) and garnish.
You’ll find cold foam made using a handheld frother, milk frother, or by shaking in a sealed jar.
Flavor variations and add-ins
You can customize mochaccinos to suit tastes or seasons. Small additions change the drink’s character quickly.
- Vanilla or hazelnut syrups: Adds aromatic sweetness and complexity.
- Spices: Cinnamon, nutmeg, or cardamom give warmth and pair well with chocolate.
- Orange zest: Adds a bright citrus contrast to deep chocolate notes.
- Alcoholic additions: A splash of Kahlúa, Amaretto, or Irish cream turns it into an after-dinner treat.
- Salt: A tiny pinch of salt enhances chocolate flavor and balances bitterness.
Latte art and presentation
Presentation elevates the experience of a mochaccino and helps you assess milk texture. You’ll work on steady pouring and simple designs.
Basic pouring tips
Tilt the cup slightly and pour from higher to integrate the milk into the coffee initially, then lower the pitcher to draw foam to the surface. You’ll time the pour to allow the foam to rise and finish with a flourish for patterns.
Using chocolate in art
You can draw with chocolate syrup or melt a small amount and use a toothpick to create rosettes and hearts. You’ll find contrast between dark chocolate lines and pale foam visually appealing and flavor-enhancing.
Nutrition and calories
Nutrition varies widely by milk, chocolate, and sweeteners. The table below gives approximate calorie ranges for common versions of mochaccino to help you plan.
| Version | Serving size | Approx calories |
|---|---|---|
| Classic (whole milk, double shot, 20 g dark chocolate) | 240–300 ml | 220–320 kcal |
| Lighter (skim milk, less chocolate) | 240–300 ml | 120–180 kcal |
| Iced with syrup (added sweeteners) | 350–450 ml | 300–450 kcal |
| Vegan (oat milk, dark chocolate) | 240–300 ml | 180–260 kcal |
You’ll adjust calories by swapping milks, reducing chocolate, or using sugar-free syrups.
Common mistakes and how to fix them
Even small missteps can change the outcome. You’ll recognize pitfalls and apply quick corrections.
- Bitter drink: Over-extracted espresso or too-dark chocolate. Fix by adjusting grind or choosing less bitter chocolate.
- Flat foam: Inadequate texture; try proper steaming technique or switch milk type.
- Separation: Chocolate or syrup not fully incorporated; pre-mix chocolate paste with hot espresso before adding milk.
- Too sweet: Reduce syrup or use darker chocolate with less sugar.
Storage and reheating
Mochaccinos are best fresh, but you can store components. You’ll get the best taste by storing thoughtfully.
- Espresso: Keep brewed espresso in the fridge up to 48 hours; add ice to chill for cold drinks. Use within 24 hours for best crema.
- Steamed milk: Reheating steamed milk loses microfoam structure; avoid reheating if you want silky foam.
- Chocolate sauce: Store in refrigerator for several weeks; warm gently before use.
For reheating, use a gentle steam wand or microwave in short bursts and re-froth if necessary to regain some texture. You’ll accept that reheated drinks rarely match freshly prepared ones.
Pairing suggestions
A mochaccino pairs especially well with pastries and desserts that either complement chocolate or cut through richness. You’ll enjoy contrasting textures and flavors together.
- Pastries: Almond croissants, pain au chocolat, or a buttery scone.
- Cakes: Coffee cake, carrot cake, or a slice of hazelnut torte.
- Savory: A salty ham and cheese croissant or an olive flatbread offers contrast.
FAQ
Below are common questions you’ll likely have as you perfect your mochaccino.
Q: Can I make a mochaccino without an espresso machine? A: Yes. Use strong coffee from a Moka pot, AeroPress, or concentrated drip coffee. Heat and froth milk with a handheld frother, French press, or whisk.
Q: How much chocolate should I add? A: That depends on how chocolate-forward you want the drink. Start with 10–15 g for a single shot and 20–30 g for a double. Adjust to taste.
Q: Why is my foam full of large bubbles? A: You’re incorporating too much air. Reduce the initial aeration time and focus on rolling the milk to refine bubbles.
Q: Can you make a mochaccino vegan? A: Absolutely. Use oat or soy barista-style milks and plant-based chocolate or cocoa. Oat milk typically gives the best silkiness.
Q: What’s the ideal temperature to steam milk? A: Aim for 55–65°C (130–149°F) for a balance of sweetness and silky texture. Stop steaming once the pitcher is hot to the touch, not scalding.
Final tips for silky mochaccino bliss
Practice and small adjustments yield the biggest improvements. You’ll benefit from fresh beans, consistent technique, and experimenting with chocolate types and milk to match your flavor preference.
- Taste and adjust: Start with suggested ratios but tweak chocolate and milk until the balance suits you.
- Keep equipment clean: Old oils and residues affect flavor and crema.
- Train your hands: Steaming and pouring require practice; aim for consistent timing.
- Experiment with chocolate: Different percentages and forms (melted vs cocoa) change the profile significantly.
You’re now equipped to create a mochaccino that’s not only chocolate-and-coffee-rich but also luxuriously silky. With attention to ingredients, technique, and a bit of practice, your home mochaccino can rival café offerings and become a daily pleasure.
